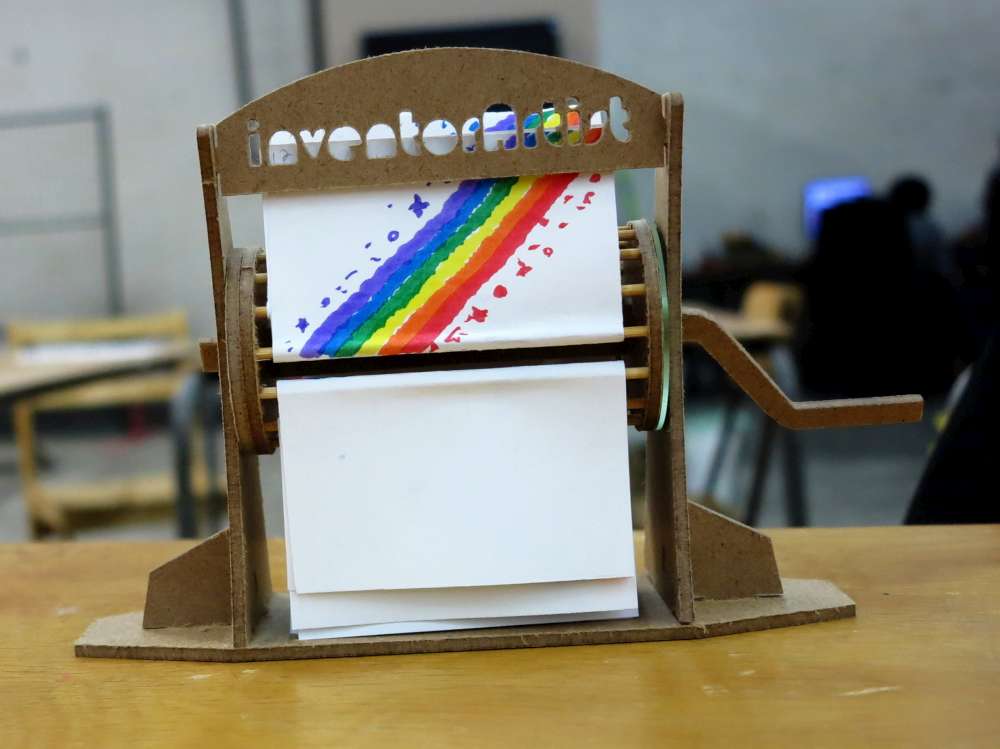
Rotary Flip Book
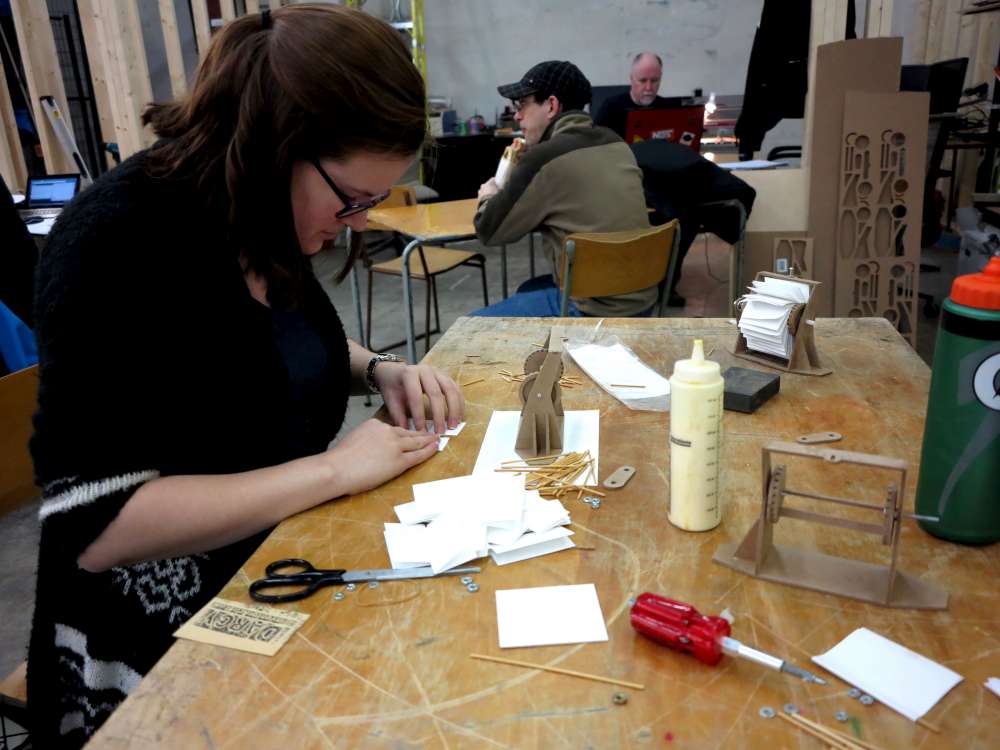
Here are the instructions for assembling the Flip kits (bottom of page).
You will need a glue stick, pencils or markers for decorating and glue (optional).
Snap your kit together, decorate it and then glue later if desired.
Please contact me for kits or workshops.
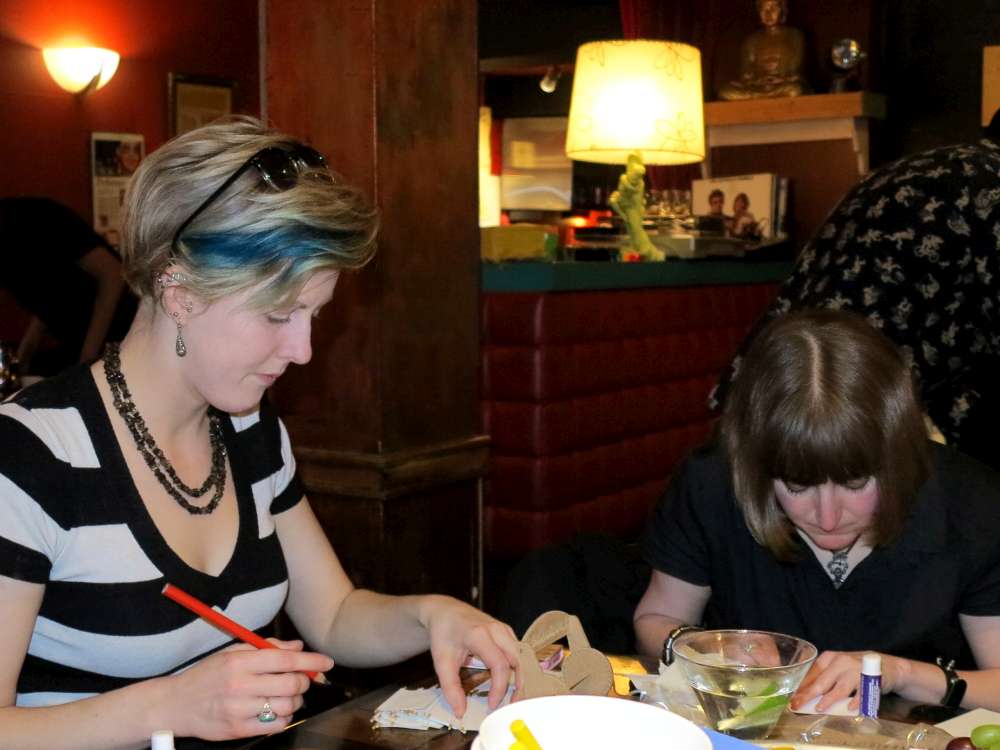
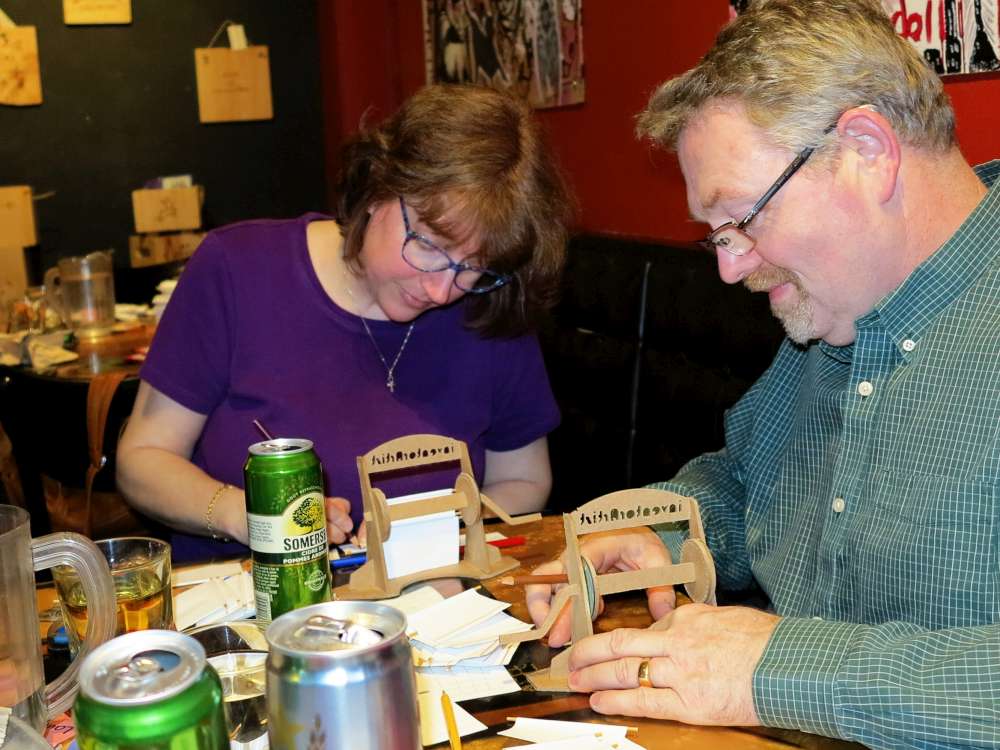
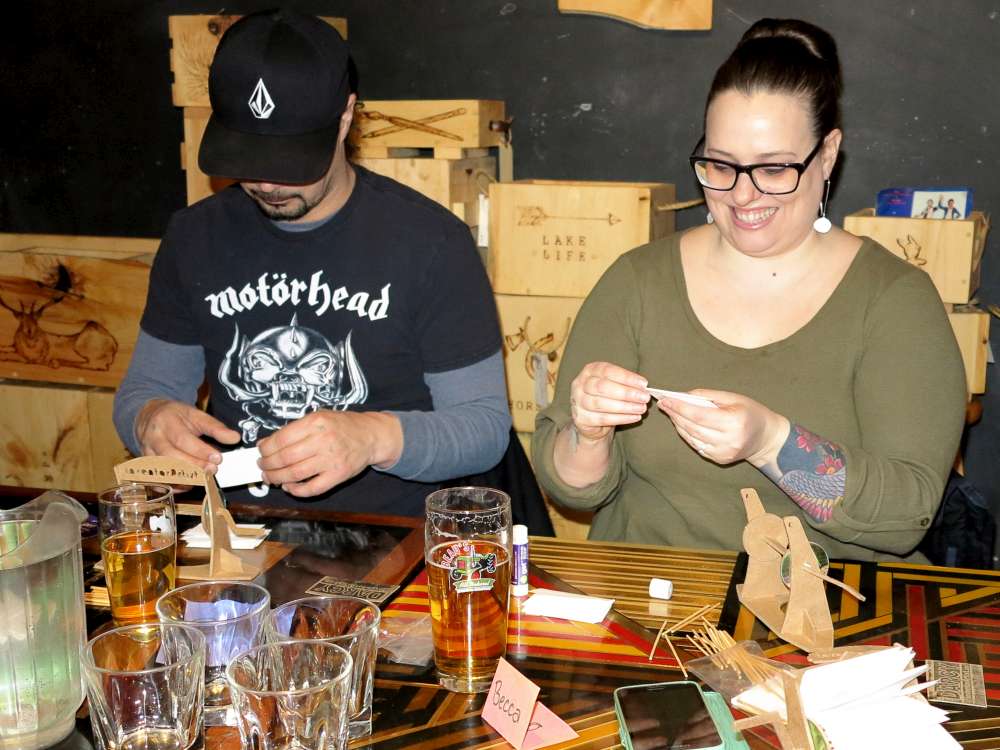
Thank you everyone for helping and attending the first Flip workshop (bottom of page)! If you’d like another card deck for your Flip, please come to the lab. Don’t forget to bring your current Flip project(s) and your friends! Please RSVP to darcy@inventorArtist.com.
Watch this site for more unusual workshops!
The story behind the creation of the Flip kits!
Don Kwan was raving about this super awesome flip book by Jaun Fontanive.
I really like it too so I put this proof of concept together.

We decided it would be fun to invite artists to make these and perhaps a whole show comes of it.
Daniel Martelock has come forward with interest and there is room for more people.
I am working out how to support other artist in making these using my CNC machines. I think a good angle is to start off with a simple kit like the proof of concept above. Then we can start experimenting with animations, photography and what have you.
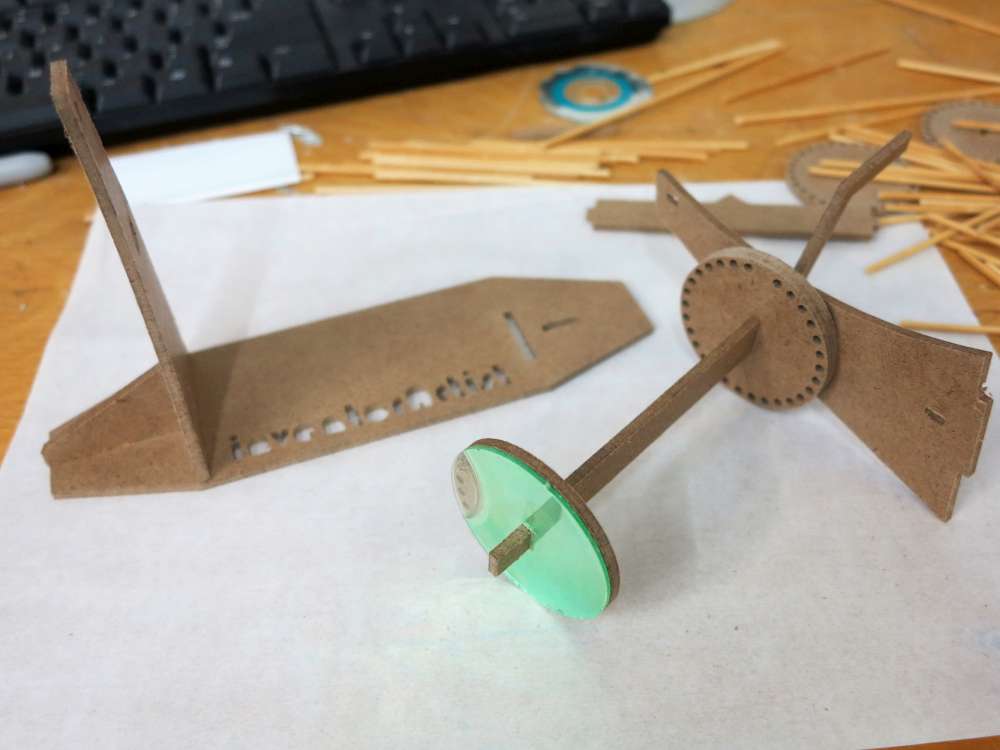
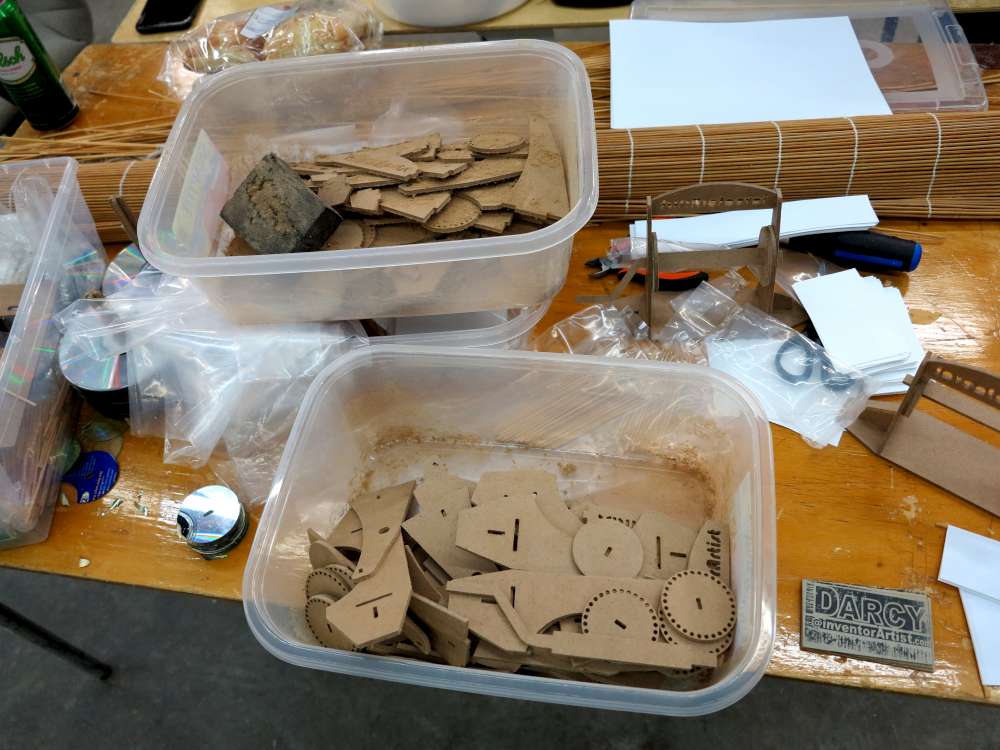
Testing Kit Beta
Once artists get this working I think they will want to make their own box to mount it or perhaps a wall mount. Some may even venture to make their own spindles. This kit is targeted to about a $10-15 cost. I think that’s a great way to get started at making animations.
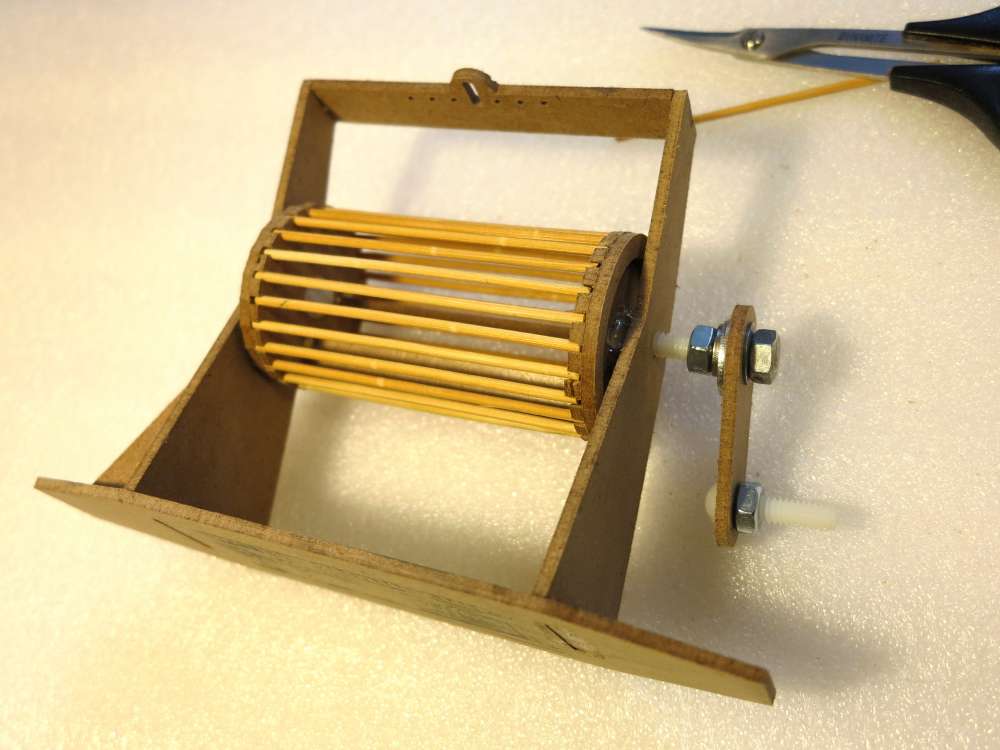
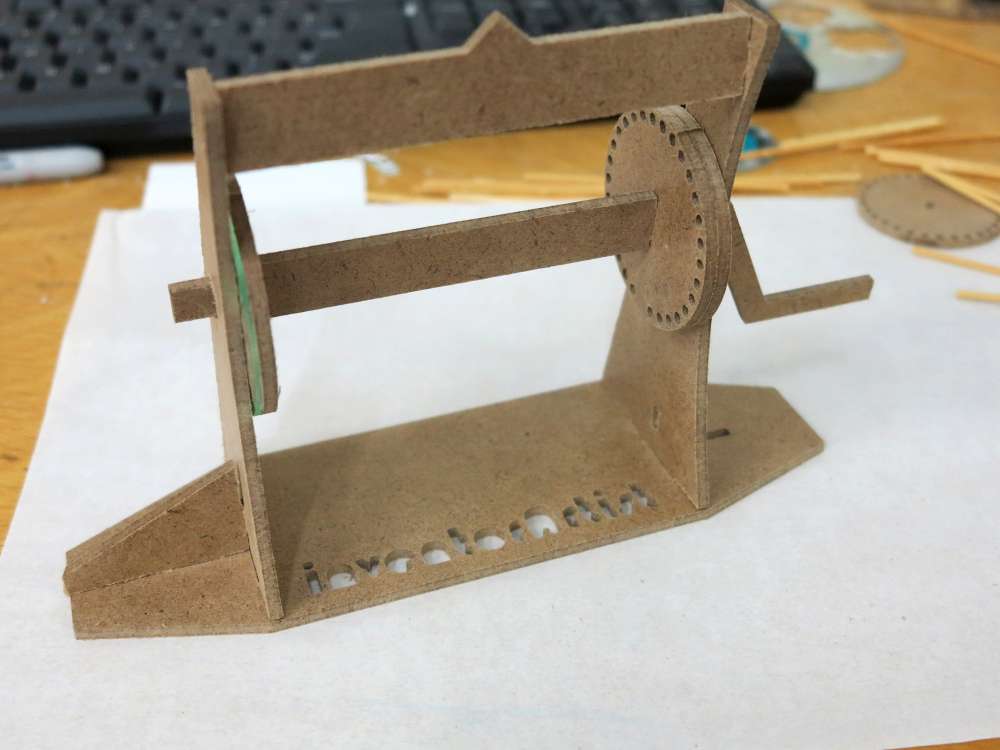
As you can see from the pictures below I have been beta testing kits. This was the first test session. After this session I started to think that the bamboo snap in shafts are a bit finicky. So I designed a different capture mechanism for the shafts.

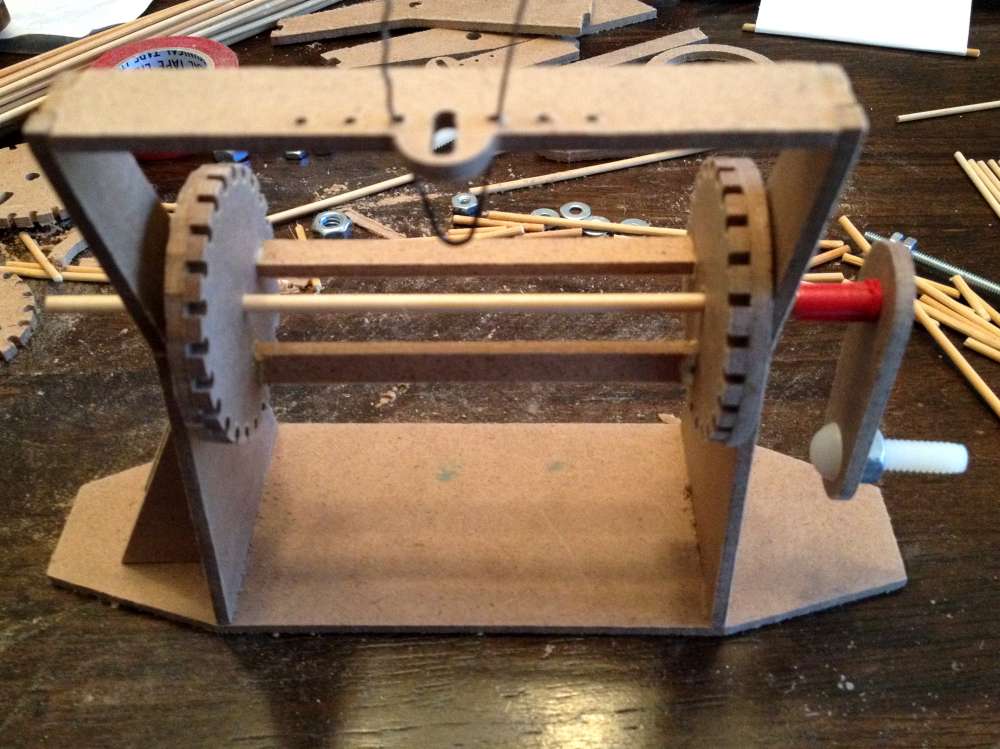
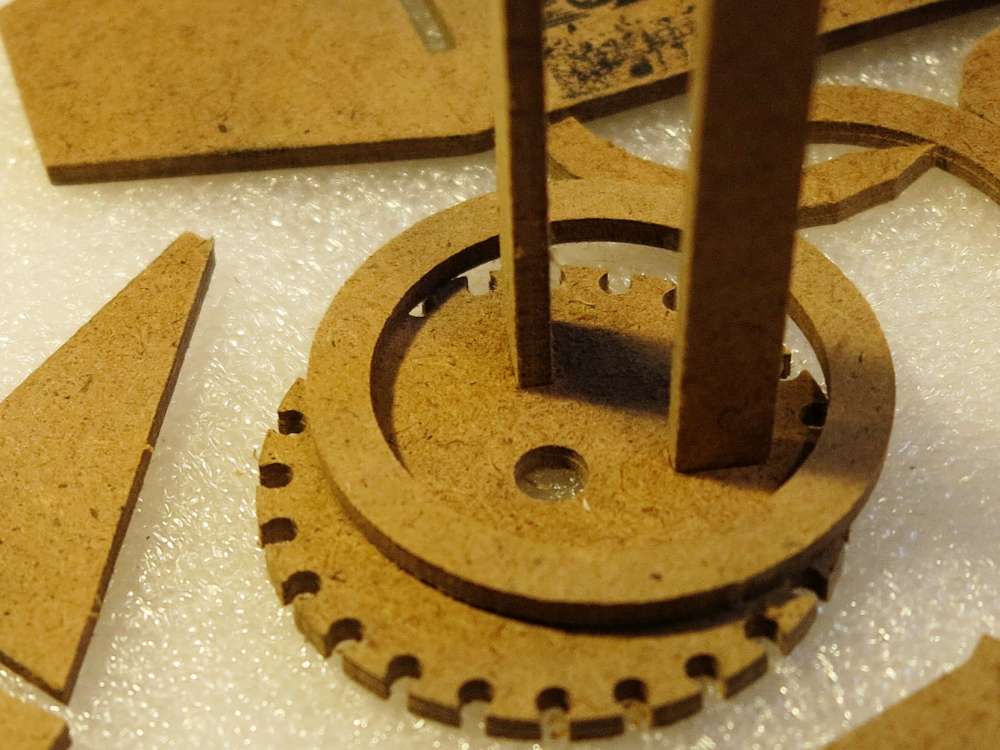
The new capture mechanism came out nice. I just used plain holes to capture the shafts completely. I think capped the ends of the spindle with a disk cut from CD and a hardboard disk. The CD flexes allowing the shafts to be removed.
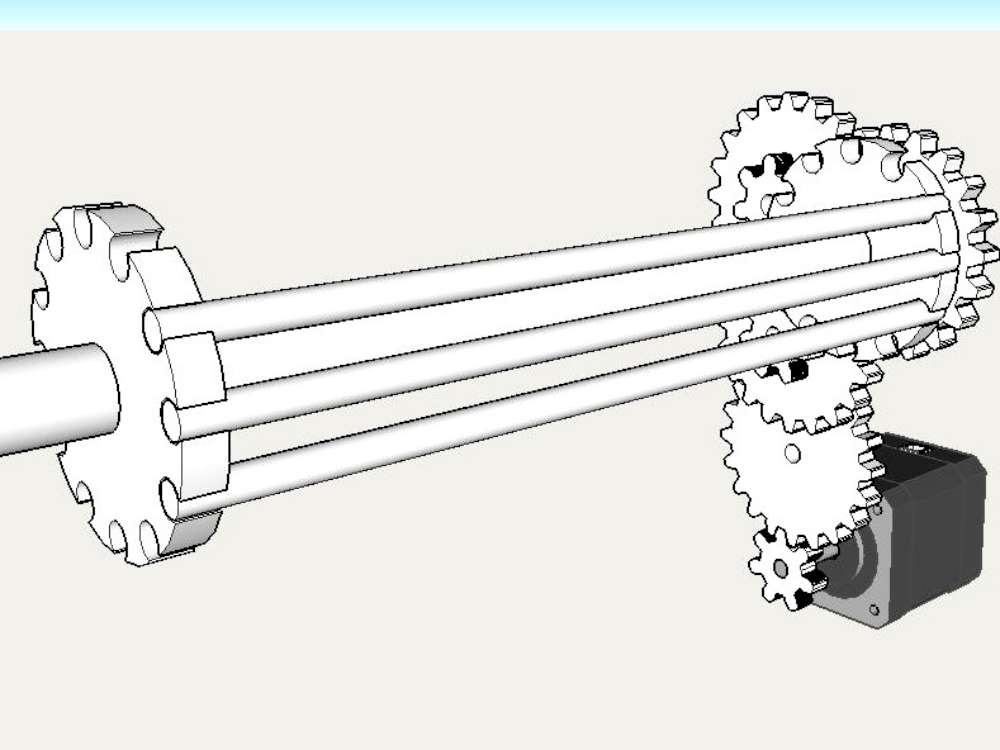
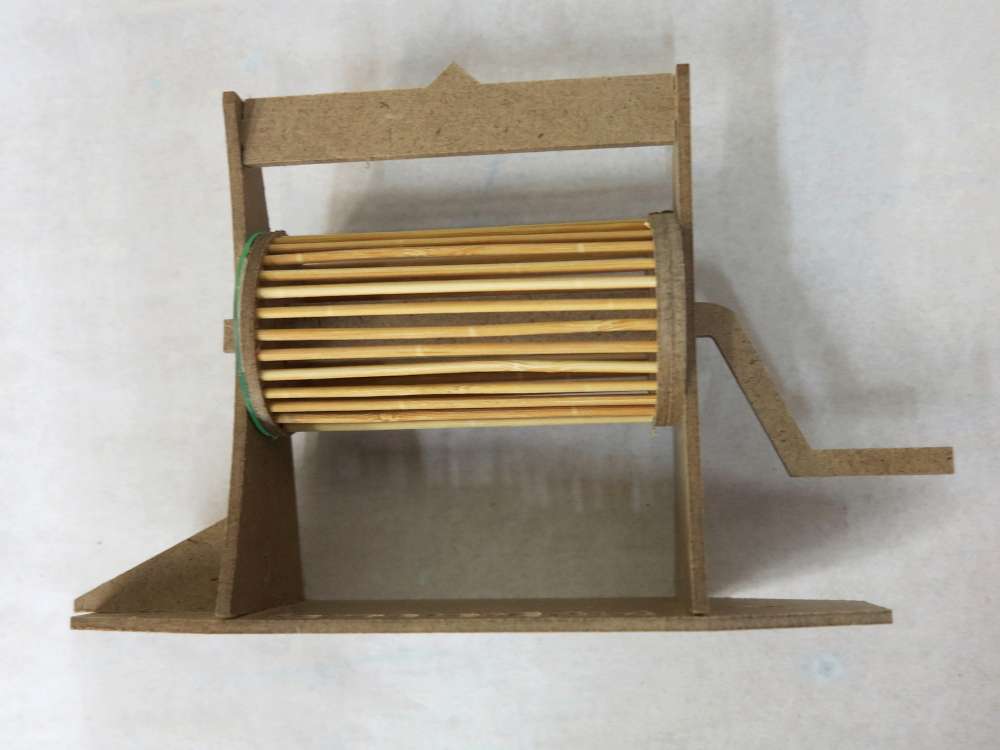
A couple of kits went to Andrew and he did some experiments with 1/12 and 1/8 dowel. The shafts hardware in the prototypes was temporary (I was just using stuff I had on hand) in order to work out a bunch of other details. I figured the shaft was easy so I’d do that last. I often pick the high apples first on these projects.
Andrew’s daughter Ava came up with this amazing video.
The new design was also tested on Don and friends. He quickly sketched this for fun.
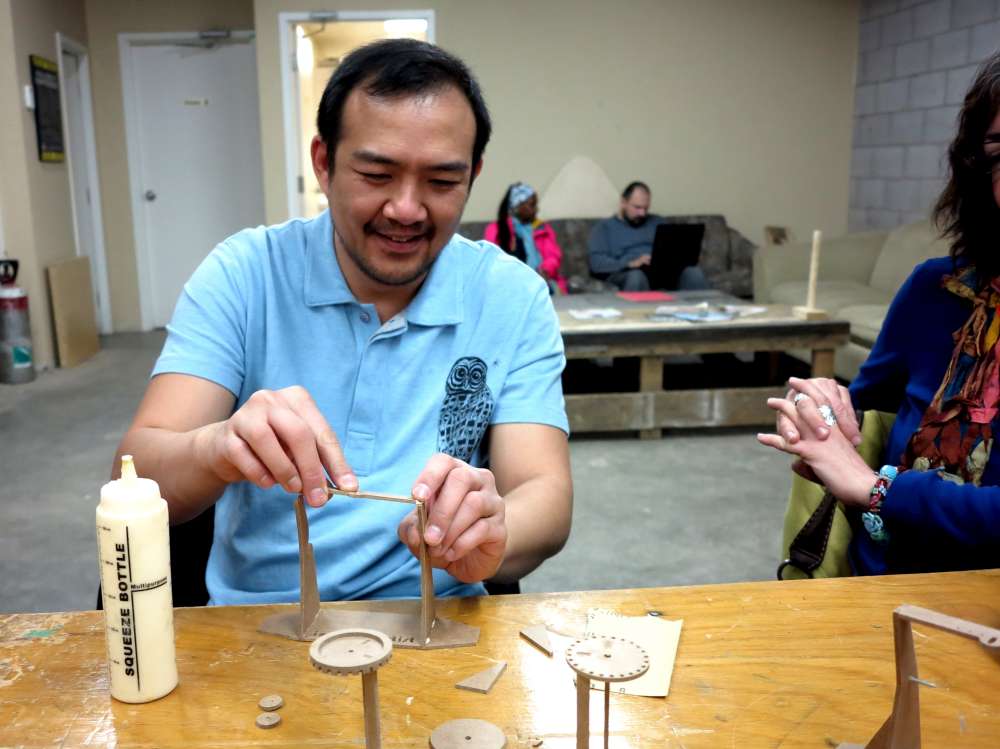
What I learned at this test session:
- There is a great value in having pre-made card decks available.
- There is still room to remove complexity from the kit. I will remove one of the upright supports and eliminate the wire/bolt that flips the paper at the top. I will rotate the top member so it can extend downward to perform the same function.
- It’s time to finalize the shaft. I was just using some bolts I had lying around.
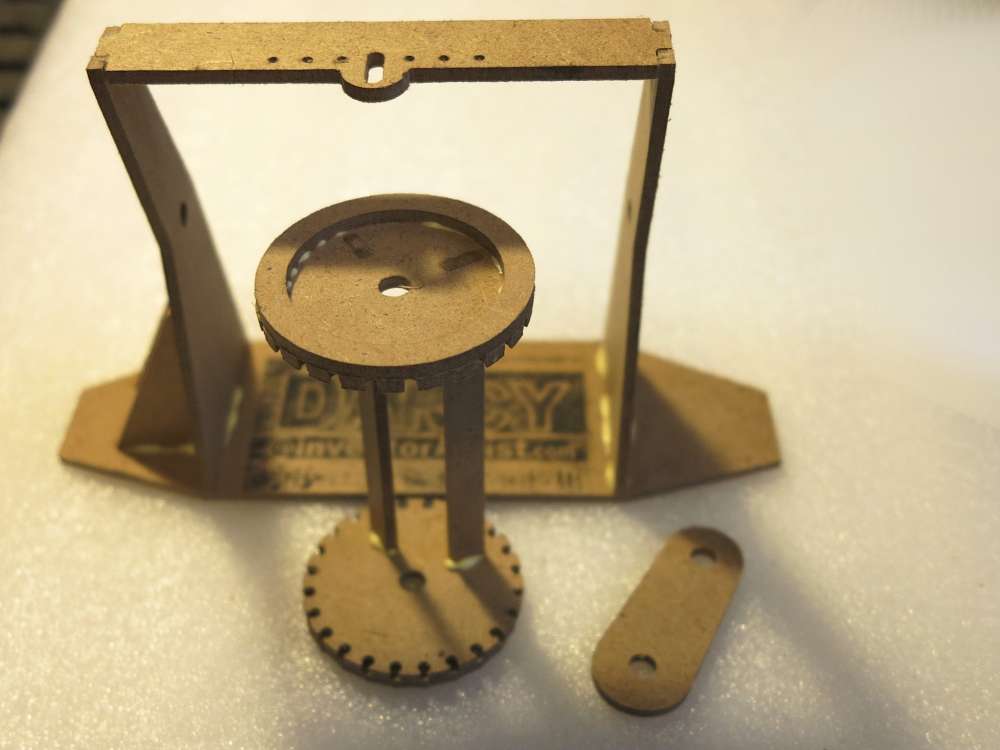
 I made a bunch of changes and decided to work on the shaft. From the very beginning of the project I had this idea in the back of my mind about using hardboard as the axle. I knew it needed to be tried. I figured the axle could be removable. Shirley and I tested it out and figured it was too unstable. What we did learn is that the hardboard shaft is strong enough and runs smooth.
I am always amazed how the most counter intuitive things often make good solutions.
I took the information from the session and went back to the drawing board.
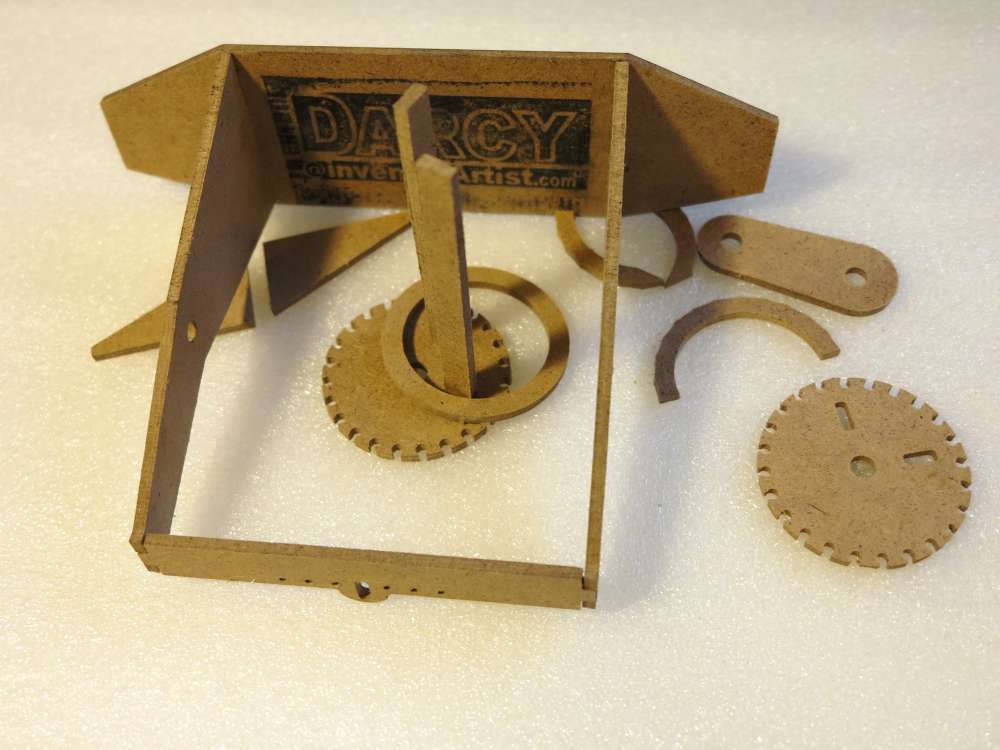
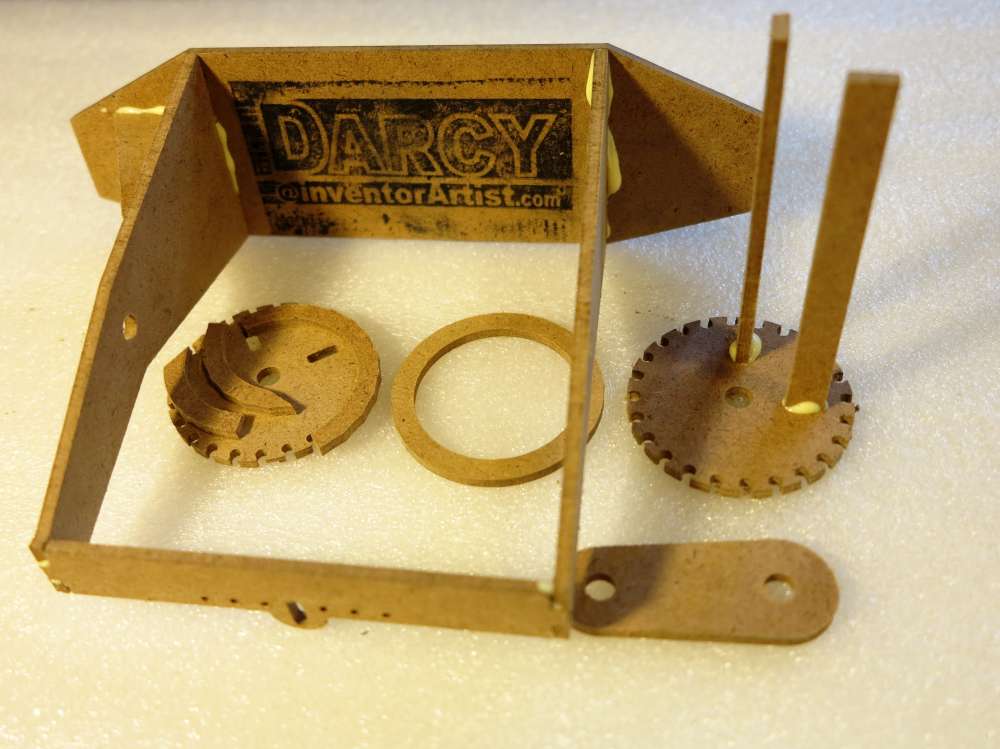
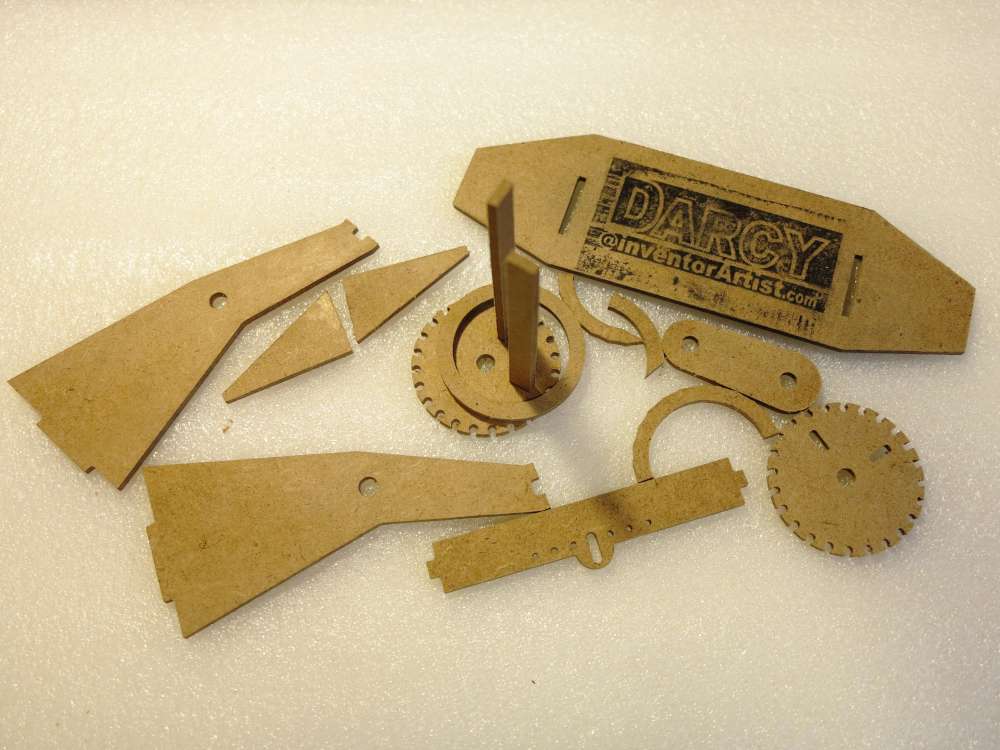
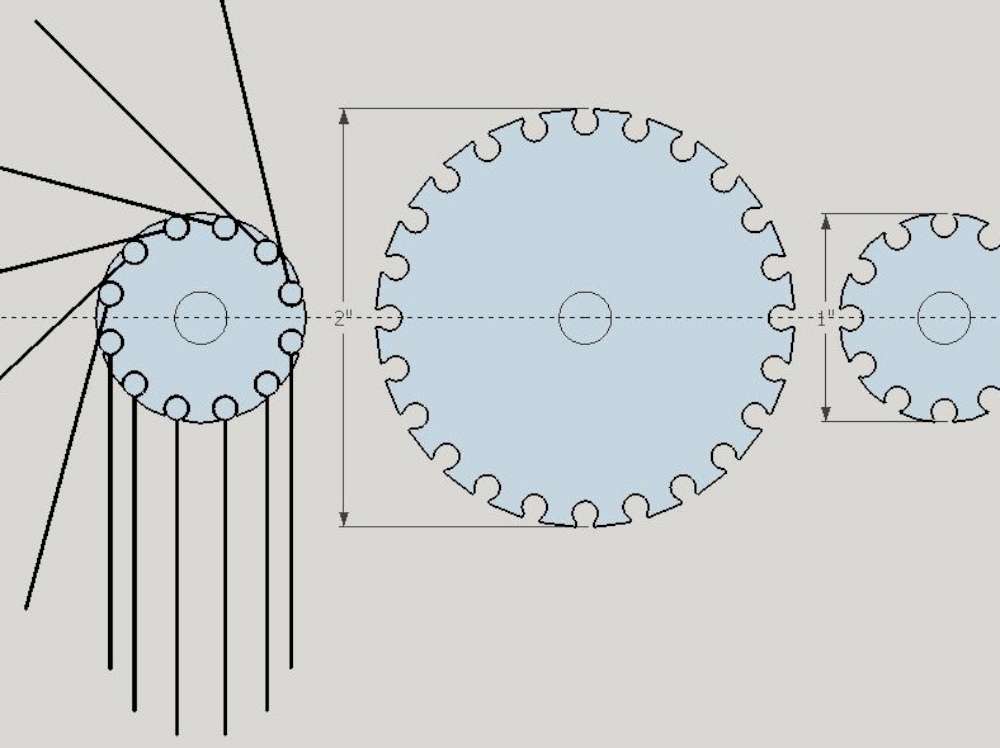
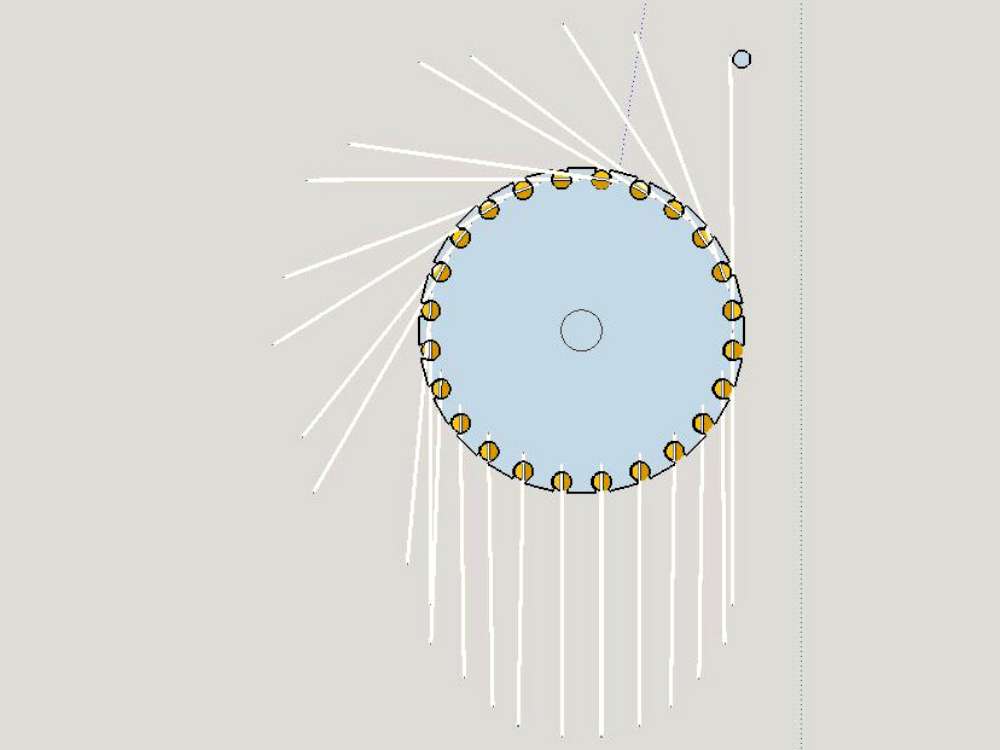
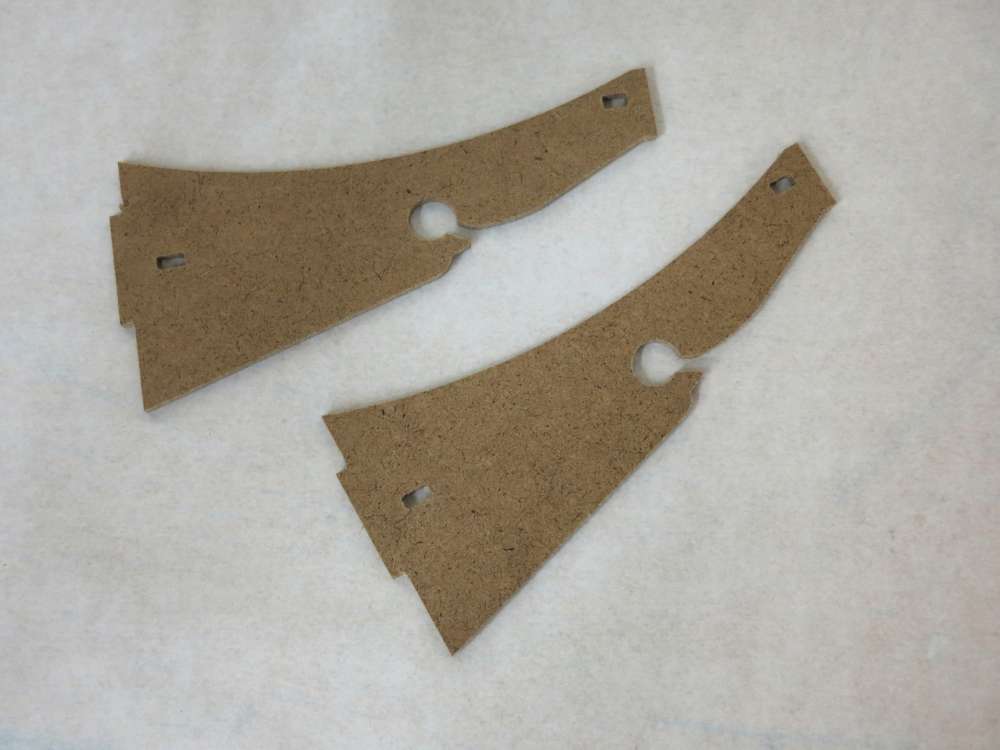
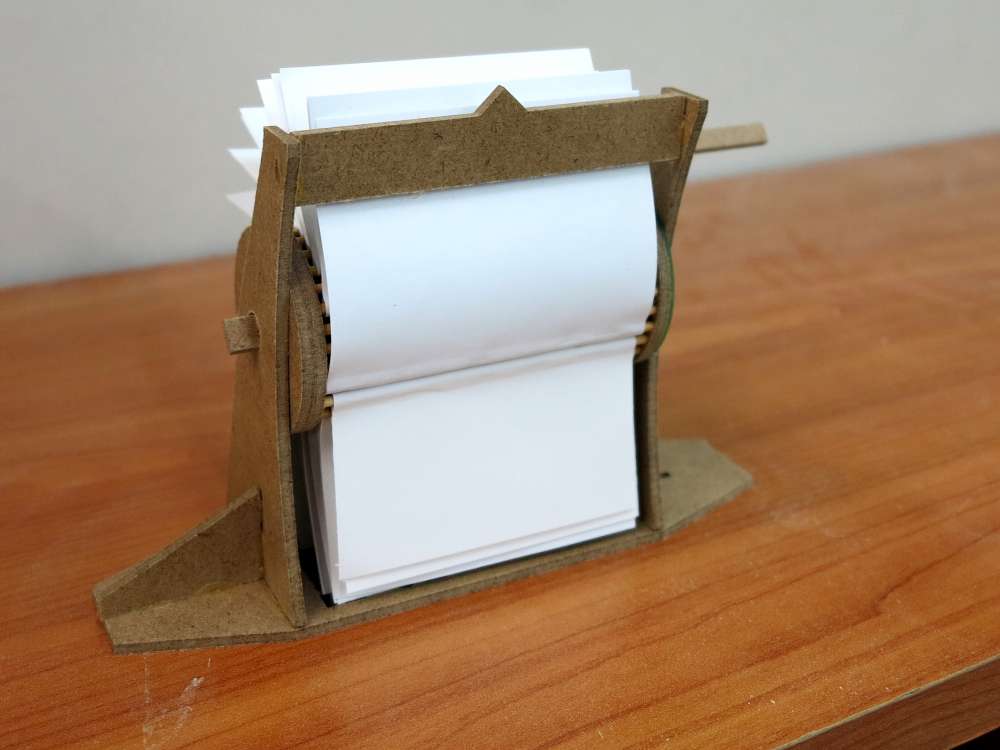
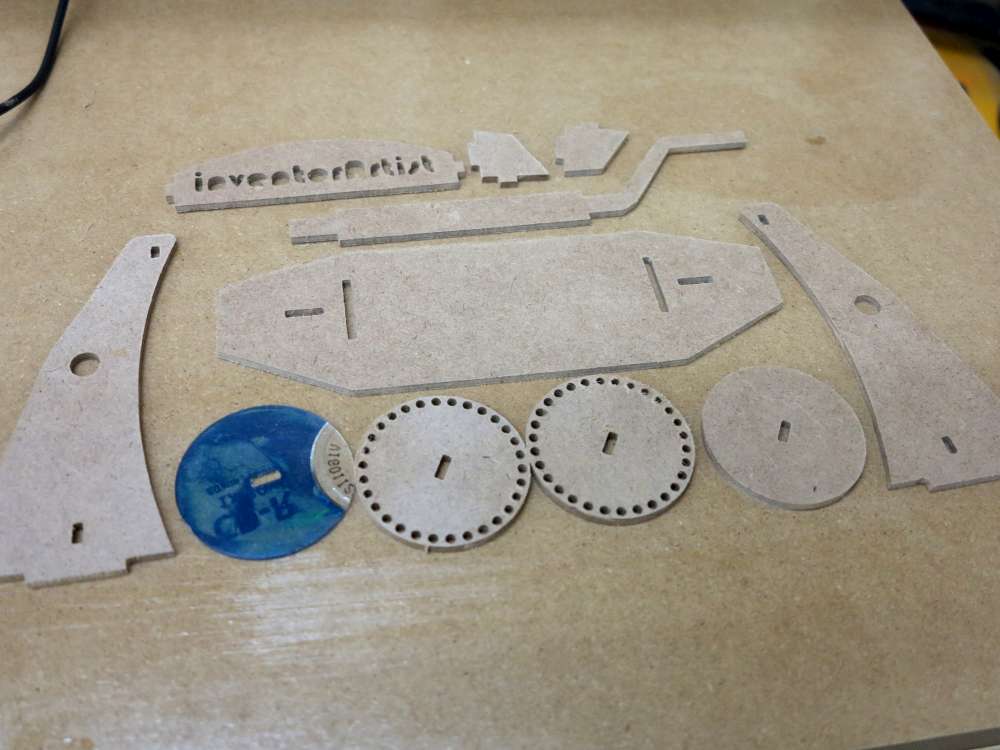
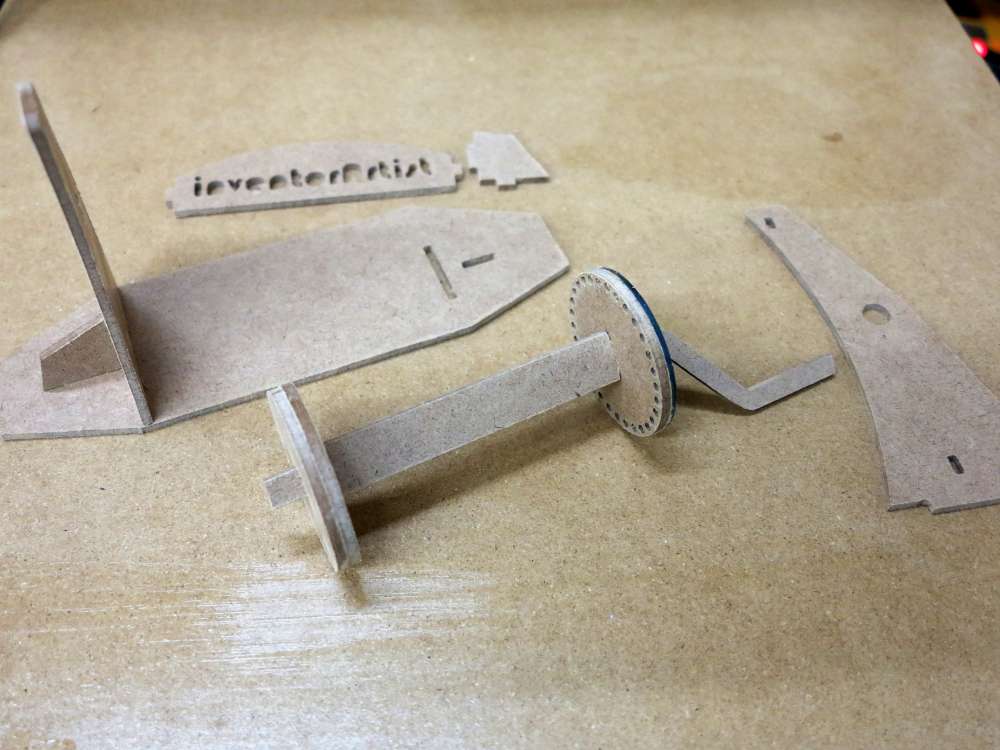
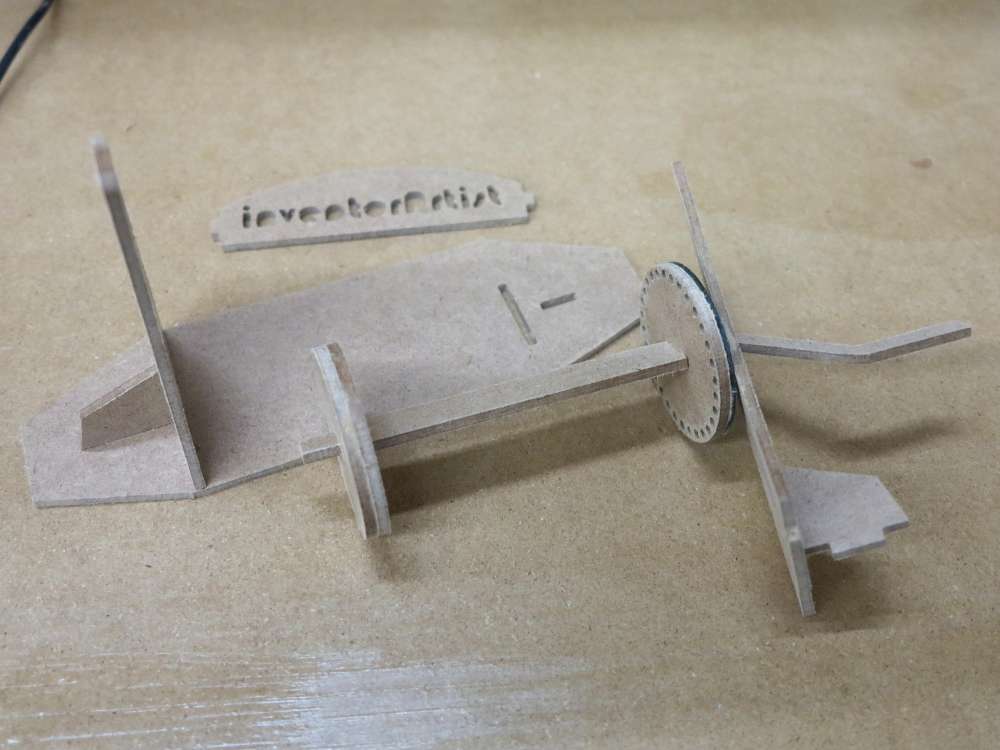
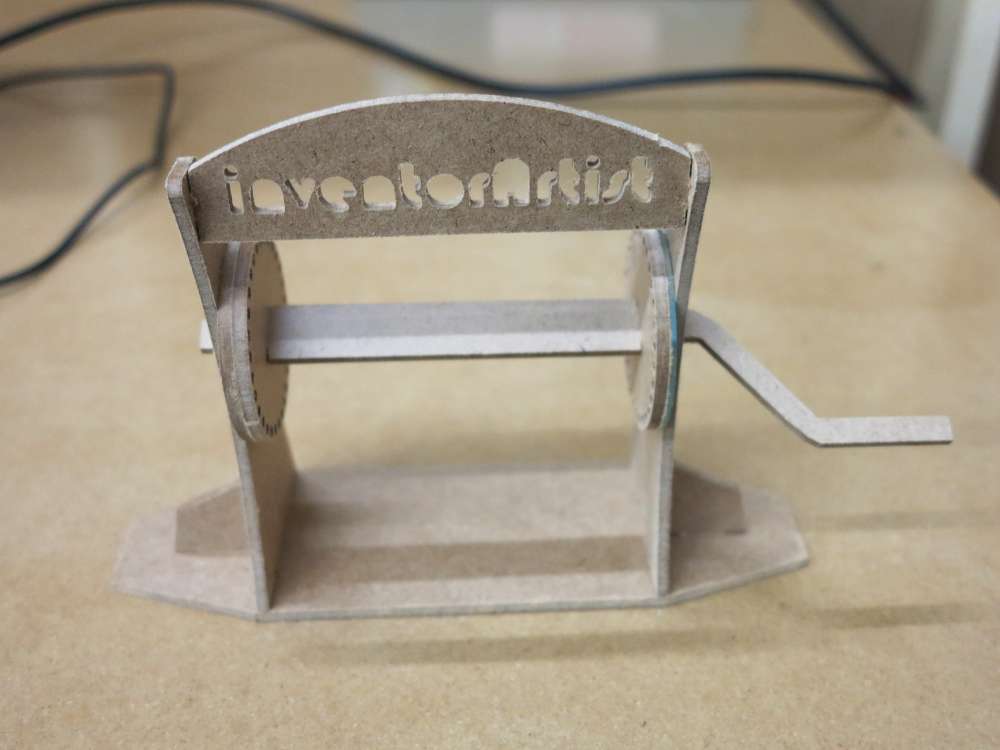
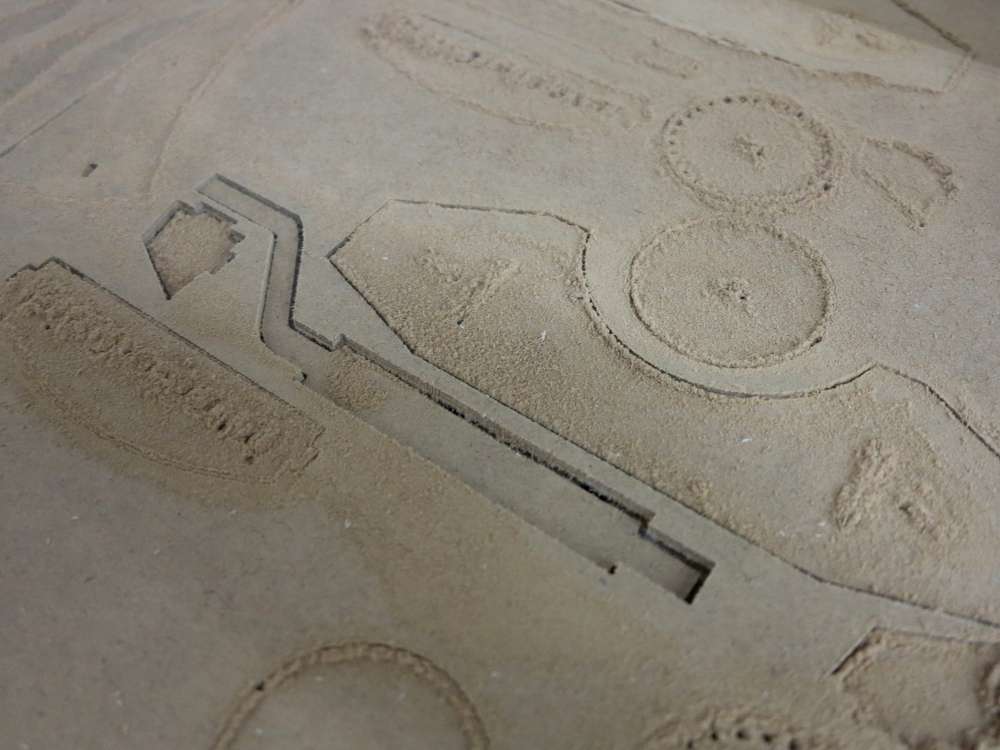
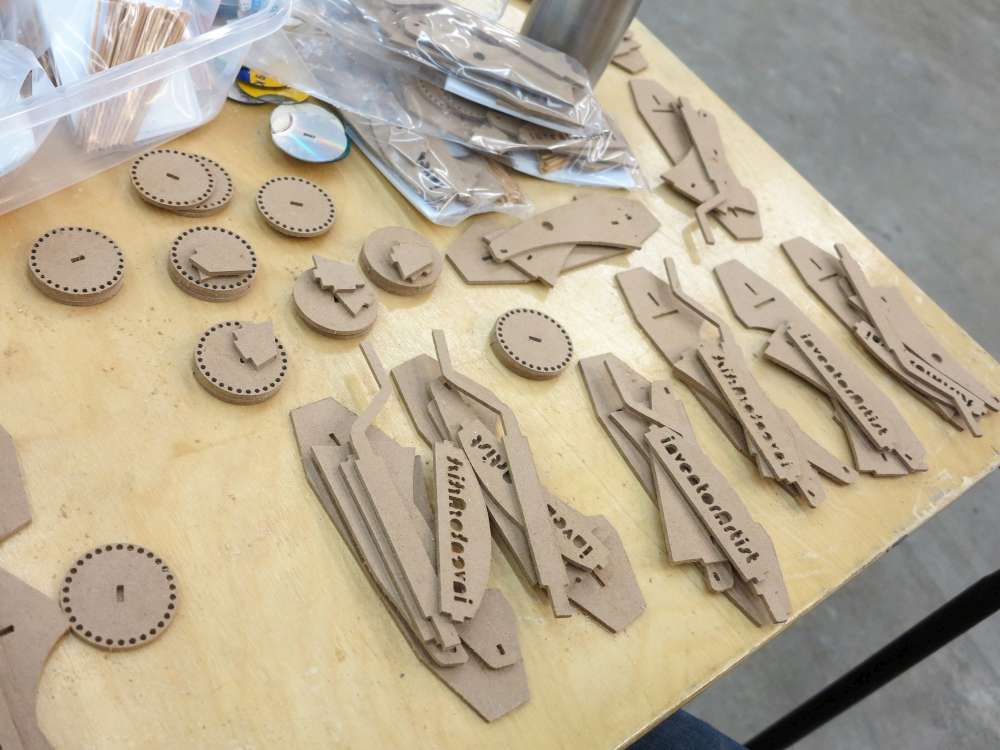
The new kits are much simpler. I went from 20+ parts down to 10. I’m not counting the card deck with its shafts. I also went from 24 frames to 30 frames as Shirley noticed there was a bit of a gap between the cards.
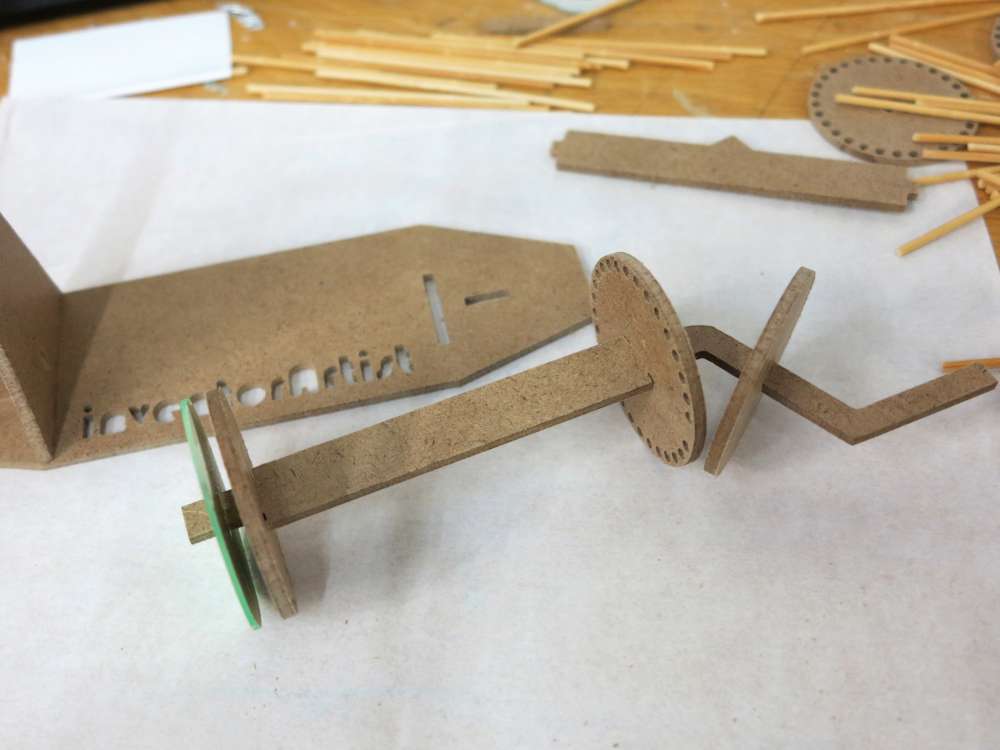
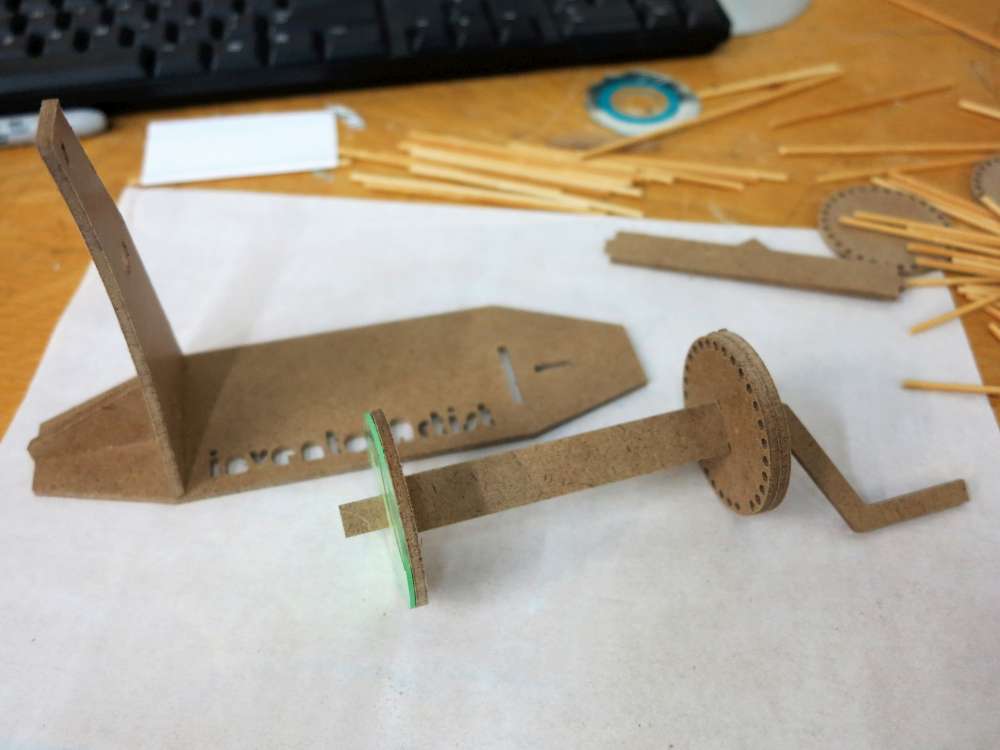
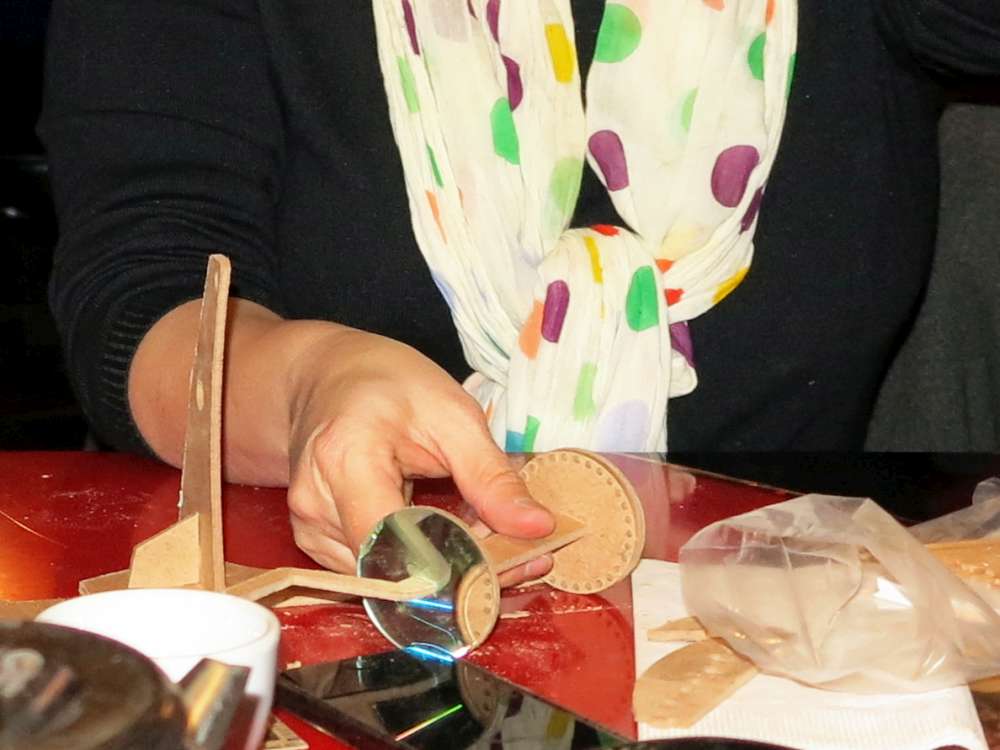
If you have a look at the pictorial below you can see the assembly steps.
- Add left upright to brace, then to lower platform (glue is optional).
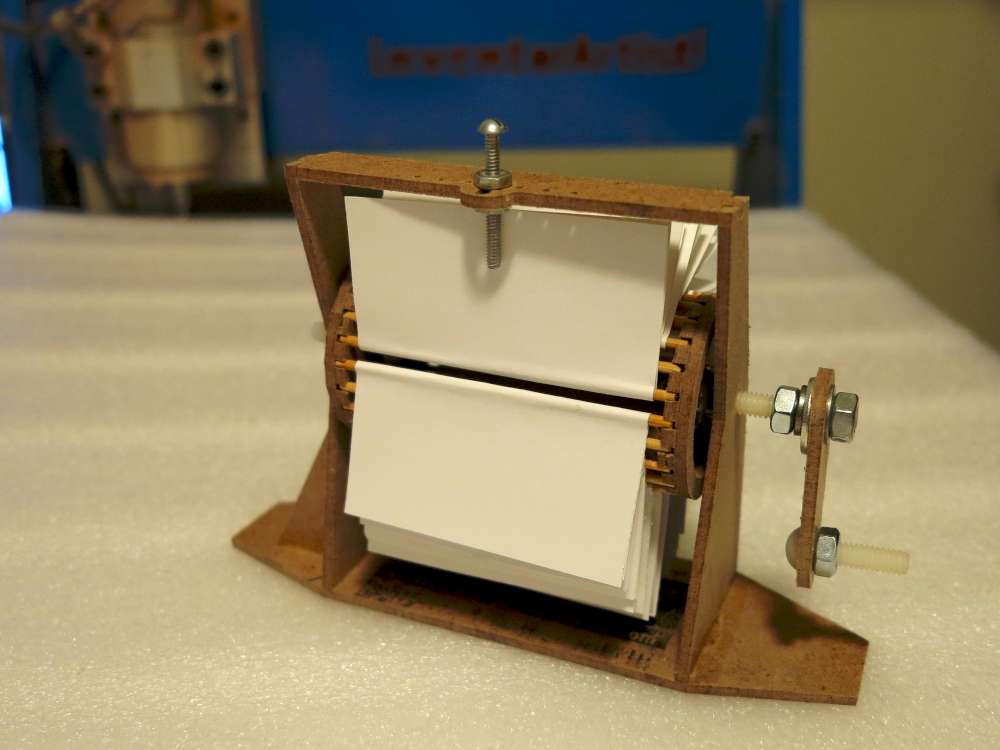
- Assemble the spindle by slipping the shaft retainers on, then the two end caps. One is made from a discarded CD and the other the same prototype material. No glue on the spindle!
- Add the right upright to the crank arm and then slip the crank through the other upright. Add the right upright to the platform (glue optional).
- Add the top brace (glue optional).

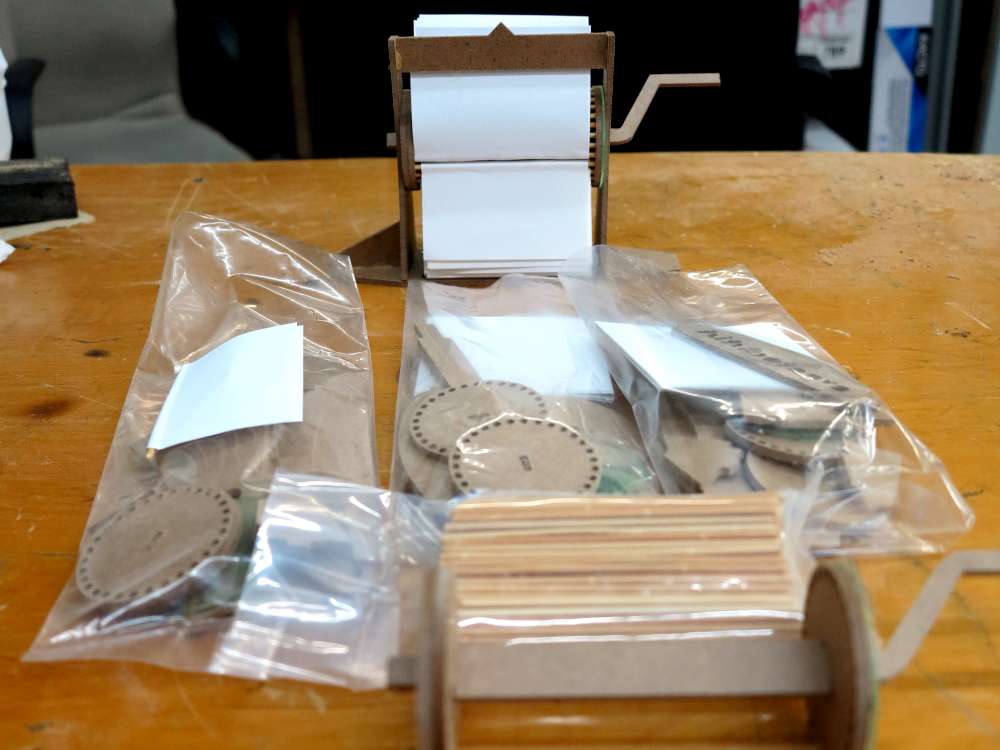
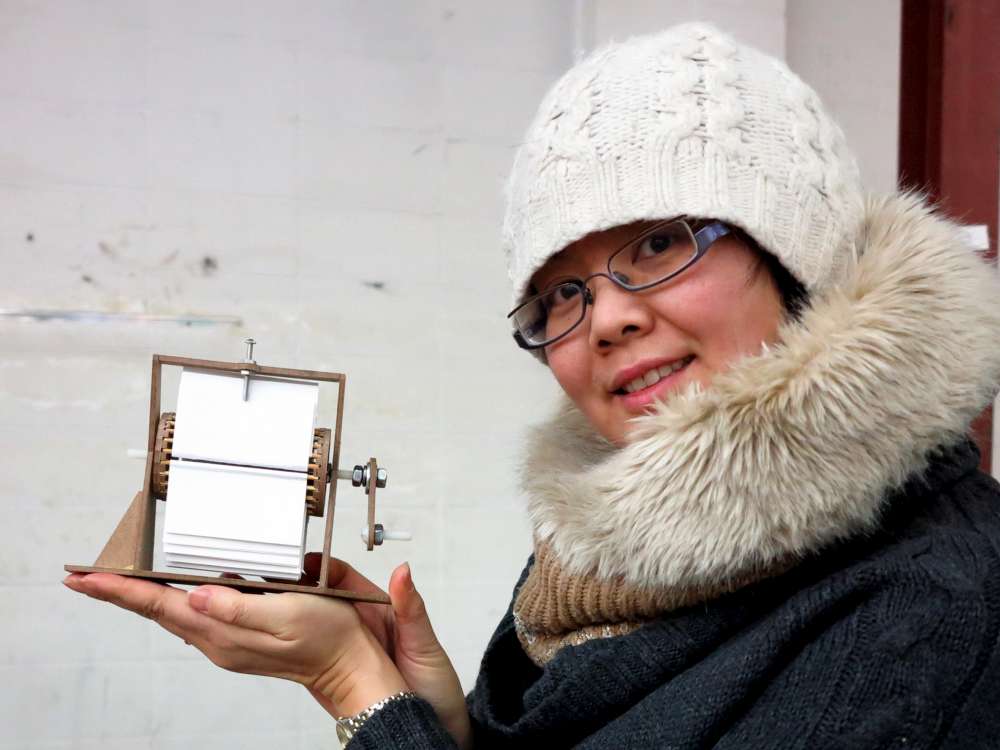
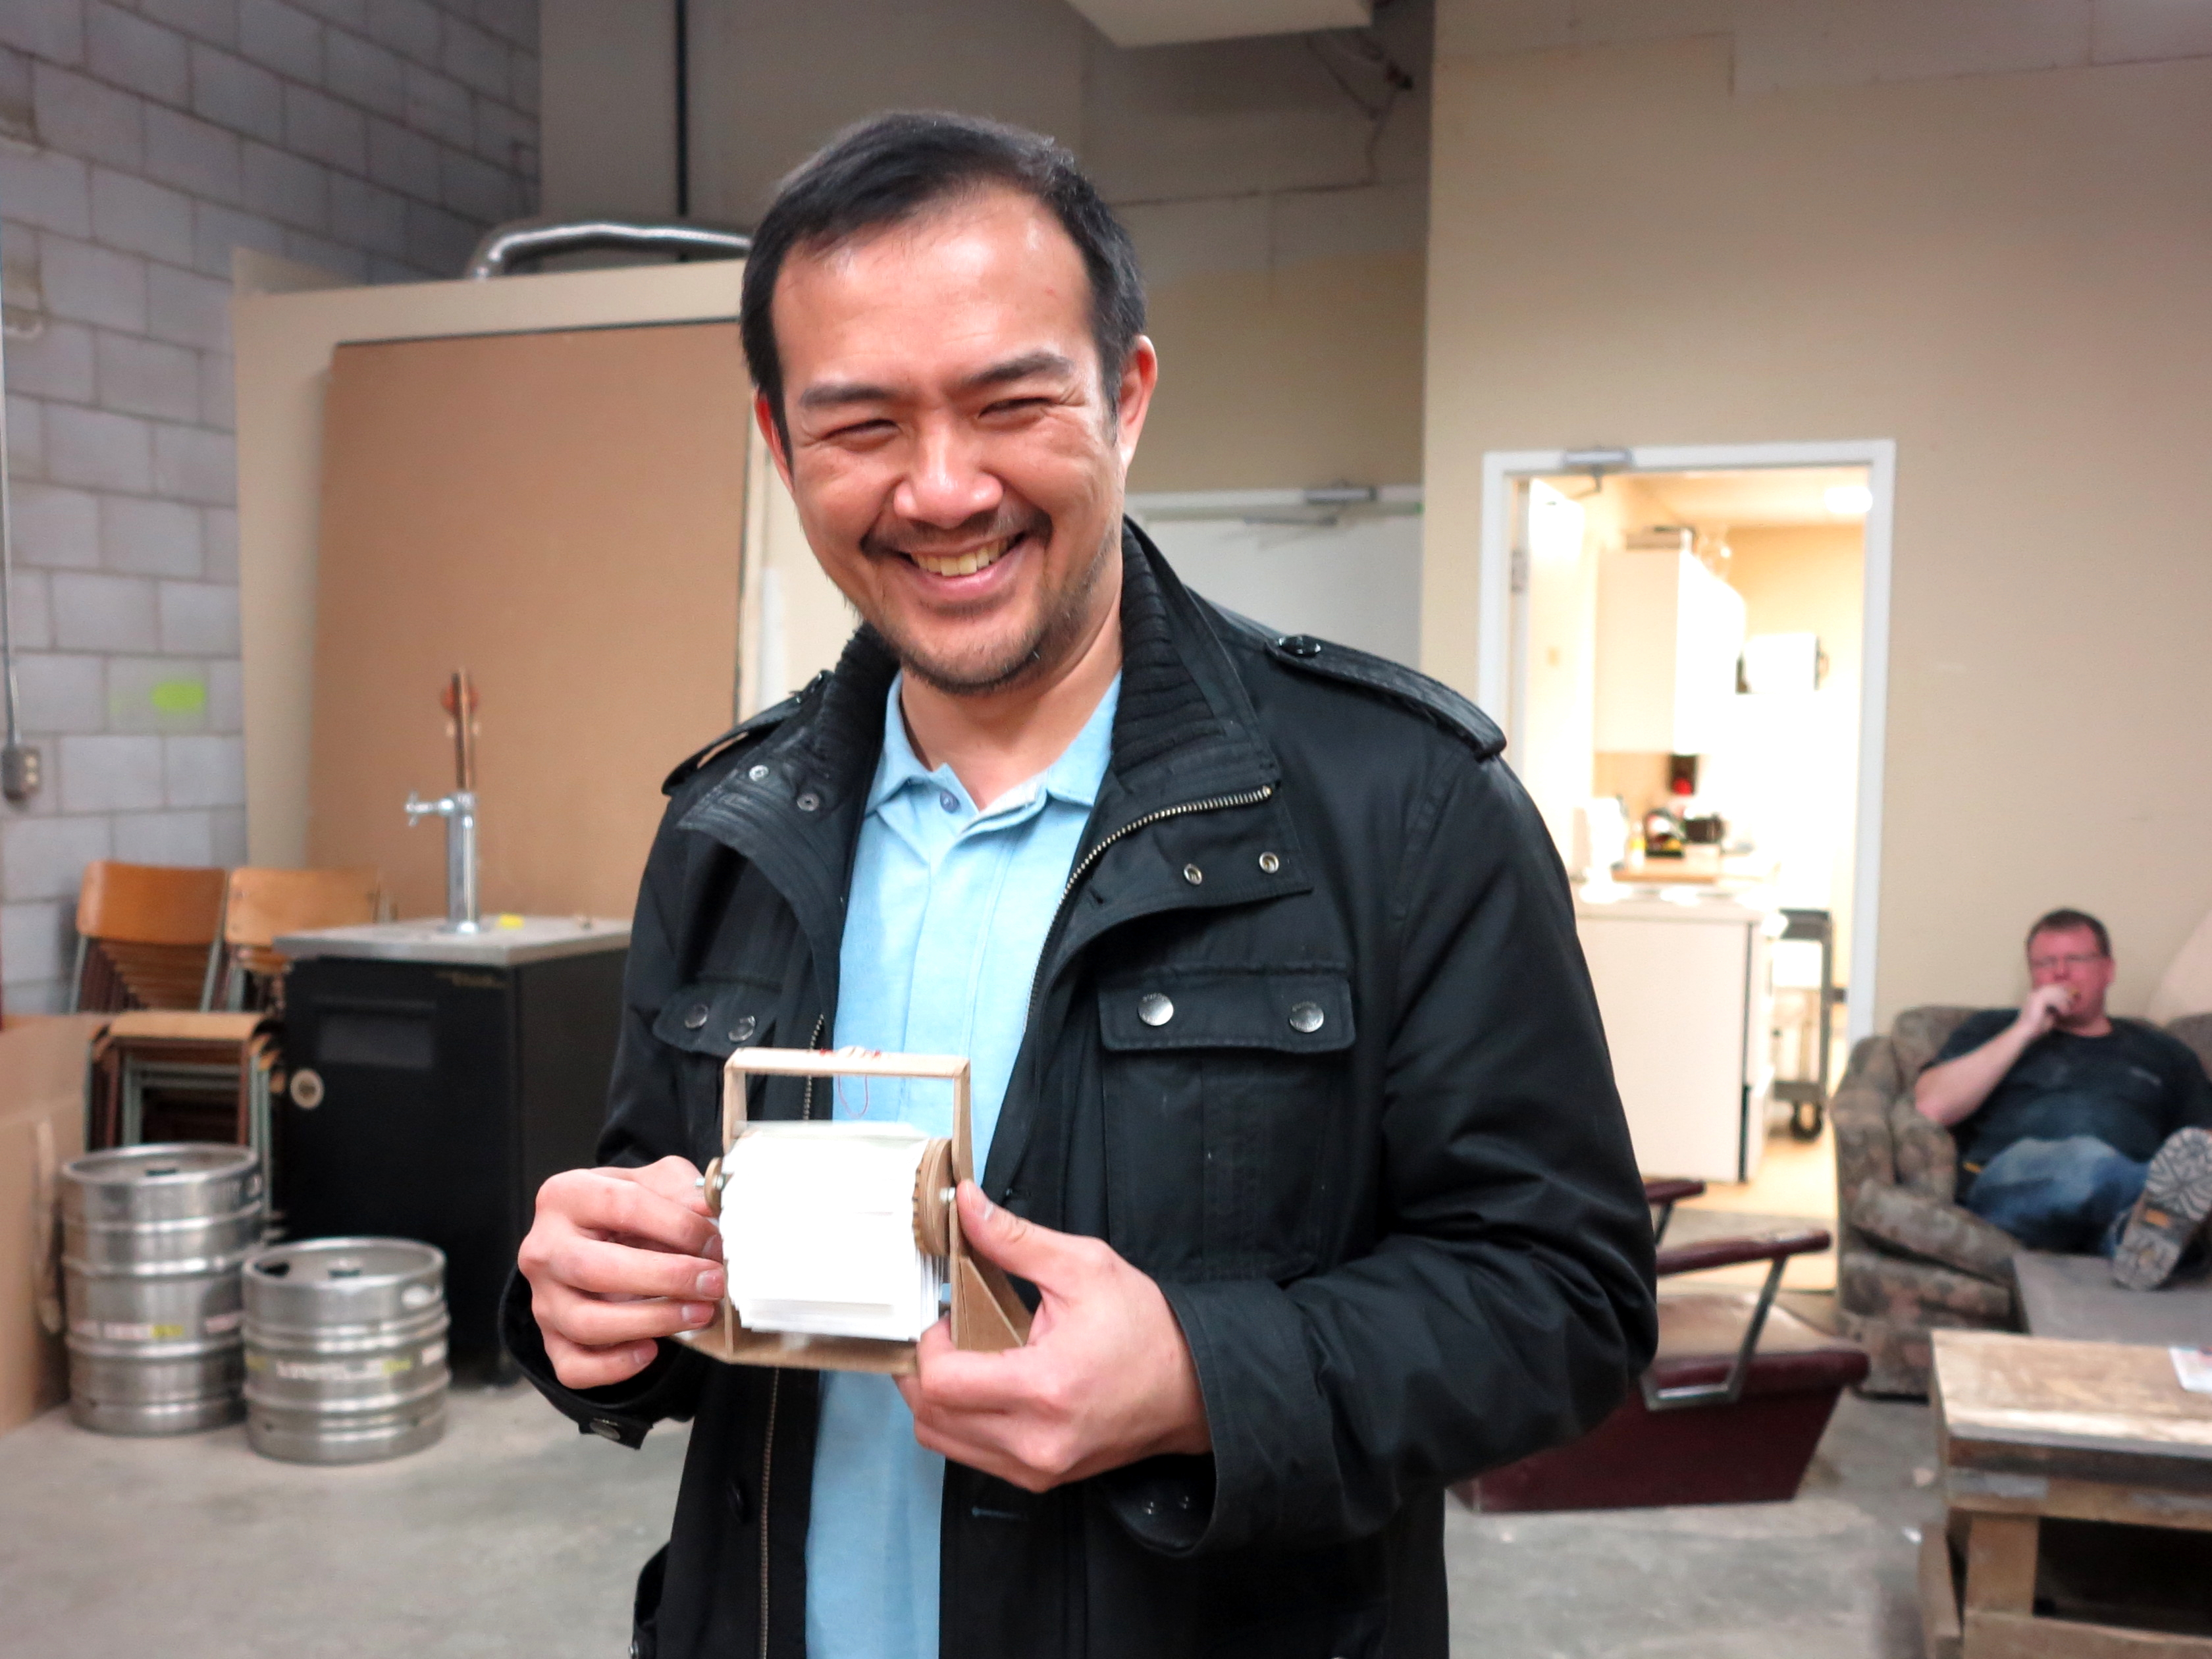
The three kits above went to Shirley for testing. I think she’s going to do a run with kids so it will be interesting to see what comes back.
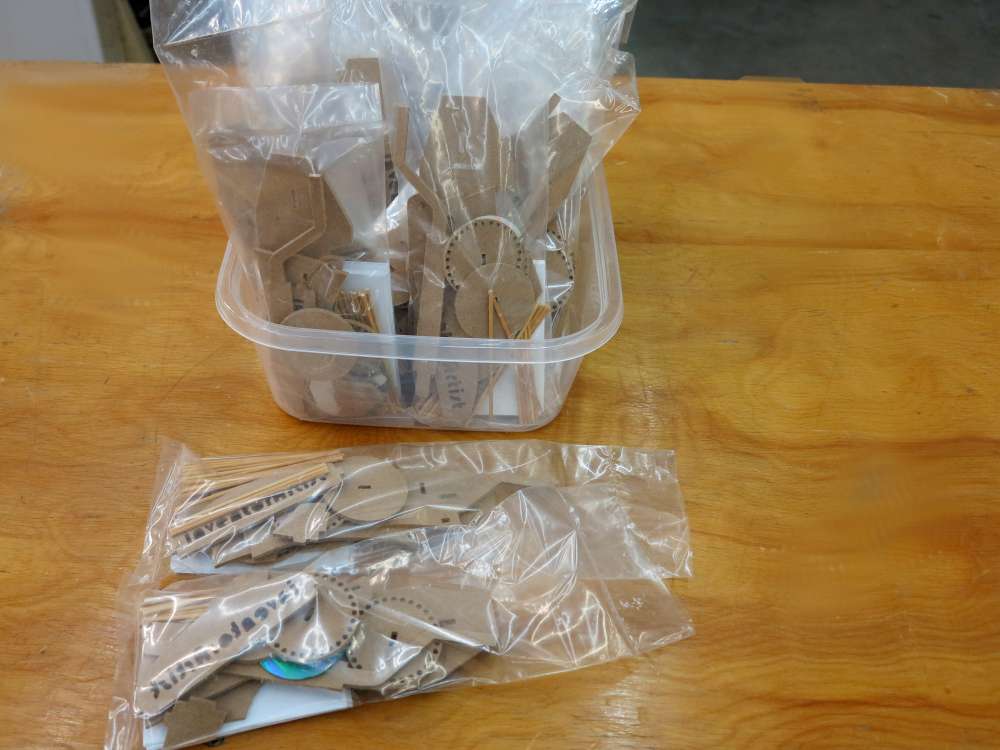
I felt confident that the kit is okay for the workshop so I finalized the design and made a run of 20 (thanks to Shirley for helping). One last change was the use of a glue stick instead of the craft/carpenter glue I’ve been using to glue the cards to the shafts. It now features rapid, snap-together construction. People can glue their frame later if they want.
Artists, Crafters and Makers welcome to Flip!
On Friday March 25th, 7-10pm at Shanghai (651 Somerset St W) I ran the first workshop with Don Kwan (fb).


Flipbook Instructions
Related
Mention in Lady Ada blog.
Check out this egg animation sent in from Slater Harrison!
Hi! I’m So impressed!!! Do you sell some kind of temptate ee of your kit? We want to make it with kids in our kids animation studio in Russia, South Ural.
I may make up another batch of kits, if you send me an email I can add you to the list to get them.
My email is darcy@inventorArtist.com
It’s does look easy but the more I’ve looked at it the harder its get. I’ put it on the back burner until I’ saw your pape flipper link, which seems nicer and cleaner.lets emails and meet, maybe together we can come up with a workable version.
See below video of a page Turner my in-law was trying to build:
https://youtu.be/R7BSSiNFtjc
Bocar
That attempt looks like a great start. Add more motors and a controller and it might be a great turner…
Yes Darcy it is a different idea , a page Turner much harder . Way back I’ve researched for a not expensive way of doing it using Arduino and motors but could not find a solution. Use to have one or 2 clients who wantsed to read a real book with a page Turner, but now with ebooks the demand for it is less. Still if available someone could use it.
Yes I am from Ottawa, maybe you could hookup one day.Bocar
If you want to work on it perhaps we should meet up.
I think it’s an interesting problem.
Surely there must be an easy solution for it….
Check this out: https://www.youtube.com/watch?v=PVLhrdcII_A
That could be used to scan a book.
Here’s some more detail on the mechanism…
https://www.youtube.com/watch?v=f5H-8QqkGSA
Here’s a whole other approach…
https://www.youtube.com/watch?v=y16rNqnxj0U
And another…
https://www.youtube.com/watch?v=sSDUkEm2mss
I think this is a great solution since you can transfer any book to a more accessible format.
Would to usefull as a page Turner for book if its can be customize or repurpose for accessibility
Interesting idea. Do you happen to be in Ottawa? I think a page turner is possible but I think it would be much different than this project.