How to Fix a Cordless Drill
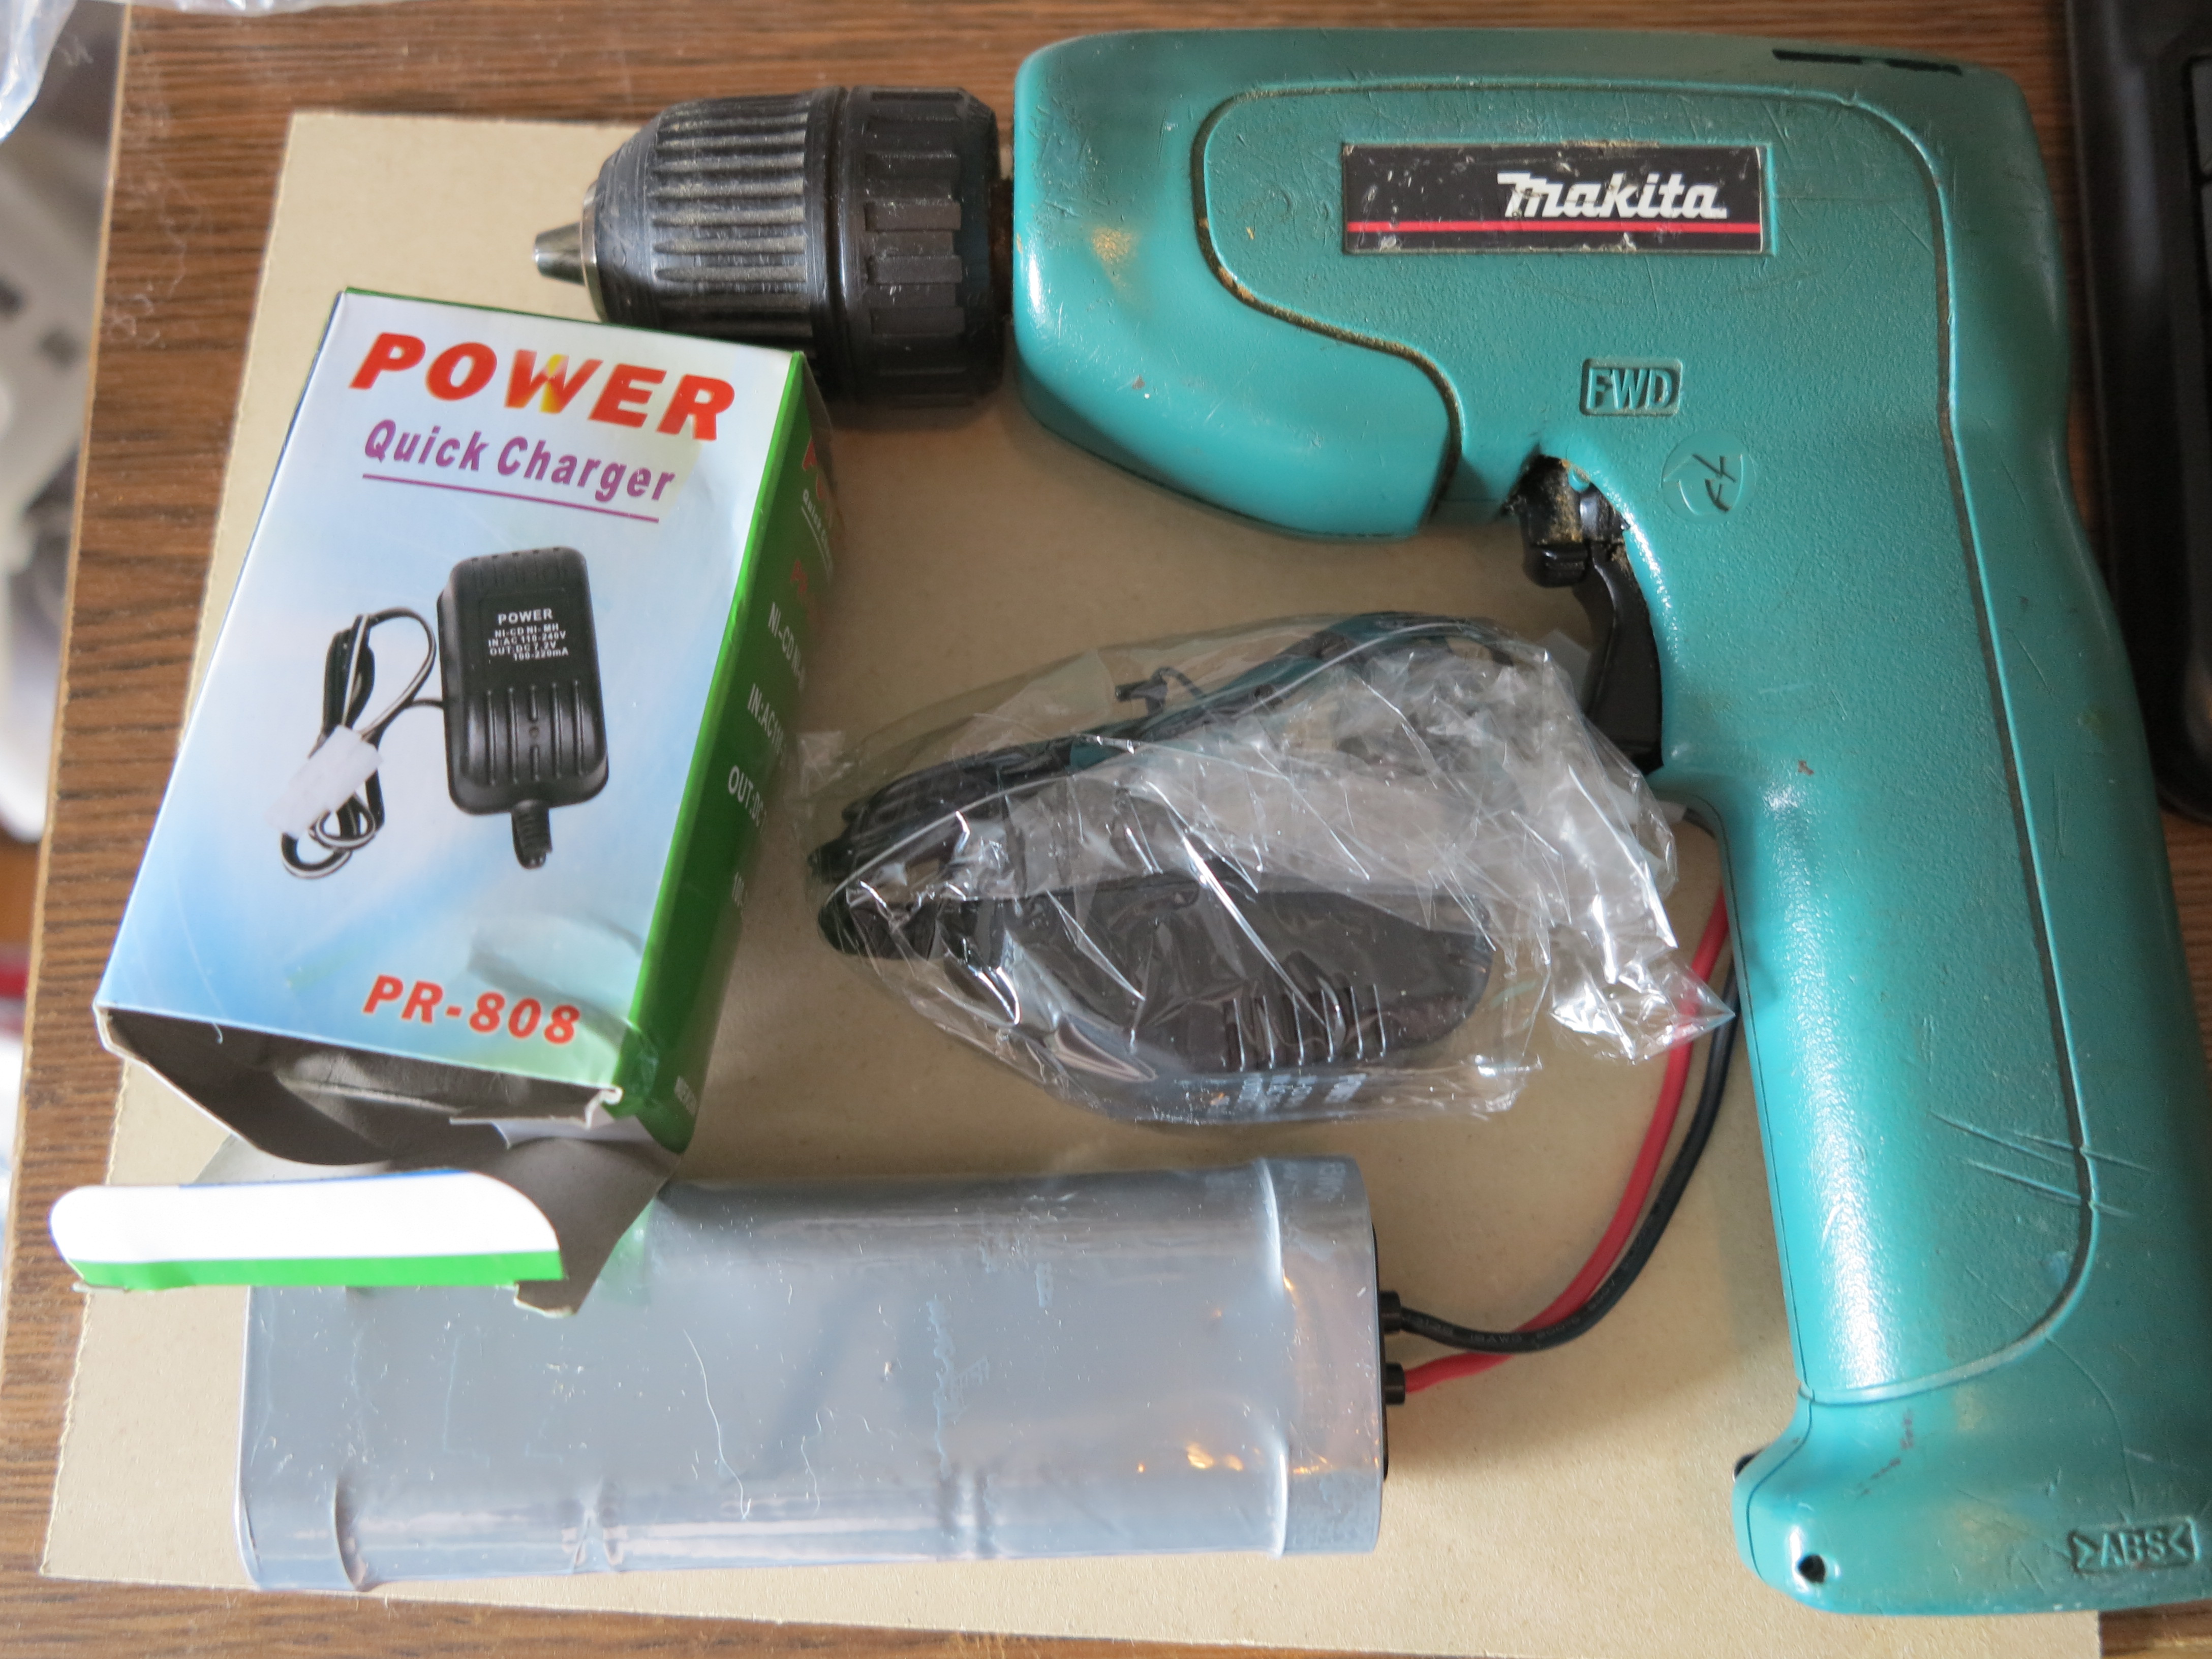
Drill pictured with model car battery replacement kit.
The Good: I was given a Makita 7.2V cordless drill. It’s nice and tiny with variable speed, reversing and key-less 3/8″ chuck (discontinued but $125 on ebay).
The Bad: The batteries and charger were toast (6176D $40.00/DC7020B $30.00). Total repair: $70.
This is such a shame since the drill is in otherwise perfect order and these are really nice compact cordless drills.
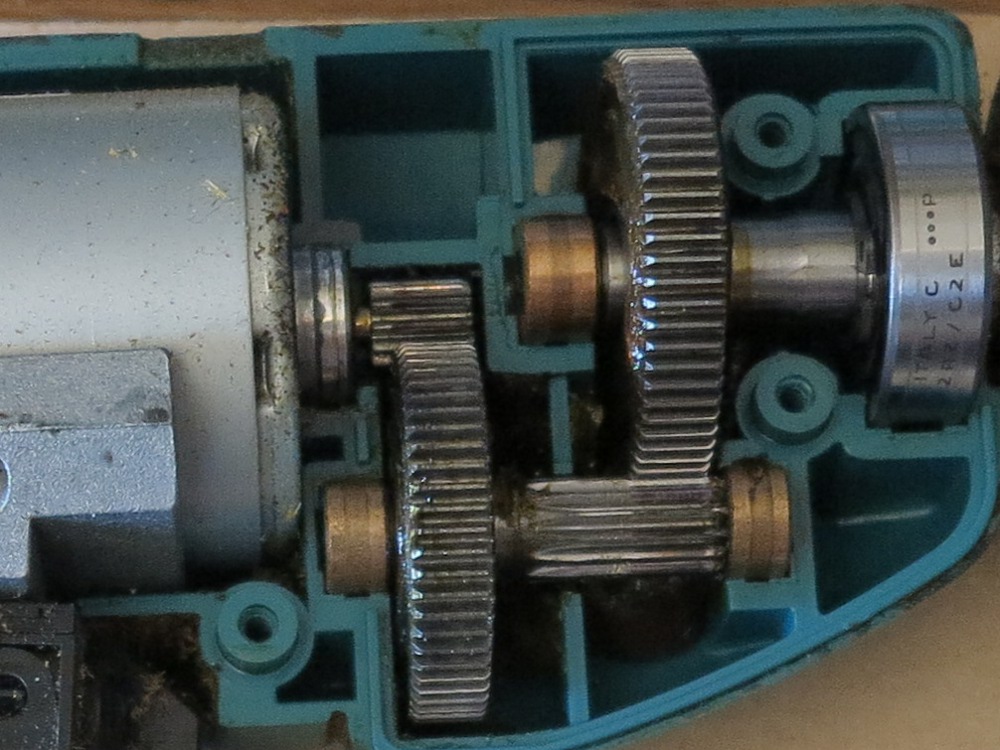
Have a look at the gear box. It has no wear. The motor is in the same packaging as those motors found in printers that drive the paper. So if the motor goes a spare can be had for nothing.
Ordinarily a $70 repair bill on a used drill would send it to the garbage bin or parts box.
The Not So Ugly
There’s a great approach to fixing this. Not only is it inexpensive but the drill will run much longer on a charge.
Model cars have similar batteries and that whole business has been “toyified” so the parts are inexpensive even though the quality may be even better.
The battery and charger pictured above-right is a replacement for a Tamiya model car (7.2V 4600mAh). This is a fairly generic model car battery and doesn’t go with any particular model. In fact it would fit a huge variety of non Tamiya stuff. I scored it from ecomoutlet a Chinese seller for $16.94US shipping included. Product Features: >Brand new NiMH, 1000 cycles, Japanese cells 110-220V charger.
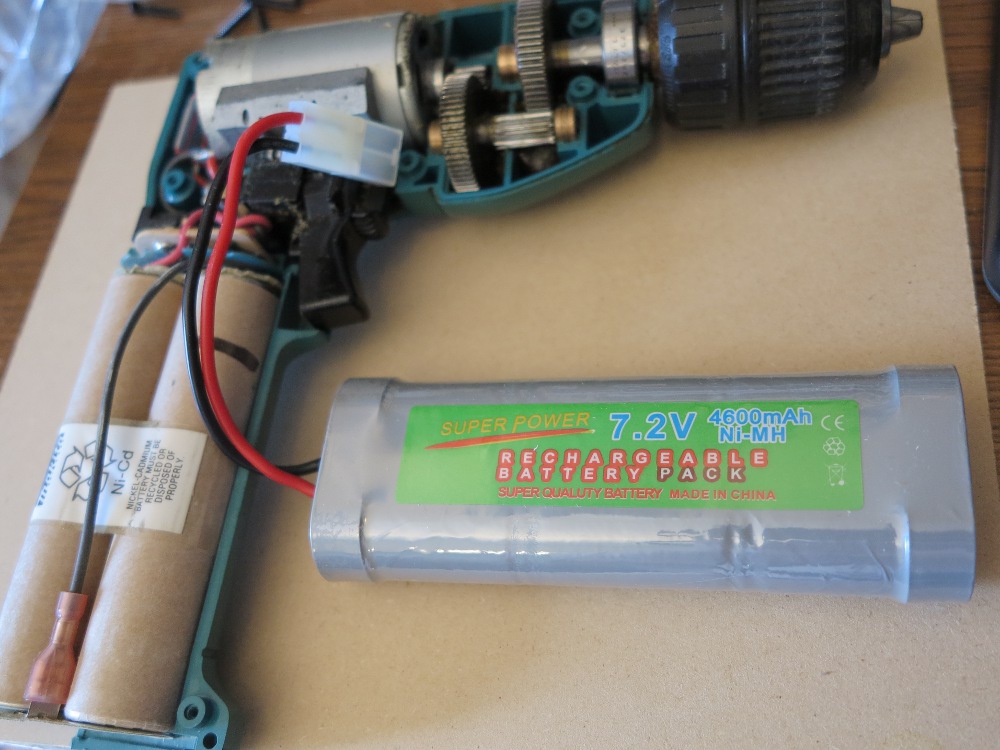 As you can see at the right the battery is a little longer than the one in the drill. But that’s the coolest part. The drill’s stock battery is 1200mAh capacity. The model car racing battery is 4600mAh. That’s almost four times the capacity. So the rill will run three or four times as long on one charge. Weather or not the seller’s claim is right, we’re likely still ahead.
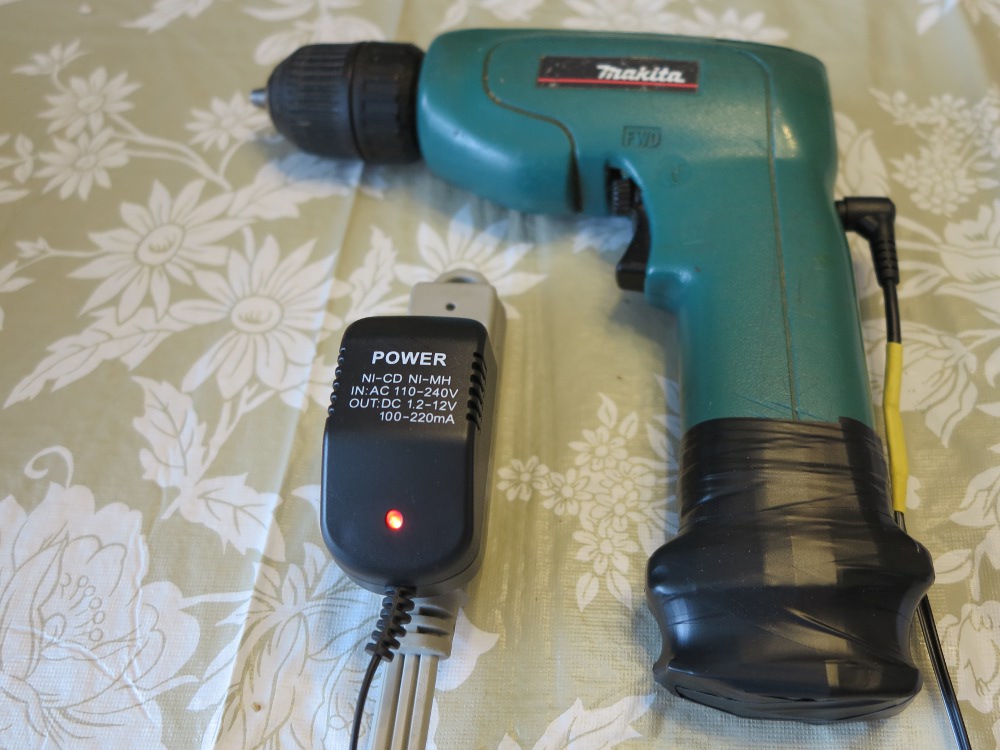
On the downside, the stock charger claims to charge in 3h and I would expect this cheap outfit to take overnight or even 24h for charging (we’ll see). But I’m okay with that.
How I Install the Batteries
It was a quick job taking only about 15 or 20m.
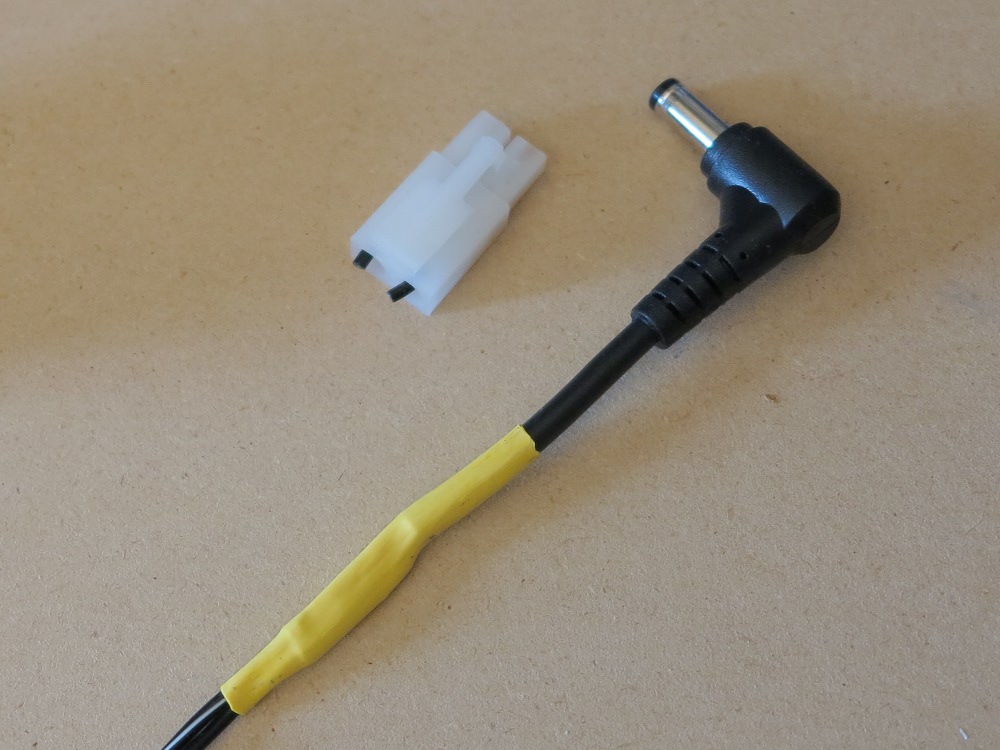
Below left is the white connectors the car battery came with. You can also see the connector I found in my parts box that matches the drill. I put the matching connector onto the new charger. I simply snipped the charger off the Tamaya connector and soldered the right connector using my home-made extra hands (center). I noticed the Tamaya connector was matching the striped wire to the positive. So I made sure when I added the new connector the stripe went to the red inside the drill. The completed charger connector on the right.
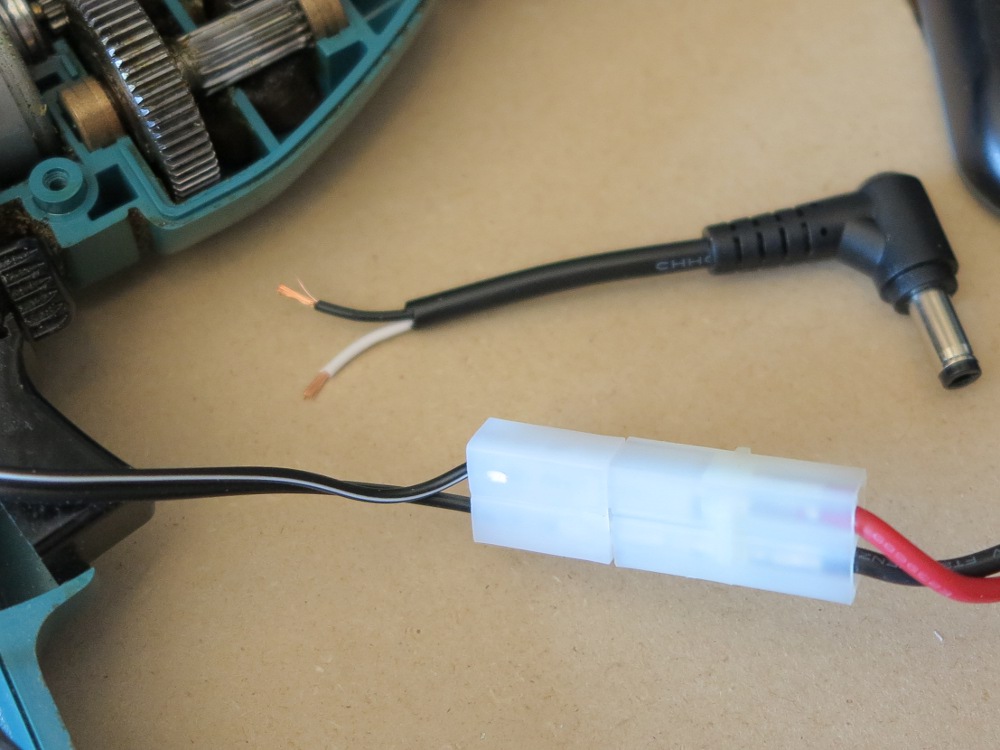
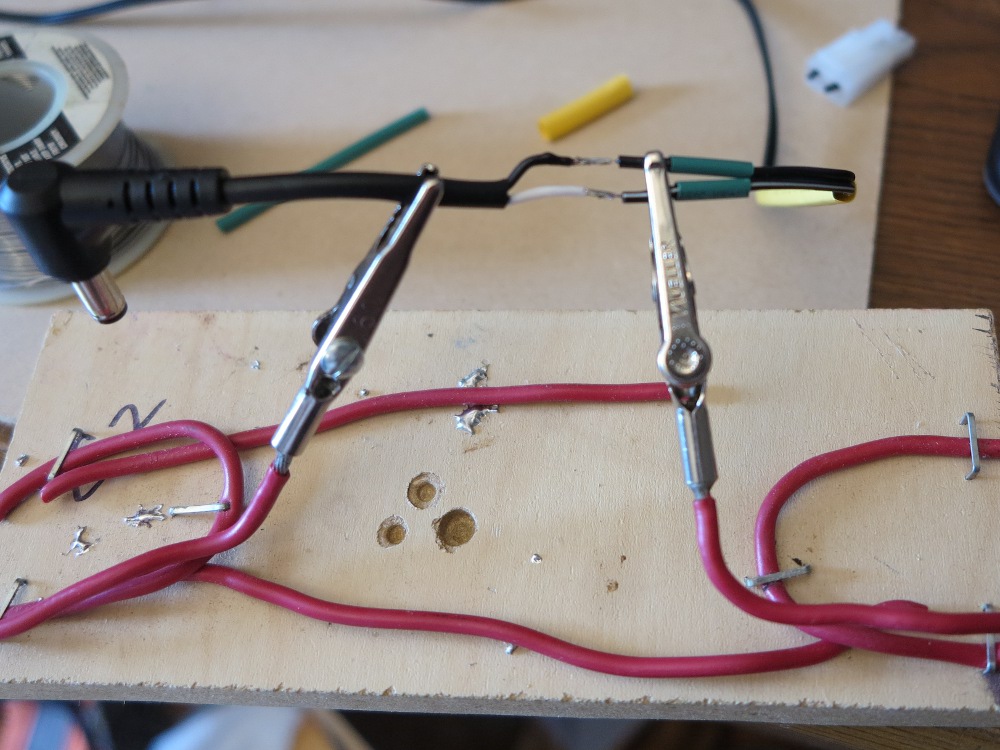
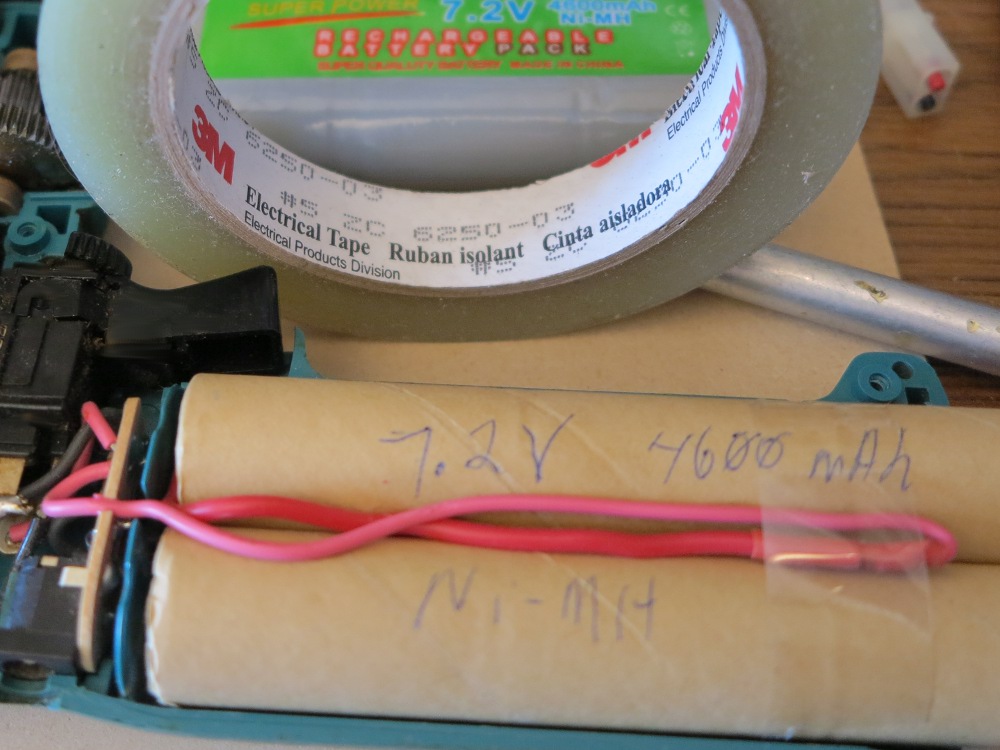
I then just clipped the Tamaya battery off of it’s connector and soldered it in red to red and black to black. I taped the wires down and closed the drill. Notice how the new batteries are longer than the previous ones and actually project out the bottom. I taped it all up with electrical tape (preserving the old battery cover) and voila. A drill better than new.

sorry this is so late. I have the exact same drill and was wondering why you changed the charger out. Wouldn’t the Makita charger work with the new battery?
I can’t remember. Perhaps the charger came with the batteries…
Thanks. I have a new battery and it was working but now seems to take for ever to charge. I kept the whole charging system but I wonder if with the increase in amp hours it may need either a very long charging time of a more powerful charger. The battery stays weak. I tried the drain and freeze method of resetting the battery. I noticed that you changed the charger plug unit and just kept the jack that goes into the drill.
by that I mean that the new battery did not come with a charger.
sorry I do not speak English..one question
En la board cicuit..donde entra el eliminador de 7.2 v..
Se me quemo..y no se que resistencia lleva ahi
Necesito saver de cuantos homs es la recsistencia..
Agradecere tu respuesta..
Saludos
Is this battery still holding up? I have the same drill and think that it would be a great project!
yeah, seems to be working fine… I used it the other day…
Good point and thinks for the note. If anybody else tries it, it will be safer. 🙂
DANGER! When clipping the battery wires, do so one at a time!
Clipping both at once with a conductive tool will pop a nasty spark and possibly ruin your tool. The battery will not like it either.
I recommend completing the whole process of clipping, soldering, and insulating one power line before starting on the next. That way the battery leads cannot be shorted together.
Good Hack!