Processing, Arduino and Web
 I saw this interesting problem a school teacher was having in the Arduino forum.
Hello! I am middle school teacher fumbling my way through learning how to use Arduino in order to help a student of mine learn to create a specific project she has in mind. I am SO new to this, I don’t even know what I don’t know. We have exactly one week to get this figured out, and I don’t want to disappoint her! She wants to program her LEDs to do this:
LED1: flash on for one second, turn off for 15 seconds, and then repeat indefinitely.
LED2: flash on for one second, turn off for 16 seconds, and then repeat indefinitely.
LED3: flash on for one second, turn off for 7.5 minutes, and then repeat indefinitely.
LED4: flash on for one second, turn off for 1 second, and then repeat indefinitely.
LED5: flash on for one second, turn off for 48 seconds, and then repeat indefinitely.
LED6: flash on for one second, turn off for 50 seconds, and then repeat indefinitely.
They were fumbling around with some code. ArduinoLEDCode
I thought would be fun to help but the difficulty was that I needed to wire six LED’s up. That’s not hard but I was on the road and didn’t have an Arduino, Breadboard with me.
decided to do it in Processing.org (code below). This problem is a great candidate for a “non-blocking” coding technique.
I think this is a great way to work on problems that eventually will live in an Arduino. You can get the logic figured out without worrying about the hardware right away.
Running Processing on the Web
You can run the code right on your Web page using Processing.js. For WordPress you can install a plugin (this plugin is temporarily disabled since it is interfering with the rest of the site) and just paste the processing code right on your page. In fact, you can work on the code directly on your Web page rather than making it in processing then bringing it to your Web page later.
[p5js code canvas]
//////////////////////////
// Non Block Blink
//
// Darcy Whyte, darcy@inventorArtist.com, 2014
//
// Sample program written in Processing.org to illustrate the idea of
// working in Processing with intent to port to Arduino.
//
// Description of the problem at:
//
//////////////////////////
//Create an array showing locations of LEDs on the screen.
int [][] LED = {
{50,50}
,{50,80}
,{50,110}
,{50,140}
,{50,170}
,{50,200}
,{50,230}
,{50,260}
};
// A color for on and a color for off.
color LEDon = color(255, 255,255);
color LEDoff = color(64, 64, 64);
//Store timing for each LED.
long [][] LEDtiming = {
{1000,15000}
,{1000,16000}
,{1000,450000}
,{1000,1000}
,{1000,48000}
,{1000,50000}
,{200,200}
,{500,500}
};
int [] LEDstate = {0,0,0,0,0,0,0,0}; //Is each LED on or off? 1/0
long [] LEDlastStateChange = {0,0,0,0,0,0,0,0}; //When is the last time each LED changed?
void setup() {
//Prepare a screen for rendering.
size(640, 480);
background(0);
//Draw each LED as on
for (int i = 0;i<=7;i++){
fill(LEDon); //
ellipse(LED[i][0], LED[i][1], 10, 10); // Draw left circle
}
}
//loop
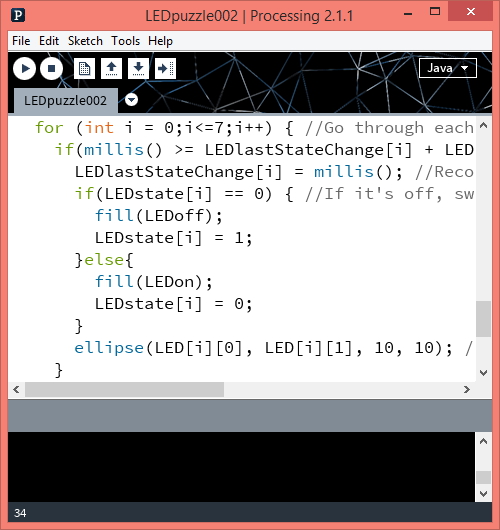
void draw() {
for (int i = 0;i<=7;i++) { //Go through each LED to figure out if it should be on or off.
if(millis() >= LEDlastStateChange[i] + LEDtiming[i][LEDstate[i]]) { //Is each LED due for change?
LEDlastStateChange[i] = millis(); //Record that we are changing it.
if(LEDstate[i] == 0) { //If it’s off, switch on, otherwise switch off.
fill(LEDoff);
LEDstate[i] = 1;
}else{
fill(LEDon);
LEDstate[i] = 0;
}
ellipse(LED[i][0], LED[i][1], 10, 10); //Render each LED.
}
}
//For extra thrill value. Throw down some paint when user presses mouse button.
stroke(255);
if (mousePressed == true) {
line(mouseX, mouseY, pmouseX, pmouseY);
}
}
[/p5js]
//////////////////////////
// Non Block Blink
//
// Darcy Whyte, darcy@inventorArtist.com, 2014
//
// Sample program written in Processing.org to illustrate the idea of
// working in Processing with intent to port to Arduino.
//
// Description of the problem at:
//
//////////////////////////

//Create an array showing locations of LEDs on the screen.
int [][] LED = {
   {50,50}
  ,{50,80}
  ,{50,110}
  ,{50,140}
  ,{50,170}
  ,{50,200}
  ,{50,230}
  ,{50,260}
};

// A color for on and a color for off.
color LEDon = color(255, 255,255);
color LEDoff = color(64, 64, 64);

//Store timing for each LED.
long [][] LEDtiming = {
   {1000,15000}
  ,{1000,16000}
  ,{1000,450000}
  ,{1000,1000}
  ,{1000,48000}
  ,{1000,50000}
  ,{200,200}
  ,{500,500}
};
int [] LEDstate = {0,0,0,0,0,0,0,0};            //Is each LED on or off? 1/0
long [] LEDlastStateChange = {0,0,0,0,0,0,0,0}; //When is the last time each LED changed?

void setup() {
  //Prepare a screen for rendering.
  size(640, 480);
  background(0);

  //Draw each LED as on
  for (int i = 0;i<=7;i++){
     fill(LEDon);                            //
     ellipse(LED[i][0], LED[i][1], 10, 10);  // Draw left circle
  }
}

//loop
void draw() {
  for (int i = 0;i<=7;i++) { //Go through each LED to figure out if it should be on or off.
    if(millis() >= LEDlastStateChange[i] + LEDtiming[i][LEDstate[i]]) { //Is each LED due for change?
      LEDlastStateChange[i] = millis(); //Record that we are changing it.
      if(LEDstate[i] == 0) { //If it's off, switch on, otherwise switch off.
        fill(LEDoff);
        LEDstate[i] = 1;
      }else{
        fill(LEDon);
        LEDstate[i] = 0;
      }
      ellipse(LED[i][0], LED[i][1], 10, 10); //Render each LED.
    }
  }

  //For extra thrill value. Throw down some paint when user presses mouse button.
  stroke(255);
  if (mousePressed == true) {
    line(mouseX, mouseY, pmouseX, pmouseY);
  }

}