Rolly Robot
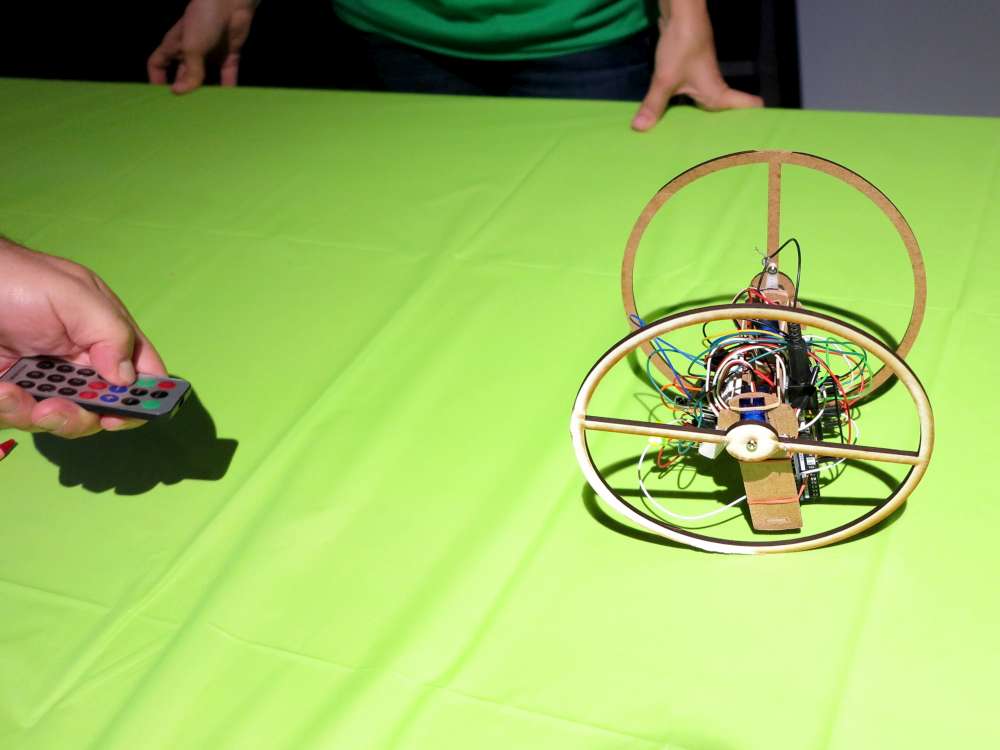
Rolly is a self balancing robot that can bounce off the wall.
All my friends have been making robots that run around the floor and I felt left out so this is my installment.
What I Liked
Their robots use an elegant solution of controlling wheel speed independently to get a tight turning radius and speed control. For instance if the left wheel turns faster than the right, then the bot goes right. If both wheels turn the same speed, then it moves forward.
What I Disliked
But they’re using geared DC motors, h-bridges, castors and layered platforms for their chassis which I thought was a a lot of busywork.
My Rational
As a beginner who likes supporting beginners I wanted something simpler. Less is more.
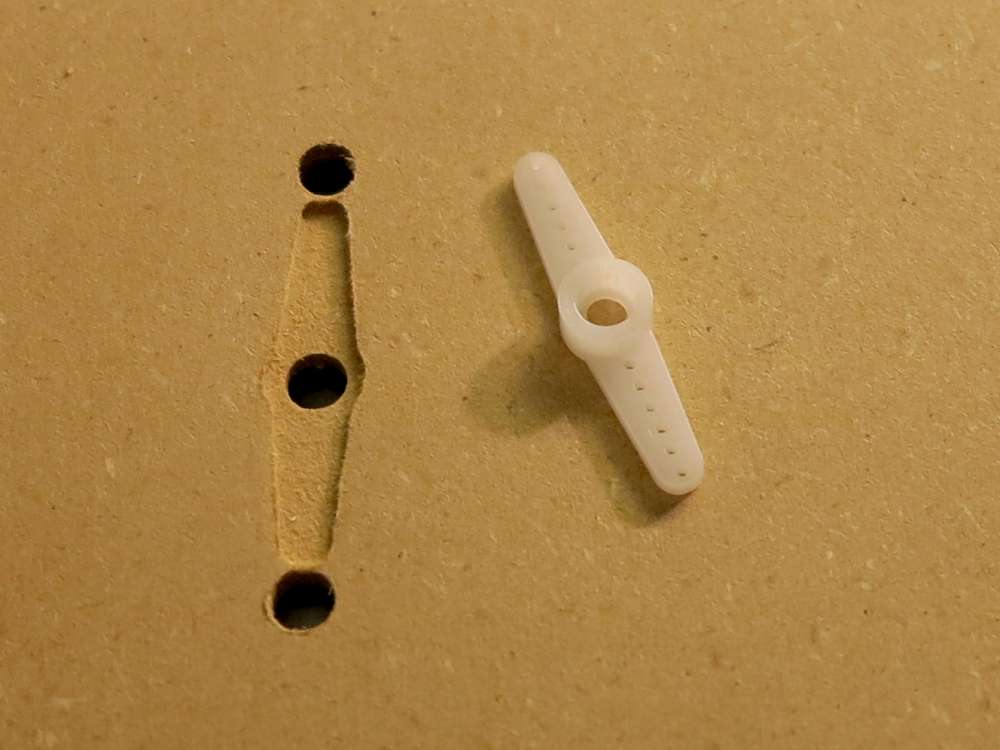
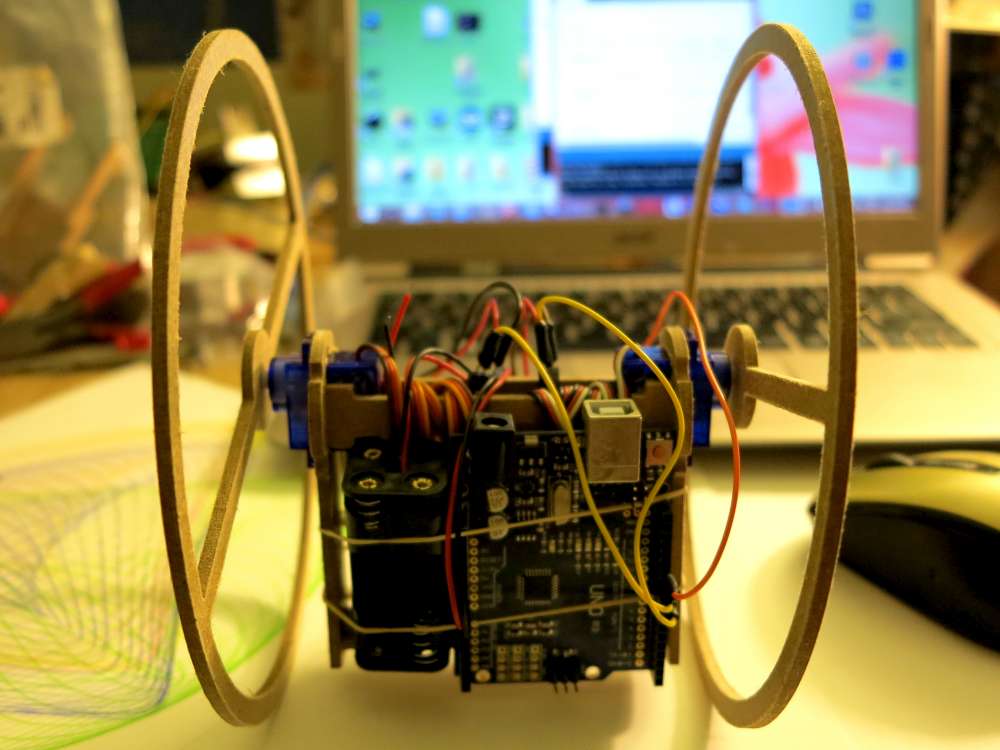
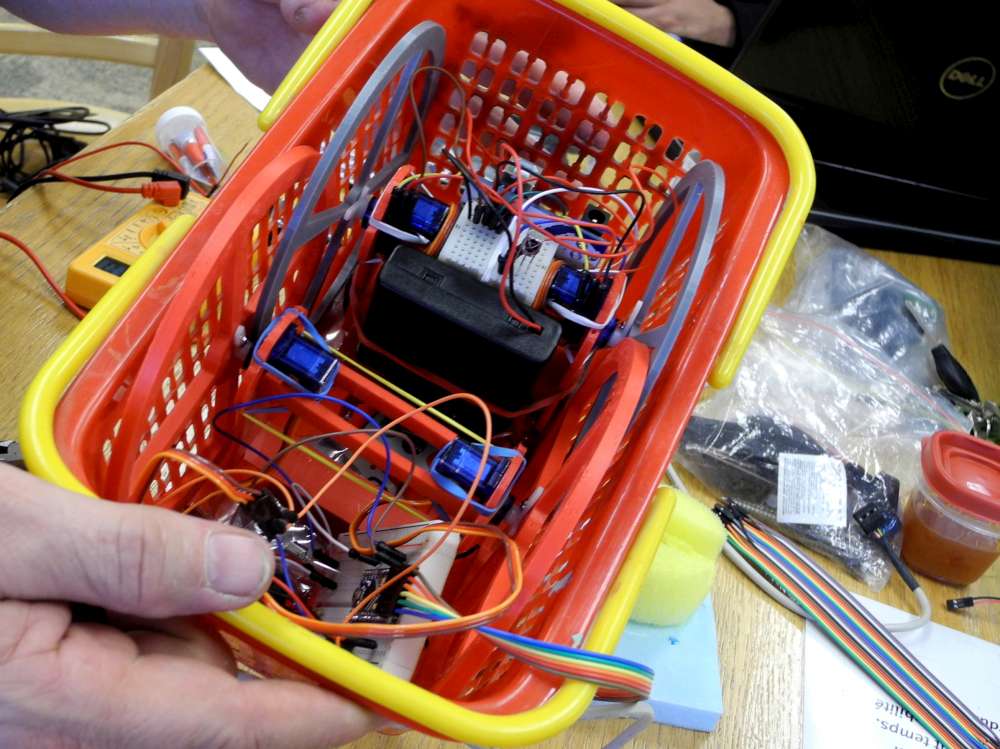
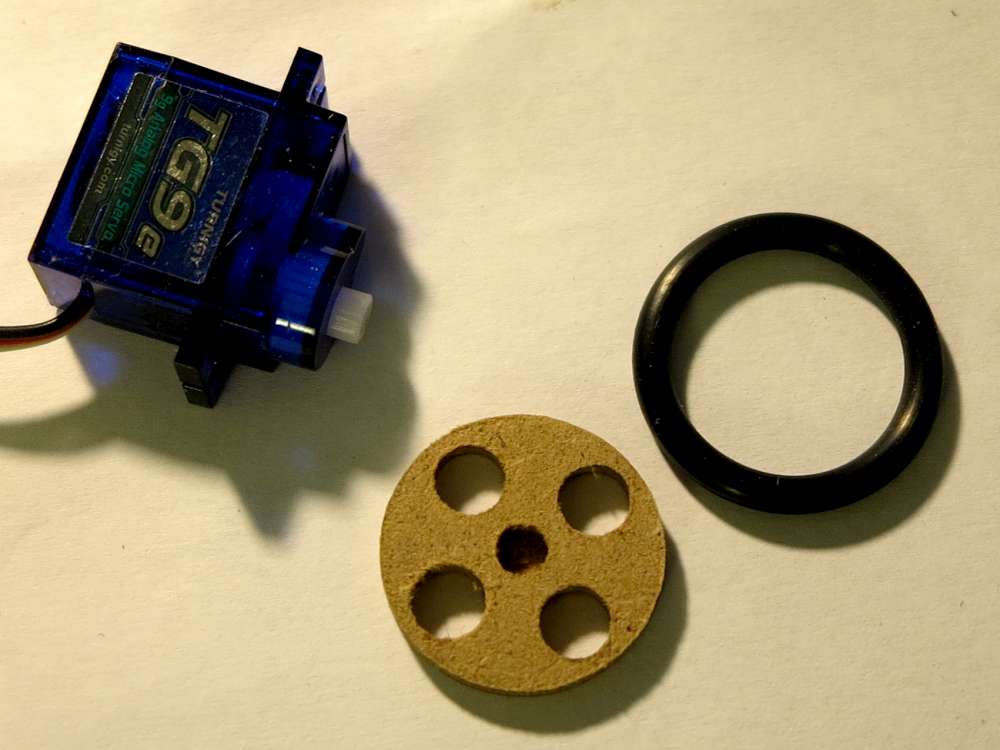
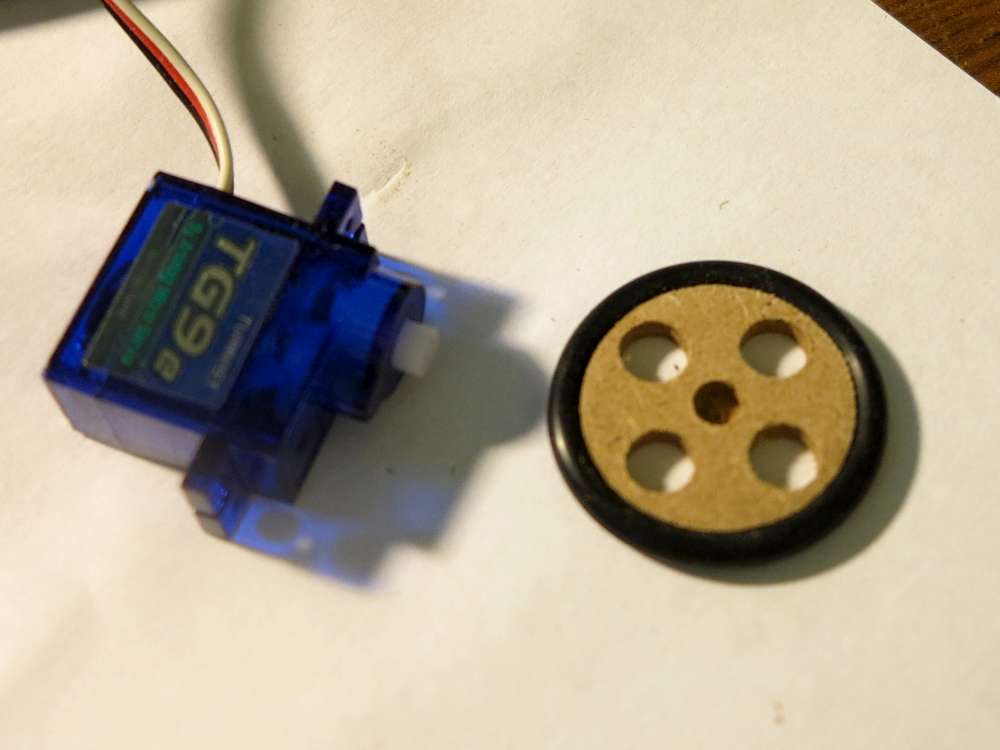
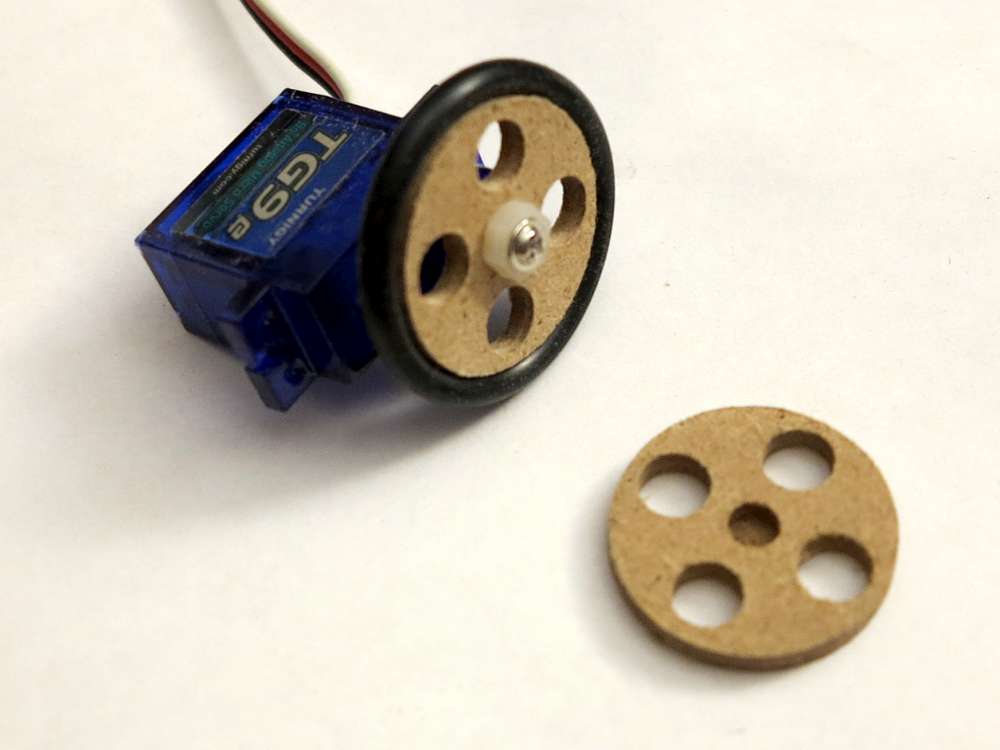
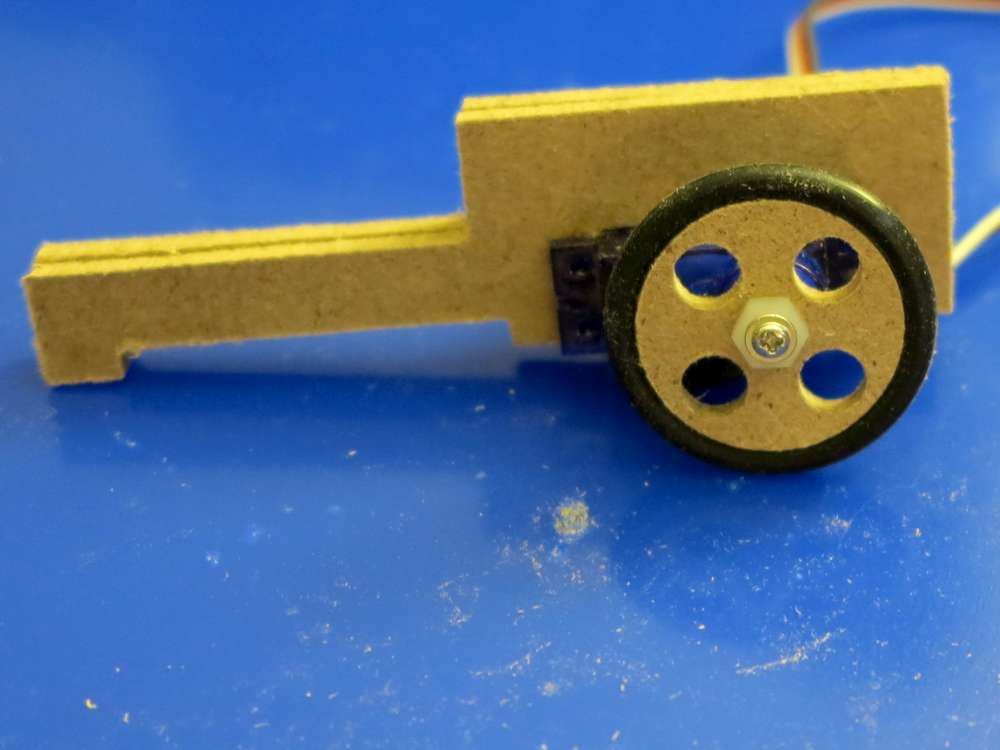
I used inexpensive servos which are easier to work with (Turnigy TG9e servo hack). Servos have gear boxes and a controller so there’s less fuss. So locomotion only requires two data pins, one for each wheel.
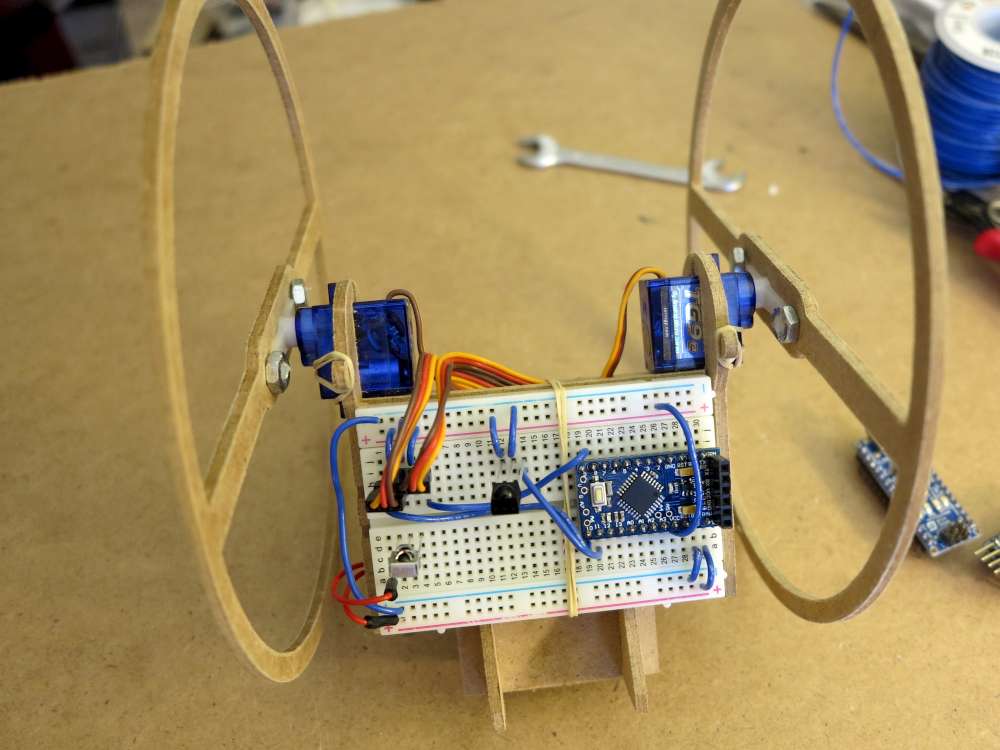
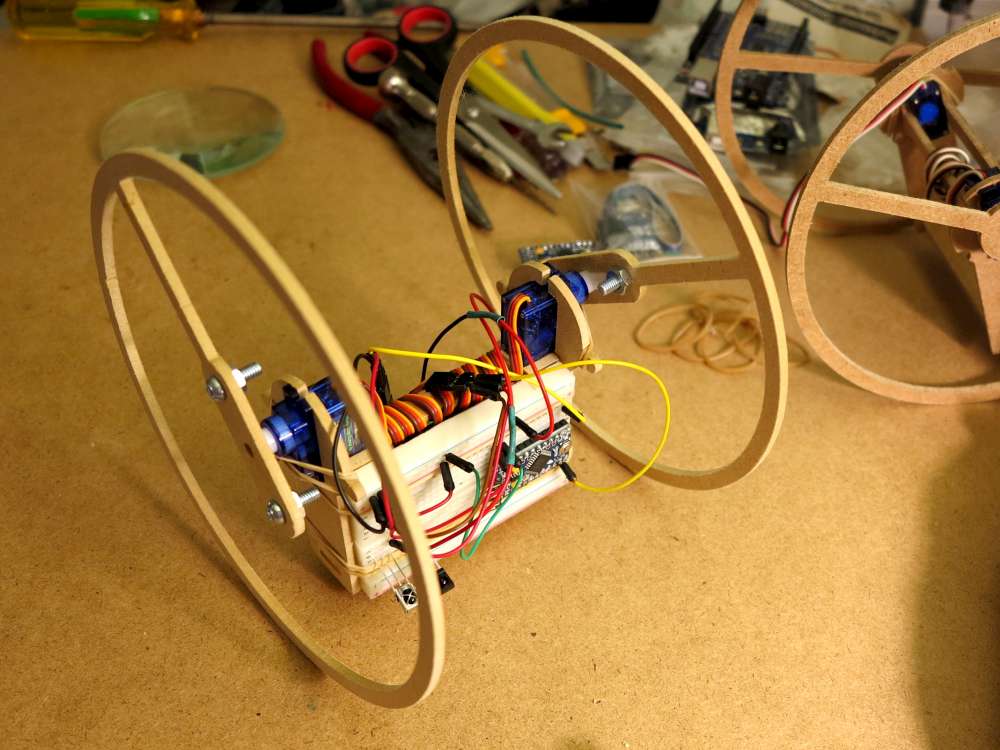
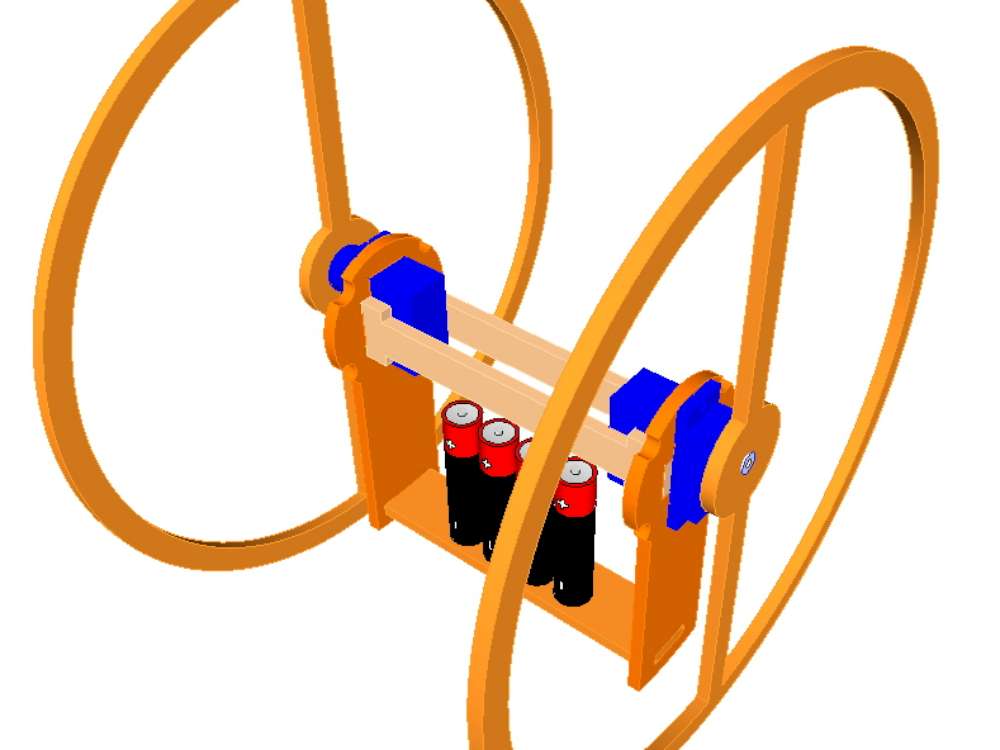
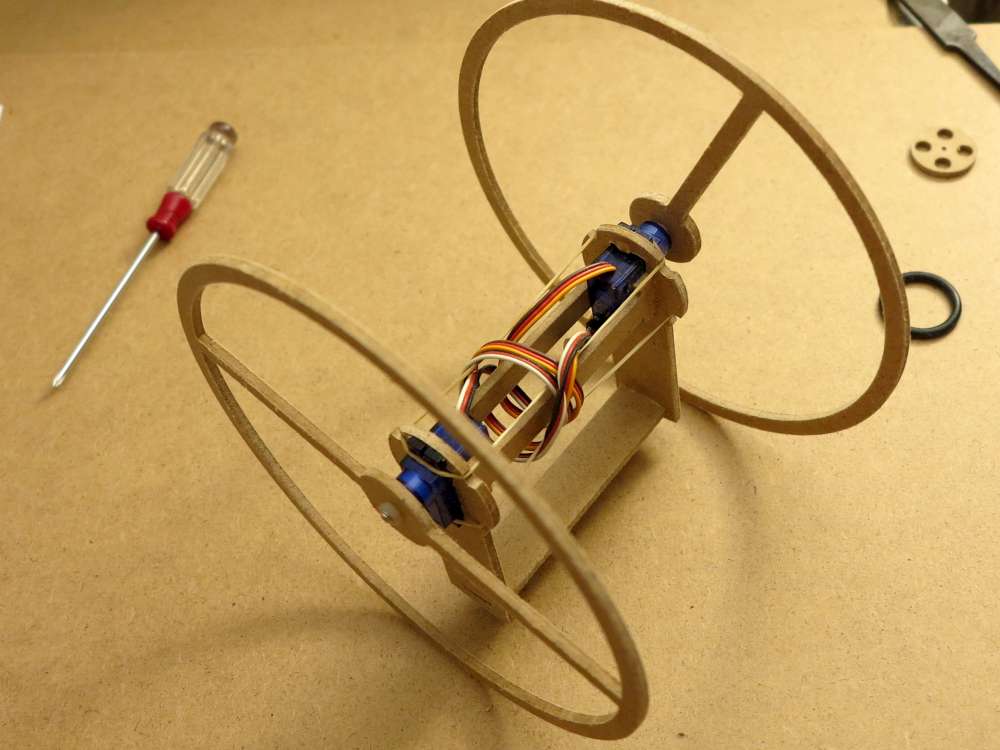
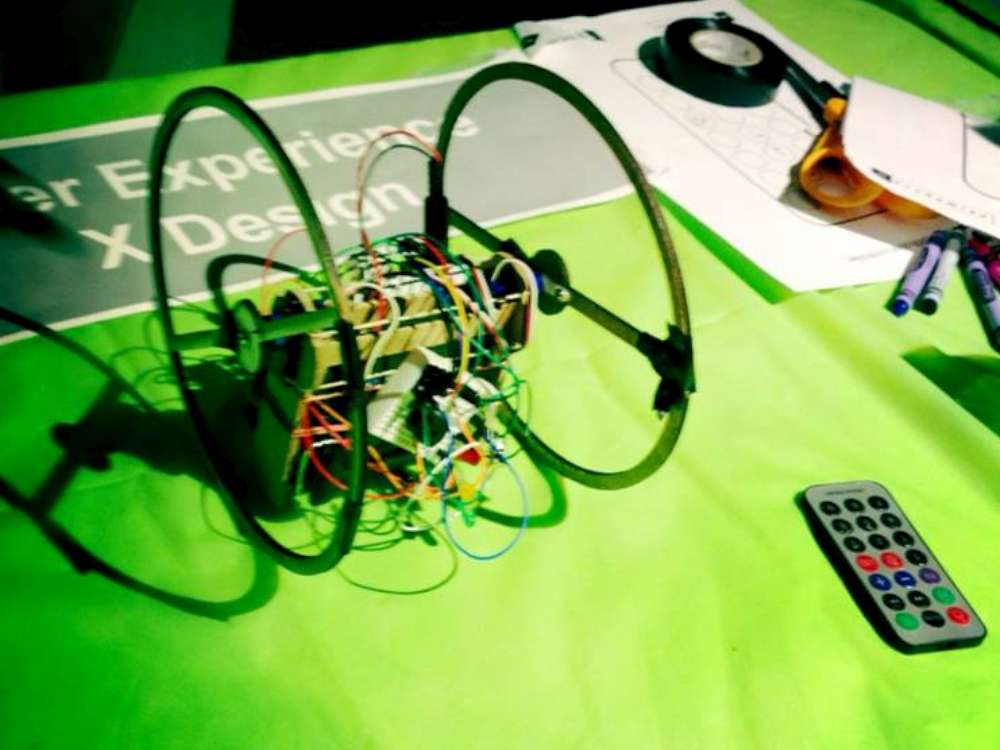
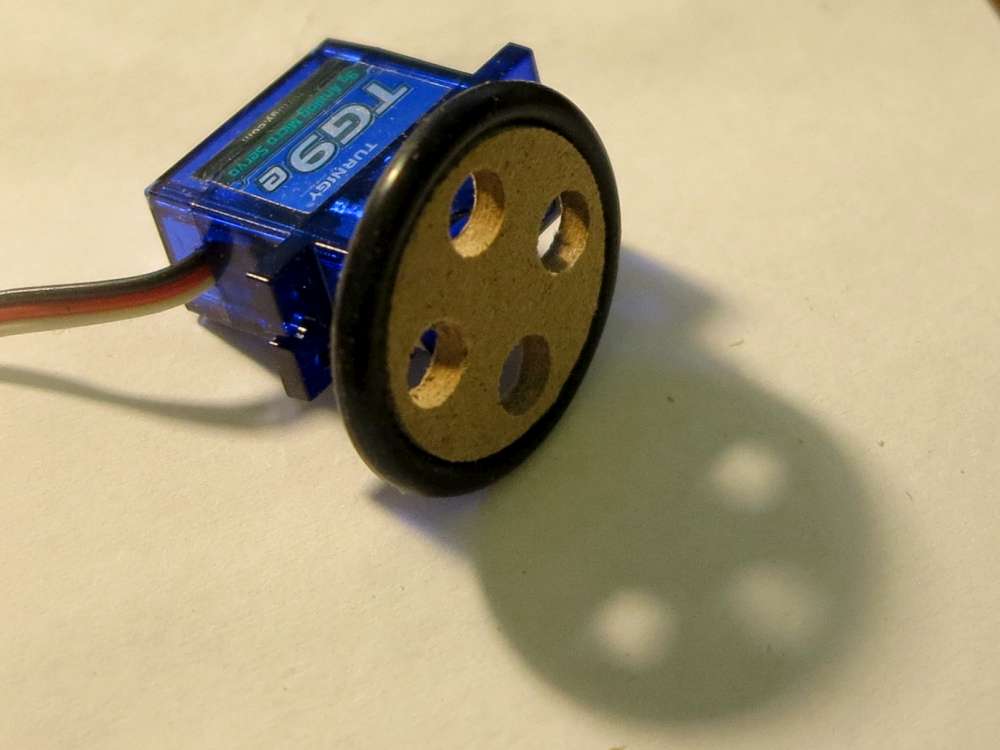
I didn’t want a castor so I made the wheels large so the body dangles like a gondola. Sort of like a self balancing robot. Large wheels also make it go faster and allow it to move on carpet. No rubber required on the wheels with the larger diameter.
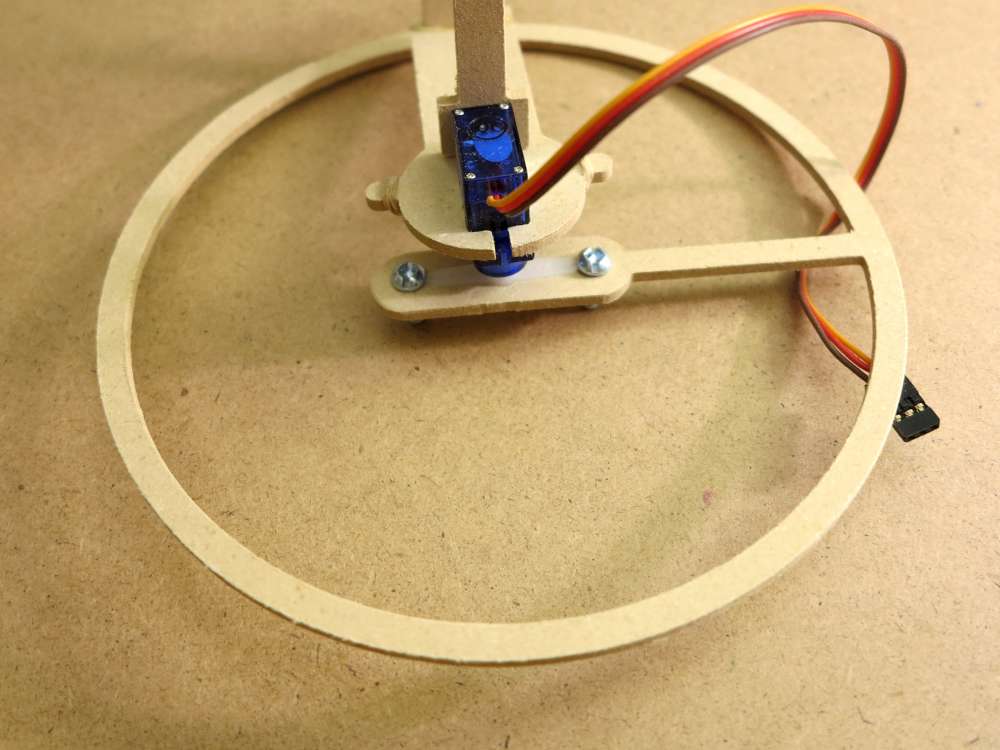
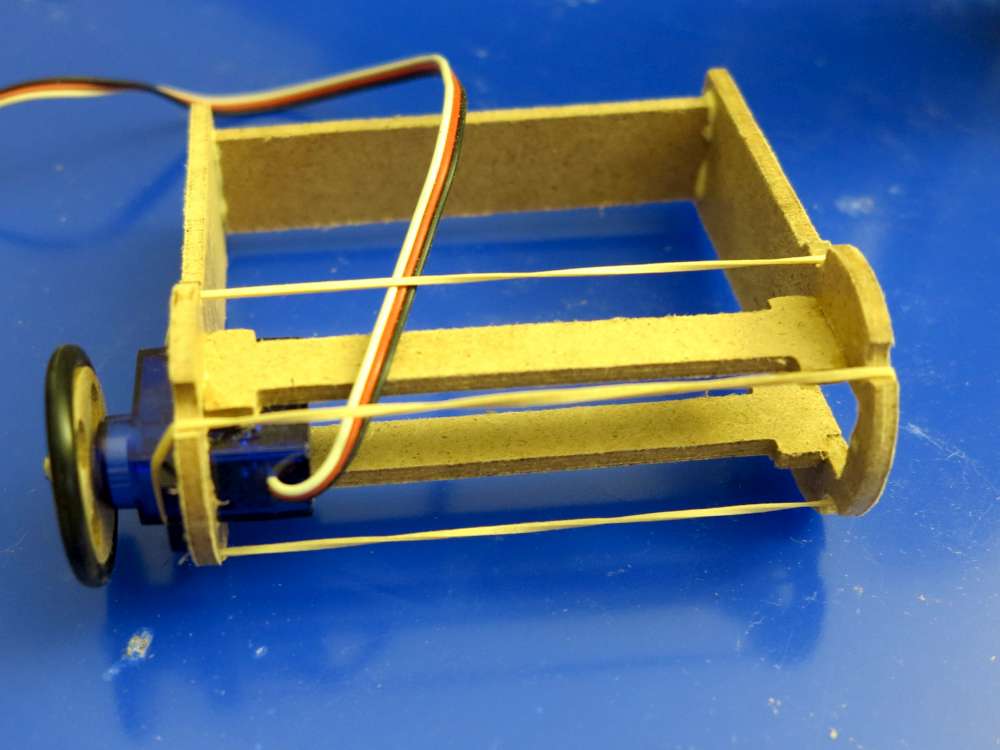
It’s very easy to work on since everything is very accessible. Servos are held in by elastics so they can be popped out as needed. I also added a kick stand so the wheels can turn freely while tethered to a computer for programming and testing.
When it strikes the wall the gondola can flip over so the motors won’t stall. In fact when the gondola flips it can back the robot away from the wall (usually unevenly so it can drive off). I really love that since if you’re a beginner at programming it, it’s another level of forgiveness. Also the swinging gondola gives it some humorous charisma. I think people will be tempted to stabilize the gondola by using smooth acceleration.
I think this is a great candidate for beginners at robotics who want something to start programming right away rather than fiddle around with complexity.
What Do You Think?
I’d be curious to know what you think. Feel free to comment below. I’m also interested in knowing how you discovered this project. I’m getting tonnes of email and feedback so look forward to making more of these! If you need any help don’t hesitate to contact me!
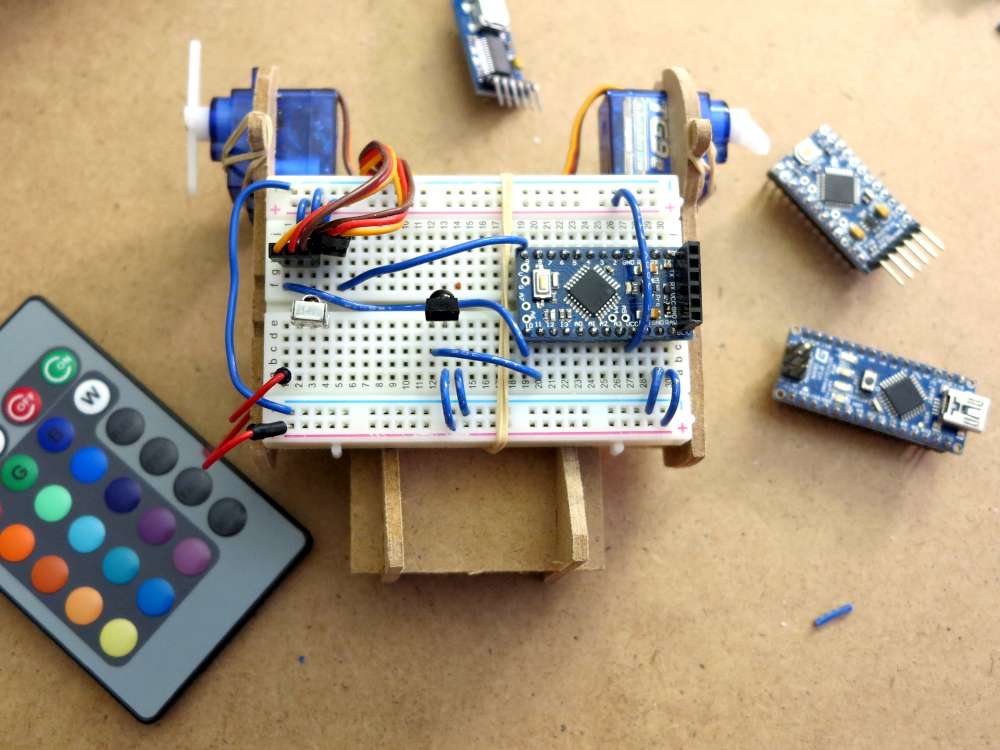
Bill of Materials
- Arduino Mini Pro $2.50 (ebay)
- 2 Small Micro Servos $5.00 for both (Hobby King)
- Battery Holder $.75 (ebay)
- Bread Board $1.00 (ebay)
- Hardboard and four nuts and bolts $.50
- TOTAL <$10
From there you have a great platform to add whatever sensors you want. The versions so far were very fun and easy to make.
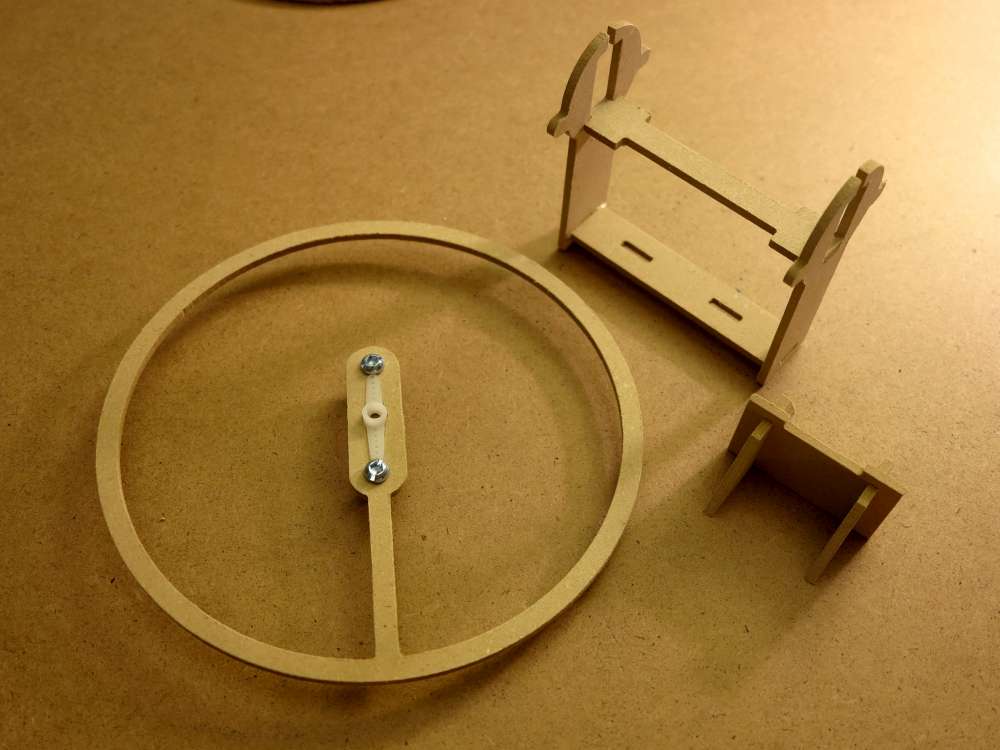
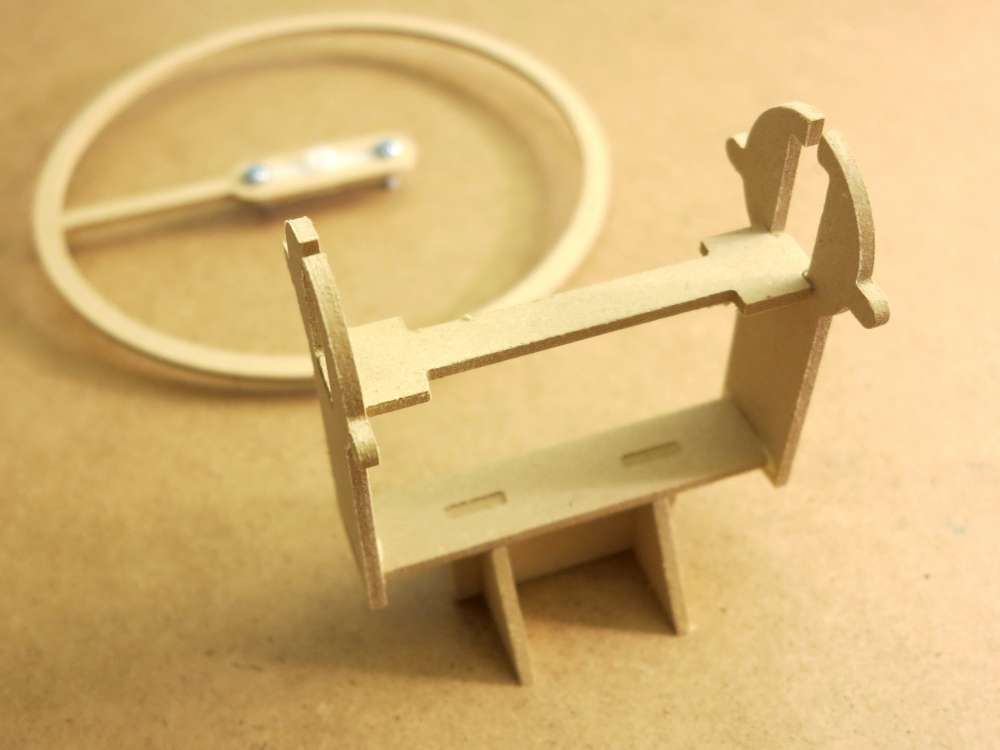
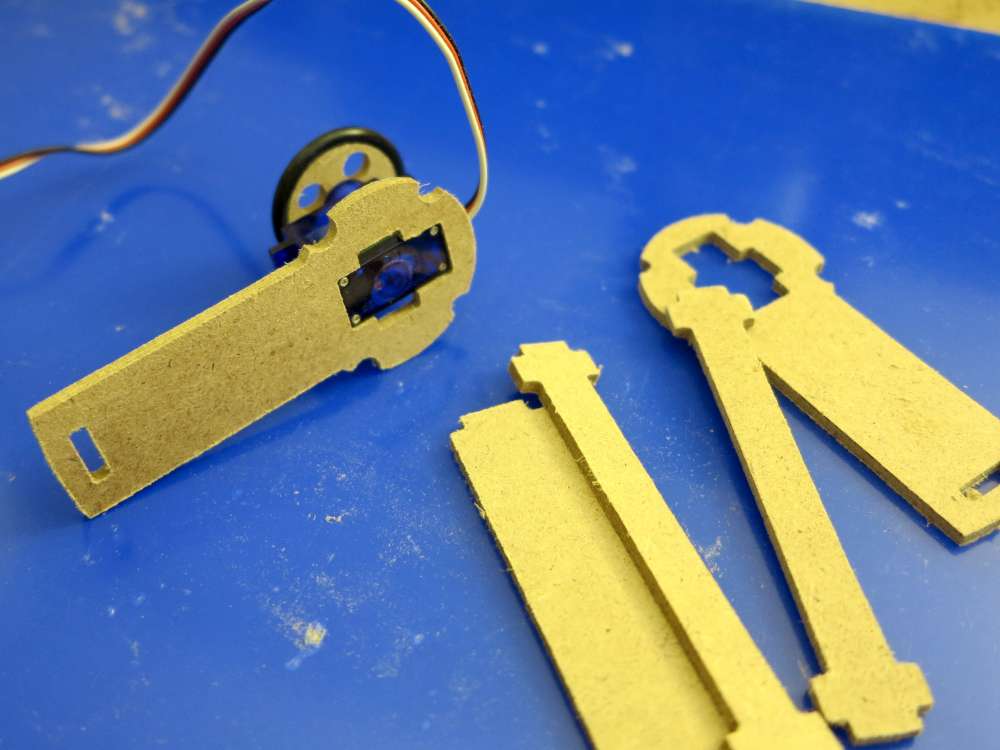
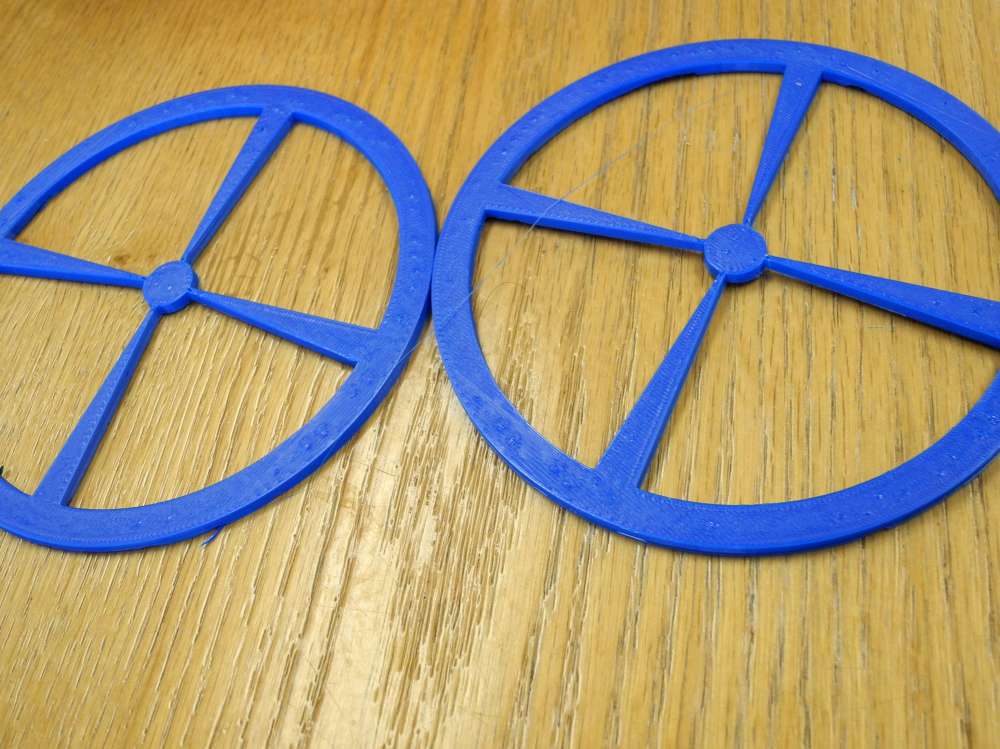
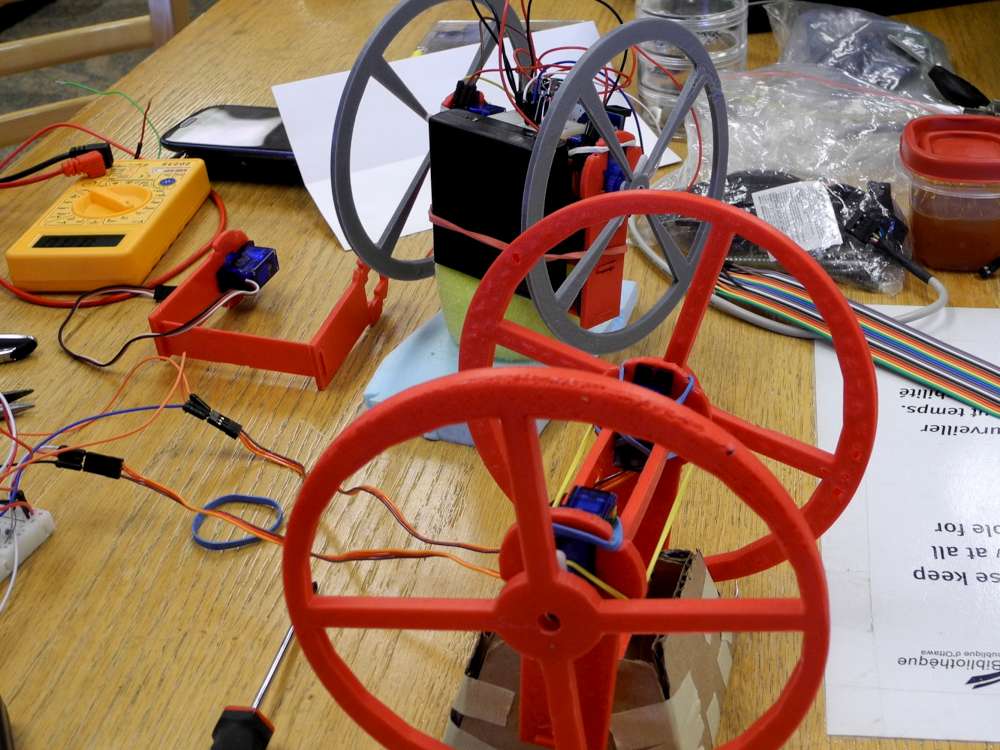
I used a CNC cutter to make the six parts (two wheels and four for the frame) but you could use a small plate for the body (perhaps tie wraps for the servos) and CD’s for wheels. The optional kickstand was three more parts. But you could sit it on any blocks.
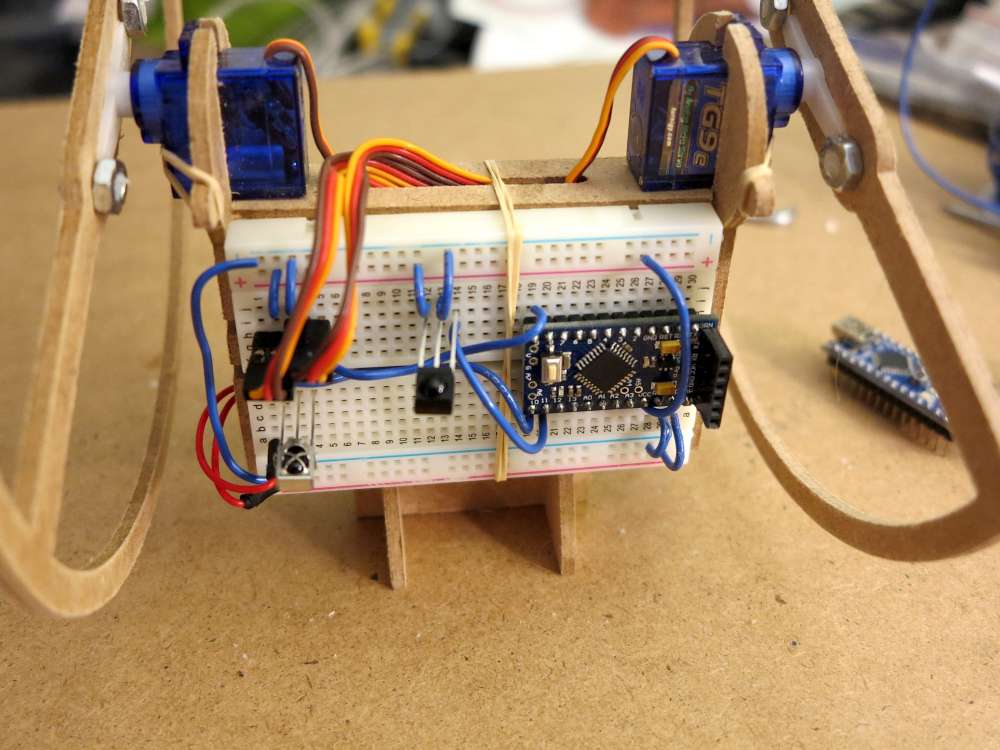
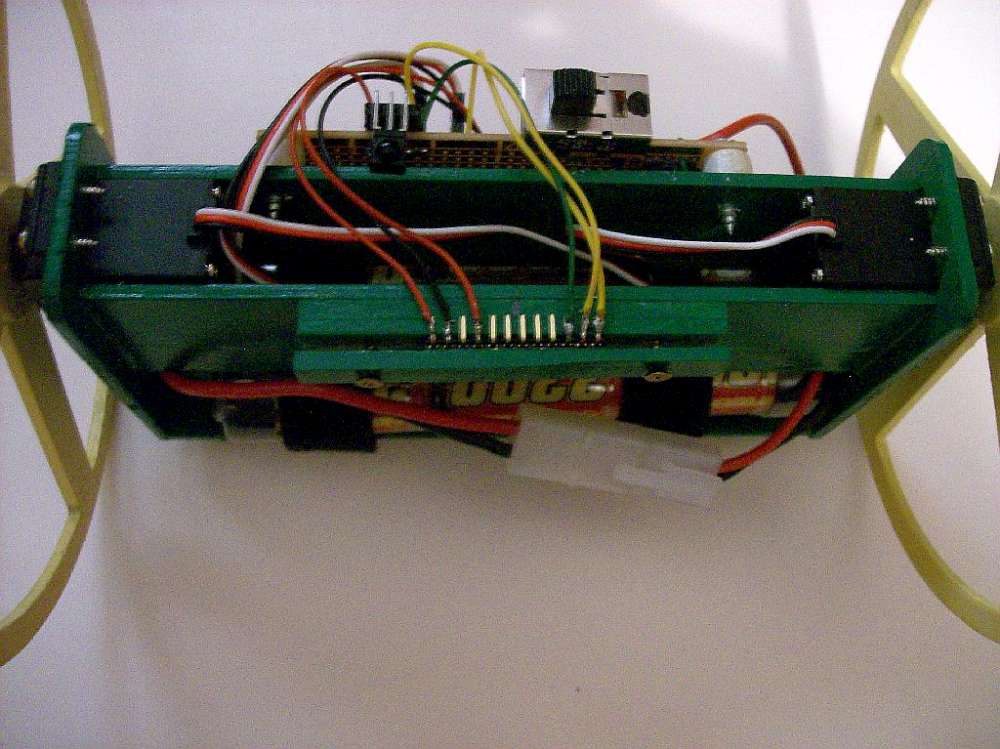
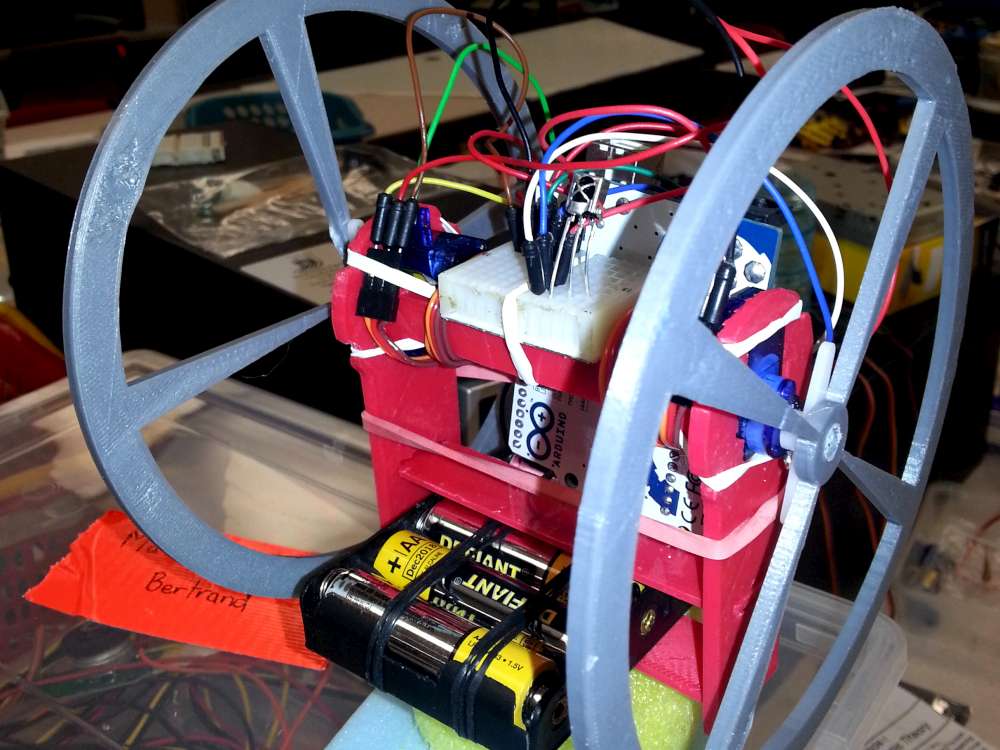
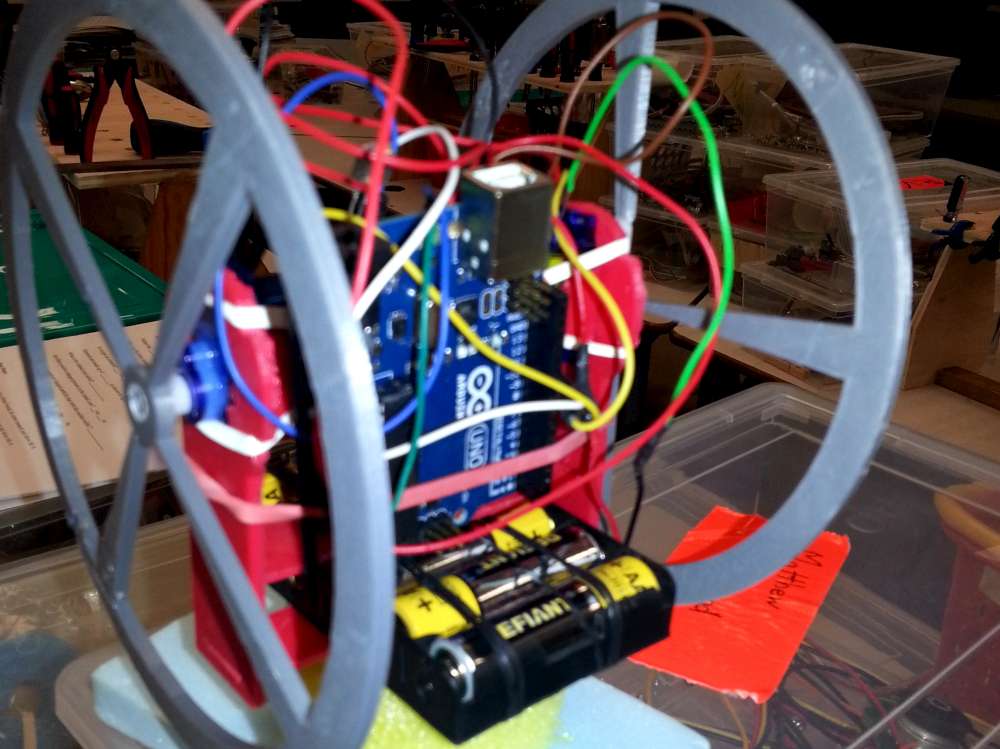
Rolly Robot Version 3
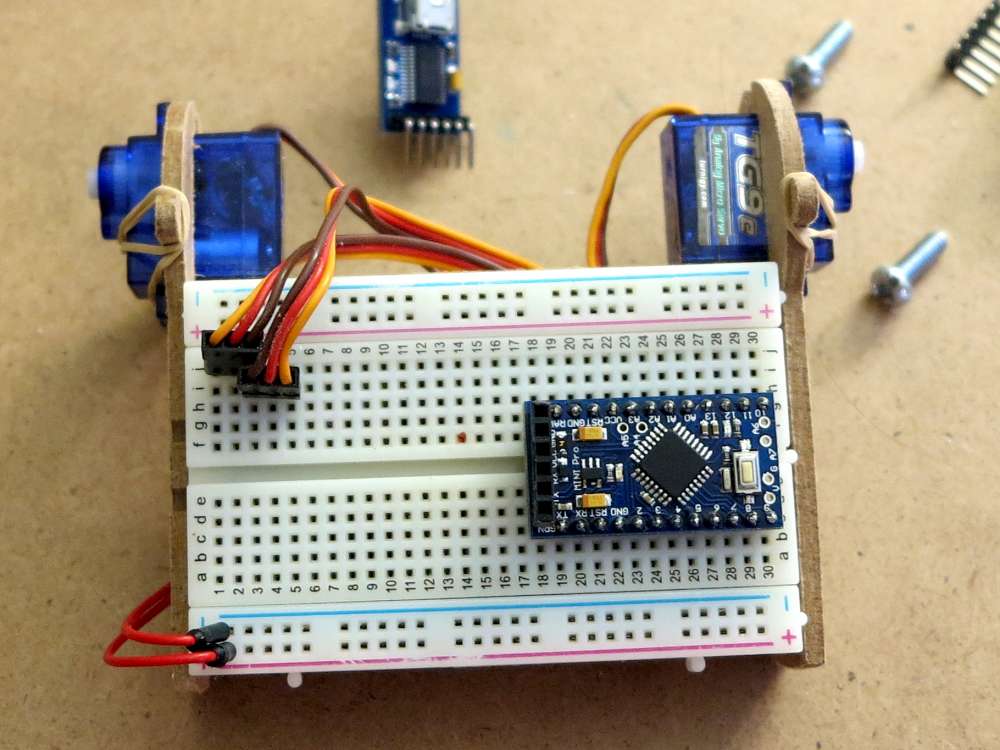
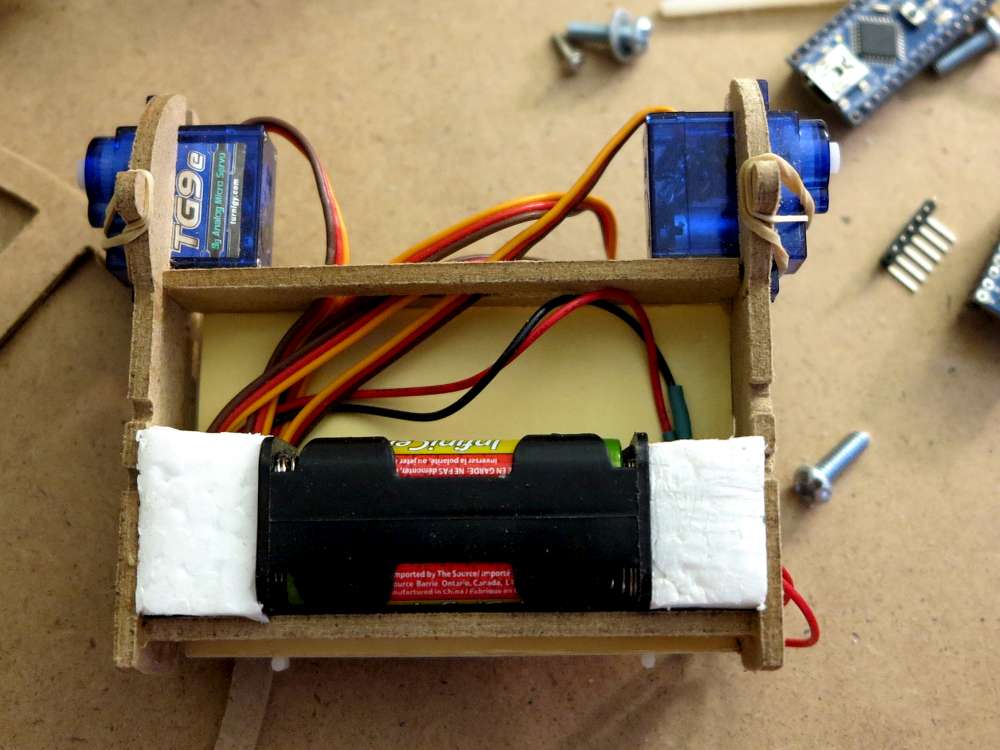
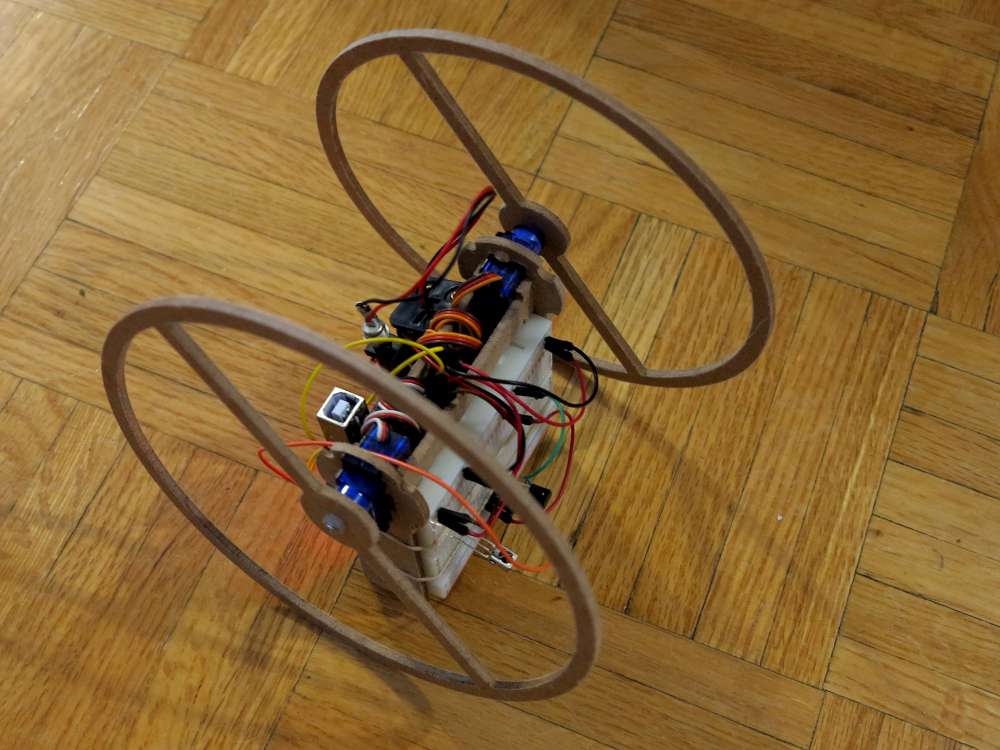
I used a two spoke wheel. I added extra notches for various elastic bands and holes and groves for wire routing. I added notches so the kickstand snaps together. I started to use foam to hold the battery in. I also used pins from headers to put the servos directly into the board. Not perfect but it’s neat.
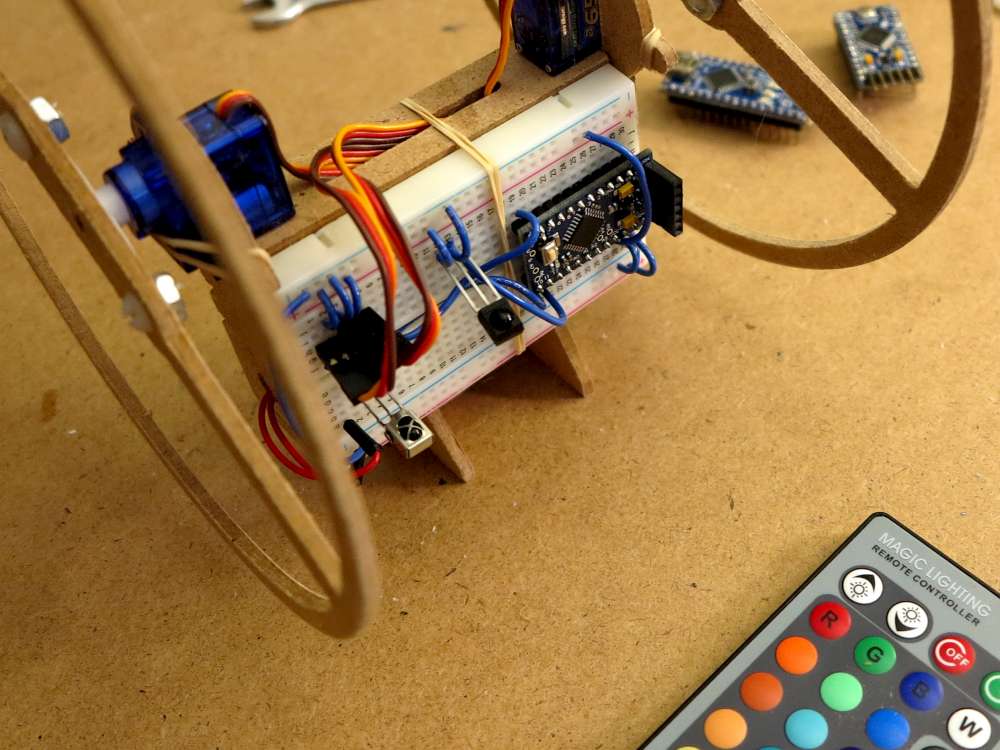
Version 3 has an IR sensor on it (tsop4838).
I made a completely new test program that uses a different approach to the motion. Most novices want to break the motion down into compartments (move left, move forward, turn on a dime). That’s what I did on version one since it was just a few minutes to set up. But this time I’ve approached motion as a continuum rather than arbitrary compartmentalized chunks.
There is a button to increase forward motion (forwardness) and one to decrease it. A button to increase rightness (turning right) and decrease. Also a smooth stop button. So the motor is never jerked (except the hard stop button).

Code:
/
Rolly Robot Version 2
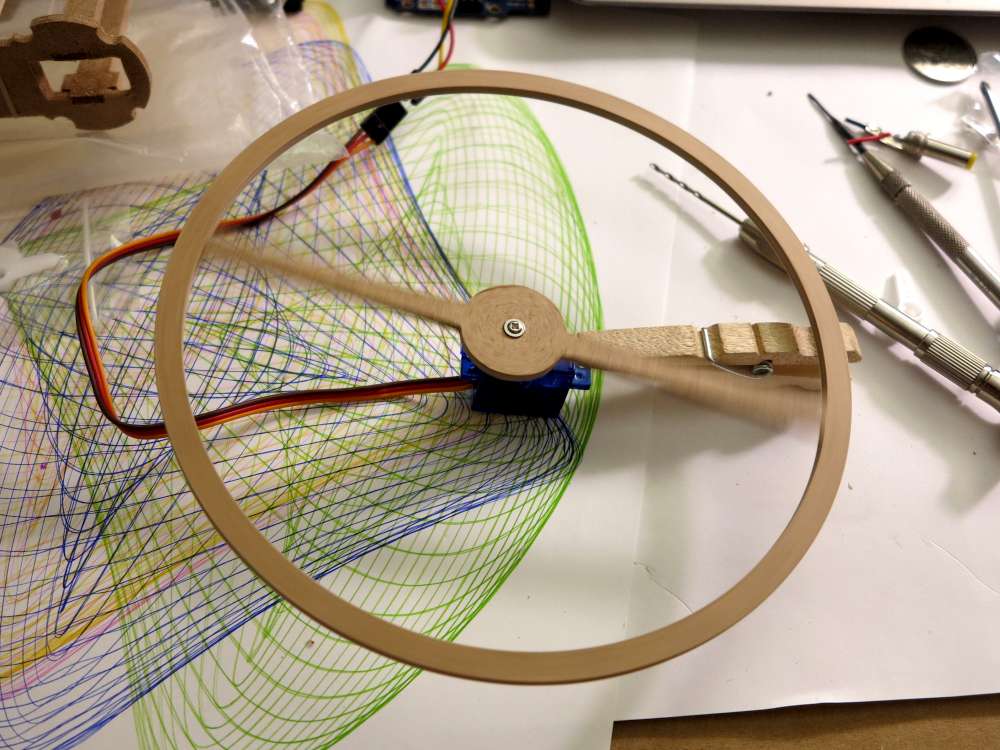
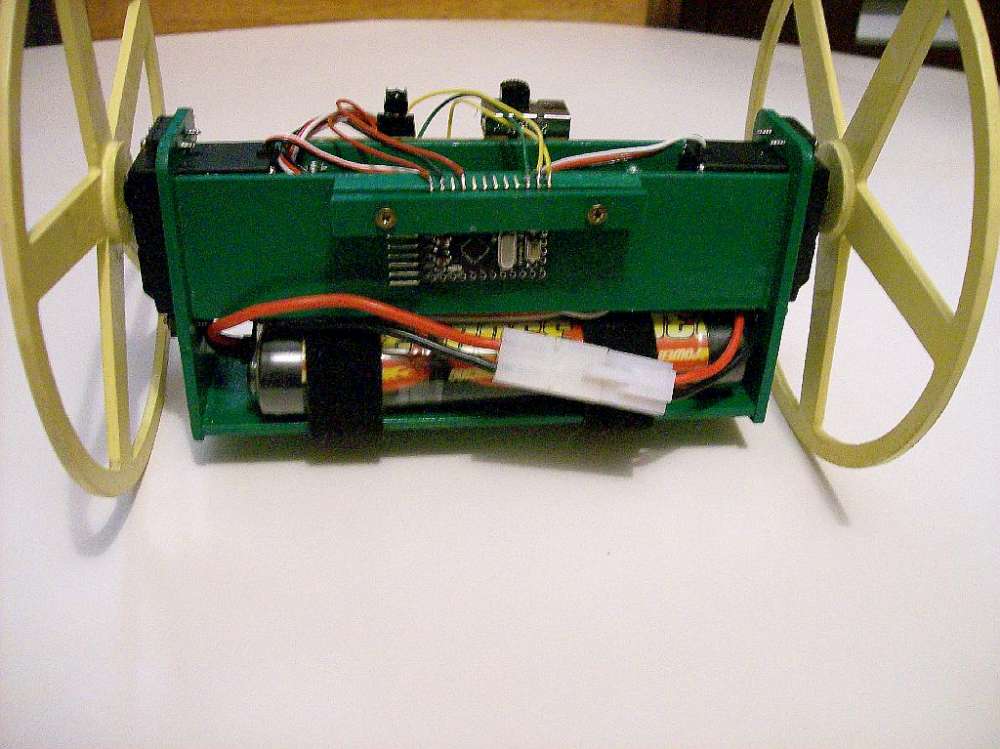
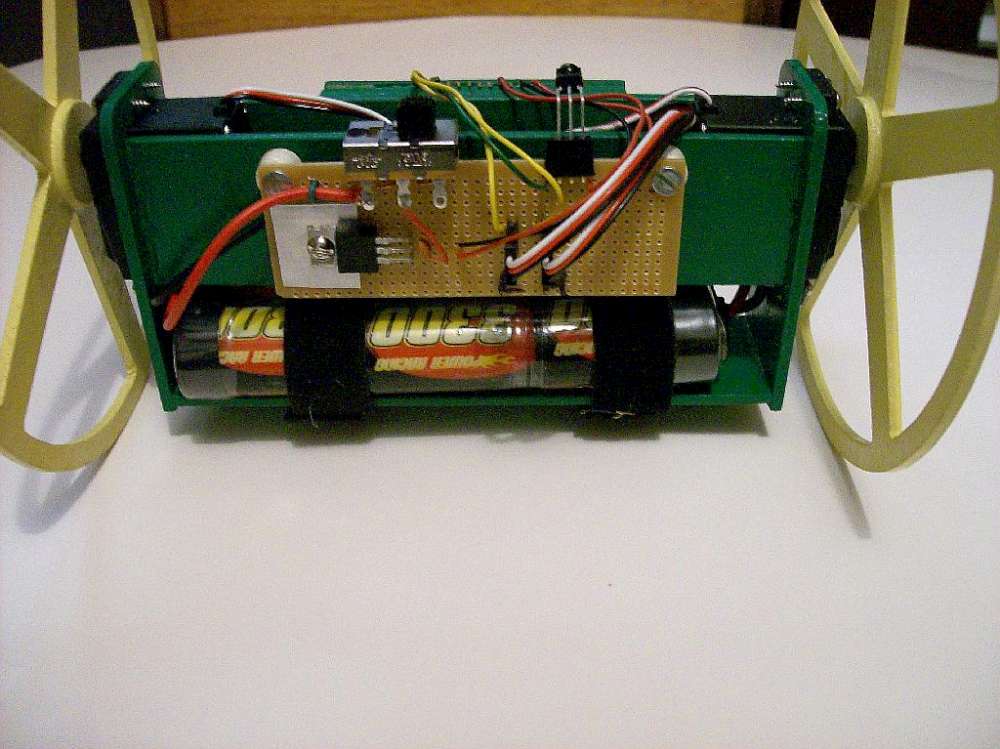
I tried a one spoke wheel. I broke it during fabrication and the glue job wasn’t successful and it broke again when testing. I used a better elastic system for the servos and a better method of attaching the servos to the wheels.
Rolly Robot Version 1
I added an IR receiver (tsop4838) and a battery so I could test locomotion using a little remote control. I used a bit clumsy Arduino Uno since I had that right at hand.
The test program is below. There’s a bit of drift when the robot is stopped which makes it quite cute. There is also a difference between the servo performance both between servos and in different directions.
That should be easy to take care of in the programming.

/*

IR table
16752735 16720095 16736415 16769055
16748655 16716015 16732335 16764975
16756815 16724175 16740495 16773135
16754775 16722135 16738455 16771095
16750695 16718055 16734375 16767015
16746615 16713975 16730295 16762935
repeat 4294967295

*/
#include <IRLib.h>
#include <Servo.h>

#define MY_PROTOCOL NEC

IRrecv My_Receiver(11);
IRdecode My_Decoder;

Servo servoRight;
int servoRightZero= 93;
int servoRightDirection = -1;

Servo servoLeft;
int servoLeftZero = 90;
int servoLeftDirection = 1;

int rightSpeed = 0;
int leftSpeed = 0;

void setup(){
  servoRight.attach(9);
  servoLeft.attach(10);
  My_Receiver.enableIRIn();
}

void loop(){
  if (My_Receiver.GetResults(&My_Decoder)) {
    My_Decoder.decode();
    if(My_Decoder.decode_type==MY_PROTOCOL) {
      switch(My_Decoder.value) {
        case 16720095: rightSpeed = 5; leftSpeed = 5; break;  // forward
        case 16716015: rightSpeed = 0; leftSpeed = 0; break;  //stop
        case 16724175: rightSpeed = -5; leftSpeed = -5; break;  //backawards
        case 16752735: rightSpeed = 10; leftSpeed = 5; break;  // left forward
        case 16736415: rightSpeed = 5; leftSpeed = 10; break;  // right forward
        case 16748655: rightSpeed = 5; leftSpeed = -5; break; // left dime
        case 16732335: rightSpeed = -5; leftSpeed = 5; break; // right dime
      }
      servoLeft.write(servoLeftZero + leftSpeed * servoLeftDirection);
      servoRight.write(servoRightZero + rightSpeed * servoRightDirection);
    }
    My_Receiver.resume();
  }
}
Jim’s Rolly Bot
Here’s Jim Steinbrecher’s version. I shared my project on the Arduino forum and Jim put together his own version. Here’s his code (rolly).
Macadamian Software’s Rolly Robot
Here’s a picture of Macadamian Lab‘s Rolly robot from the Ottawa Makerfaire.
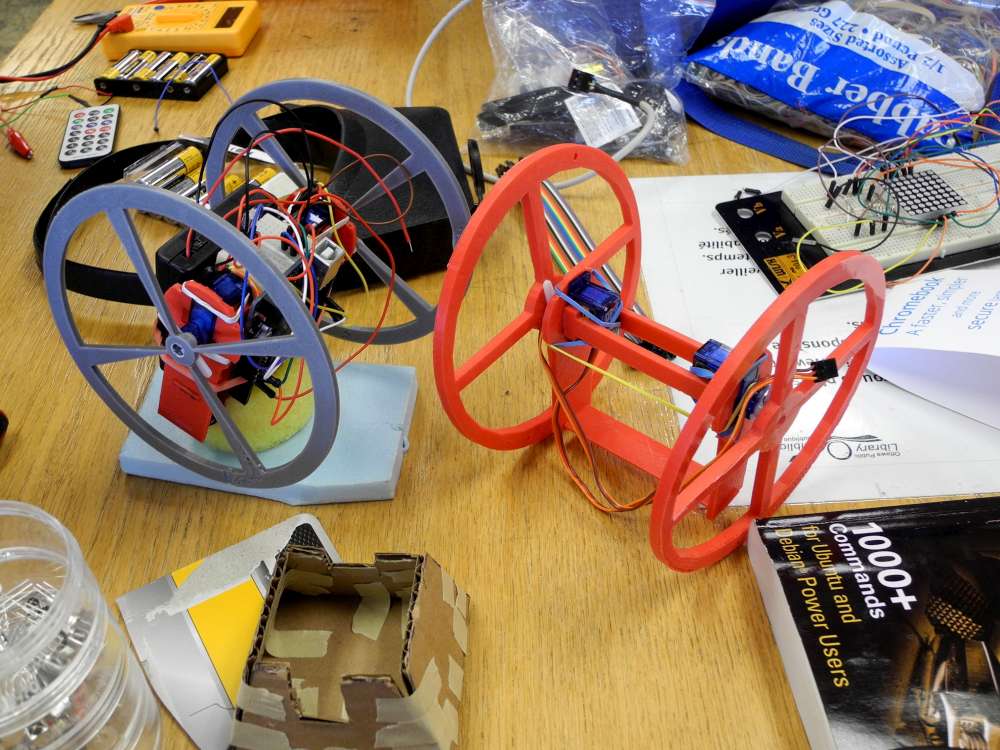
Rick’s Rollybots at St. Peter’s High School
Rick’s class has one running, four nearly running and another twenty in the works! Notice they made a 3D printed version.
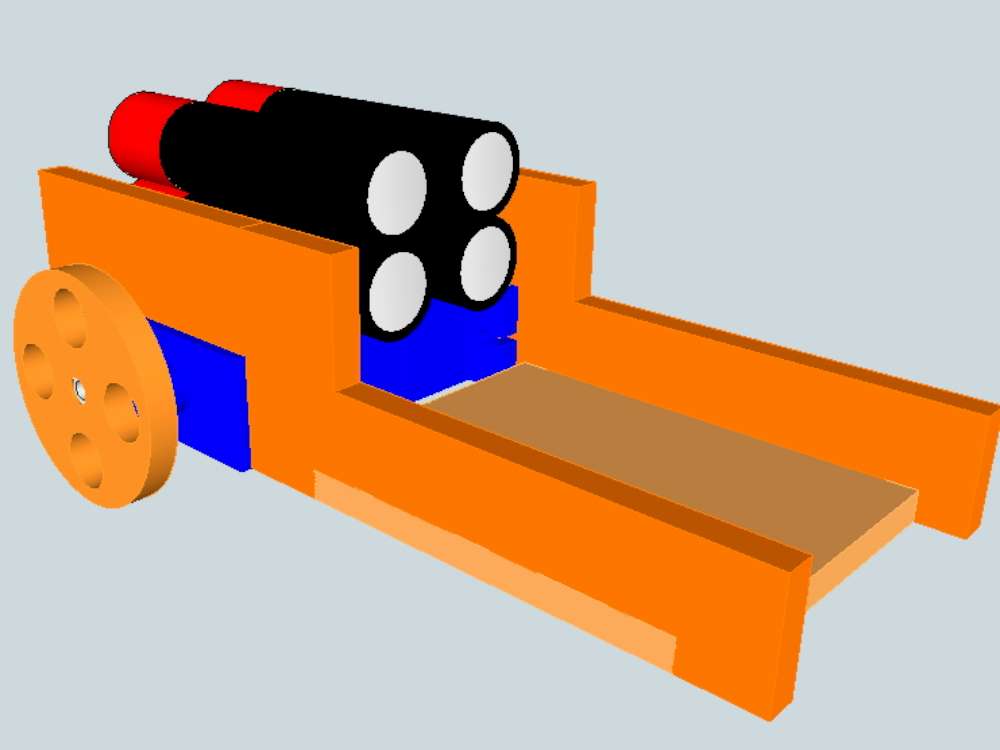
Version With Castor
While I was working on this, in parallel I’m making a simple one that will have smaller wheels and a castor. I’ve not done much on this. Anybody want the chassis? I’ll help you get it running…
Related
Update 2018-07-12: Discovered an older robot of this layout:
Using an IR Remote. Be sure to follow his link at the top of his page to download the library.
Download: rollie V1
Download: rolie V2
This project in reddit.
Similar project.
Line follower. Line follower simulator!
My other Arduino projects.
Some drawing robot projects.
Ottawa Robotics Builds Similar Projects.
Hi all. I made similar project, called R-Frame Mini. But one of motor has broke. Look at my work:
balancing: http://www.youtube.com/watch?v=CJSd1kXN2o4
first test drive: http://www.youtube.com/watch?v=CJSd1kXN2o4
full story (Russian text): http://robocontroller.ru/news/2014-10-11-50
EDIT:
first test drive: http://www.youtube.com/watch?v=92mYp5Vc7sU
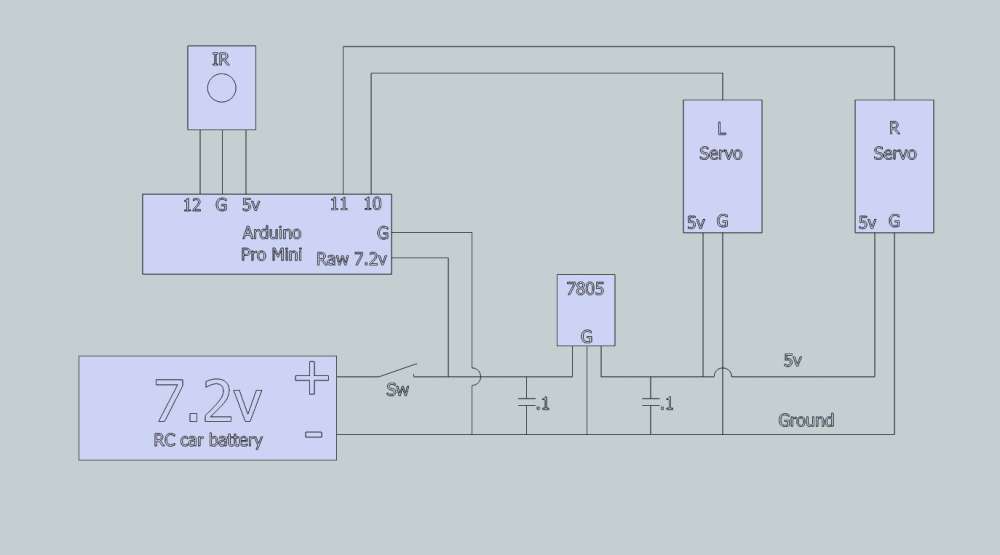
I received a suggestion to use a 7805 regulator. https://www.youtube.com/watch?v=WTylbNtZW3A
Thanks Darcy for your robot design and posts.
Thanks Jim! I love your version! It’s better than mine. I better try again. 🙂 I’ve got one with a pro mini that works nice. I broke the wheel will make another set of wheels.
Hi Darcy, It’s a very nice and clean design. I especially like the big wheels. I’ve got some spare servos so I’m going to experiment with something similar myself. FipS — 4FipS.com
Thanks for the note. I’m looking forward to seeing your robot come together!
great project lets get this into the new ottawamakerspace blog coming this Sept
Sure… mine is made on my own equipment. I guess I need to make a version on the library equipment…