Single LED Clock
An example of this LED clock is installed in my 2014 rooster project.
I’ve been thinking about making a single LED clock that uses color to display time for a little while now. If it’s just one LED and it communicates in color, then it can be very small yet be read from very far away. Of course there’s the colorblind issue. I think a clock like this could have numerous display modes and could obviously contain some modes that work for colorblind people.
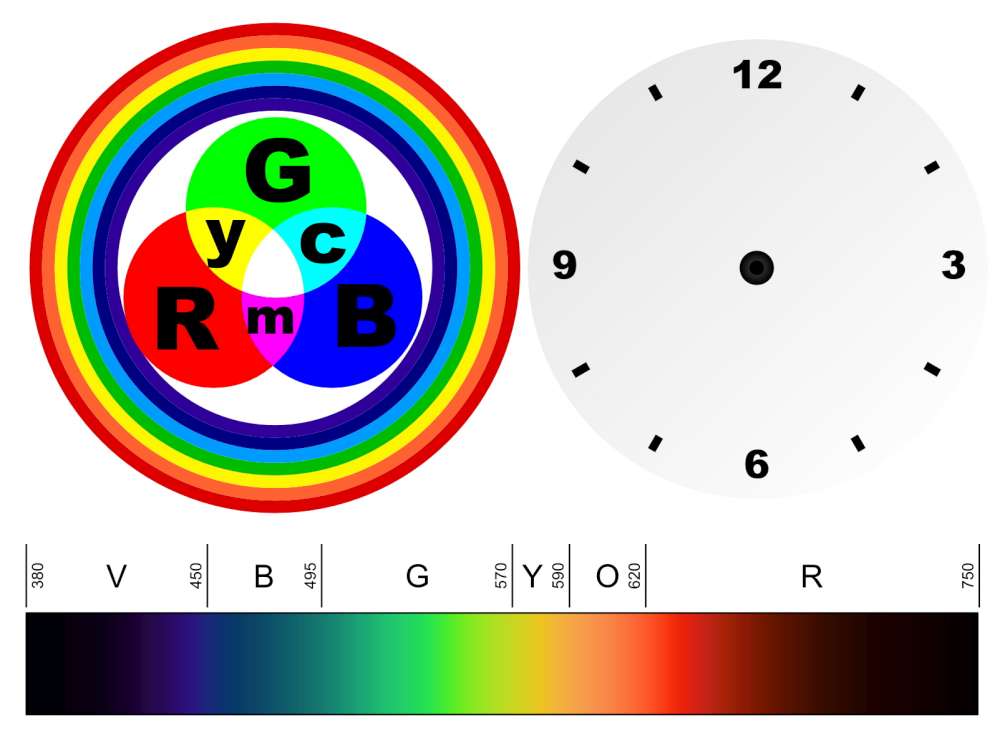
The question is how to assign color to time. I’ve arranged some color diagrams and a clock face to brainstorm An RGB Venn (RYGCBMW), a rainbow (ROYGBIV) and the electromagnetic spectrum (ROYGBV).
A Color for Each Hour
The six primaries RGB and CMY are all very easy to identify. So for the hour that could take us from 1am to 6am. White, orange and perhaps some shade of blue could bring us to 9am. That’s pretty close to having enough colors to go all the way around the clock. We’d need three more after that and I’m a bit afraid that there will be ambiguity. I wont give up on that concept as I think it needs to be tried. Further it may be easier to show one of the primaries first then the shade. For instance orange could show Red, then shift towards yellow a bit. So it can’t be confused with red or yellow. Shades of blue the same.
This mechanism would need to be tried and it would be interesting to see if there can be a color wheel with twelve steps in it that people can always discern. I’m going to save this mode for testing on a physical prototype.
Beautiful Numbers
As a child I found it odd that a clock was divided into sixty seconds (or twelve hours) but everything else we did was base 10. I set out to make a base 10. There’d be 10 hours on the a 100 minute dial for the 24 hour day. I used a compass to make the face. I marked a center then made a circle. I set the compass to an estimate of 1/10 the circumference and then I walked the compass around the circle to see if my estimate was right. This didn’t work very well. I noticed that dividing into eight was easy because you were just bisecting your way around (right angle triangle). I also noticed a 12 hour clock was a bit easy because once you have the circle in quarters then you just have to third each quadrant. Later in life I figured out what was so special about the number sixty. It divides evenly in many ways (30, 15, 12, 10, 6, 5, 4, 3 and 2). That explains why base sixty would have been great for trade and why that system was kept for time and angles.
So let’s leverage that beauty. We can assign four colors to the four quadrants. How about red, green, blue and white. Since they’re the primaries and white is the combination of them. So a flash of red means we’re in the top right quadrant of the clock. Each quadrant has three hours. So flash one of cyan, magenta and yellow to show were we are in the quadrant (since they’re the secondary colors and also the subtractive primaries). So two flashes of light tell us what hour we’re in.
For minutes, just repeat the same system again using two more flashes. Four flashes can tell us the time within 5 minutes. Or three flashes can tell us the time within 15 minutes.
Here’s a working model:
I also thought of using red, green and blue twice in a row for hour, then cyan, magenta and yellow twice for minutes. The difficulty here is you can have two colors in a row that are the same. I’ll try it as well but for some reason went with the above.
Setting the Clock
There is the clock face then there is the interface for setting the clock. I’m leaning towards a jumper or switch. Perhaps a button you press. Quick press is forward one minute. Hold, scroll forward. Hold longer, scroll fast forward. Double click hold, scroll backward. Double click hold longer, scroll backward faster.
I also need to look at how the Arduino will actually keep time.
Related
Adruino Dot Clock by Andrew O’Malley
Let’s Make a Clock Challenge.
http://www.opengpstracker.org/one-led-clock.html

I officially challenge you to turn this into a watch!
http://tronixstuff.com/2010/08/02/blinky-the-one-eyed-clock/
I think you’re on to something with the colour bar presented above. The issue becomes precision, unless you provide a two colour juxtaposition – one shade assigned per hour would be ok, then provide distinct shading to account for minutes.
I’m looking at four flashes. Two for hour. One tells quadrant and the 2nd where in the quadrant. Then repeat the same pattern to figure out minutes.